background image

E-24

CAUTION

Maintenance and Storage


After rinsing, dry the product well with a soft dry cloth, then let the product dry 
in the shade, out of direct sunlight.


Do not dry the product by heating (using a hair dryer, for example). Heating can 
deform and damage the product.


If you will not use the product for an extended period of time, store it away from 
high temperatures, high humidity, direct sunlight, or extreme cold.


Do not store the product with naphthalene or camphor mothballs, or in locations 
such as a laboratory where chemicals are used. This environment can cause 
mold, rust, corrosion or malfunction.


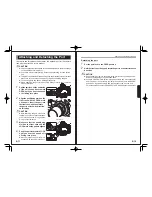
Always remove the camera from the housing after use. Thoroughly wipe off water 
before opening the housing and avoid any water drops inside the housing.


After using the product, maintain the O-rings before storing. Examine the O-rings 
before and after each dive. We recommend early exchange of the O-rings, at 
least once a year.


Every two years we recommend a complete overhaul of O-rings regardless of 
the frequency in use, for the best performance of the product.


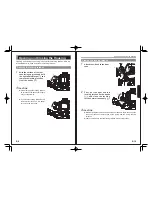
After each use in salt water, make 
sure it’s watertight, then soak it 
sufficiently in fresh water.


Insufficient soaking causes damage 
by salt to the product. Salty residue 
may be left on the product where it will 
crystallize as it evaporates. Crystallized 
salt is hard to dissolve and difficult to be 
removed once formed, and it will result in 
water leakage.


Never use chemicals, cosmetics, any petroleum solvents such as paint thinner, 
or neutral detergent on the product. They may deform and damage the product.

Attaching the Optional Accessories

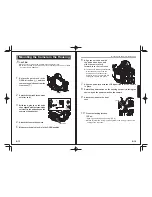
Accessory shoe

E-23

<Example>

CAUTION

Strobes / lights can be mounted to the accessory shoe by using optional 
Mini Shoe Arm (29511) or Hot Shoe Arm (29501) or SA8 Ball Base for 
Accessory Shoe

22120

.


The max. weight of an accessory that can be mounted to the accessory shoe 
is approx. 1050g / 26.3oz .


Remove the accessories from the accessory shoe when carrying the housing 
out of water.


When attaching the accessories to the accessory shoe, always refer to the 
instruction manual provided.

Summary of Contents for MDX-D800

Page 1: ...UNDERWATER HOUSING for Nikon D800 D800E MDX D800 日本語 English 取扱説明書 Instruction Manual 06162 ...

Page 2: ...sture and debris in order to prevent malfunction or flooding Avoid strong shocks impacts or excess stress to prevent malfunction damage or breakdown Make sure that the product has been securely mounted to other products in order to prevent injury fall or missing Keep out of reach of children to prevent accidental ingestion If swallowed seek medical advice immediately Failure to heed the precaution...

Page 3: ... Precautions Do not rest heavy weight on the product It might deform the outer casing damage internal parts make the waterproofing fail or result in fire or electric shock Please note that some marks may be left on the camera scraping against the dials or gears of the housing Handle the product carefully so as not to scratch the front port the lens the flash window or the finder Always dry the fro...

Page 4: ...he entire O ring with your finger Applying too much grease will make it easier for dust and debris to adhere to the O ring and could cause flooding When fitting the O ring into the O ring groove insert it straight into the groove do not bend or twist it Precautions on Handling the O ring Coat with silicone grease Do not twist the O ring Remove the O ring for inspection before each use Be careful a...

Page 5: ...a is operating correctly referring to the camera s instruction manual for details Prepare the connecting accessories When using external strobes lights or other accessories in combination with this product prepare the equipment before setting up If the accessories are kept watertight by O rings make sure the O rings are properly maintained If the accessories are powered by batteries make sure that...

Page 6: ... sure that the locking latches are securely locked L hook E 9 1 CAUTION Opening and Closing the Housing Opening the locking latches When removing the locking latches be sure to use the tips of your fingers not your fingernails If you lock the locking latch after it is removed from the hook it is easier to remove the rear case With the surface of the rear case facing up press and hold the right and...

Page 7: ... case with the OPEN mark on the port insert the port into the front case and then rotate the port in a clockwise direction until it stops Before attaching the port make sure there are no specks of dust scratches or deformities on the O ring and the O ring contact surfaces Make sure that the positioning mark on the front case and the LOCK mark on the port are aligned Push the port lock toward LOCK ...

Page 8: ... Make sure that the O ring is properly fitted in the O ring groove before setting of the rear case Close the locking latches See Opening and Closing the Housing P E 9 E 13 Fixing screw AF M A Mounting the Camera in the Housing Make sure to release the camera s focus selector lock Remove the strap or the LCD monitor cover from the camera if any of these accessories are attached Rotate the quick loc...

Page 9: ...connected strobe functions correctly before underwater use 2 Insert the fiber optic cable s connector into the socket until it stops Do not remove the caps from fiber optic cable socket not in use to keep light from entering in 1 Remove the fiber optic cable socket caps Connect the strobe with the fiber optic cable option when the strobe is triggered by sensing the light from the camera s built in...

Page 10: ...mmand dial or sub command dial to make operation settings Selecting YES for Release Button to Use Dial from the camera s custom settings menu allows adjustments normally made by affected buttons being held down and a command dial being rotated to be made by rotation of the command dial after the button is released Refer to the camera s instruction manual for details Power switch By rotating the kn...

Page 11: ...nsor The leak sensor is optionally available and can be attached to the leak sensor mount The leak sensor lights up in red if water leakage is detected while underwater If the leak sensor lights up surface as soon as you safely can and remove the camera from the housing If a lot of water leaks in the atmospheric pressure inside the housing will increase which is very dangerous When releasing the l...

Page 12: ...e screw areas are coated in grease so be careful not to touch them Rotate the replacement finder unit in a clockwise direction to attach it Before attaching the finder check to make sure that there is no dust dirt or debris inside it When replacing the finder do not touch the surface of the finder lens When replacing the pick up finder always refer to the instruction manual provided CAUTION When r...

Page 13: ...rs we recommend a complete overhaul of O rings regardless of the frequency in use for the best performance of the product After each use in salt water make sure it s watertight then soak it sufficiently in fresh water Insufficient soaking causes damage by salt to the product Salty residue may be left on the product where it will crystallize as it evaporates Crystallized salt is hard to dissolve an...

Page 14: ...ual Attached accessories to the product Housing body cap Fiber optic cable socket cap x2 Power switch Exposure compensation button Exposure mode Formatting memory cards button Flash pop up button Braketing button Image quality button White balance button Release mode dial lock release Flash mode button Focus Zoom dial AF mode button Focus mode selector dial Sub command dial Shutter lever Release m...

Page 15: ...式会社 145 0062 東京都大田区北千束1 4 6 TEL 03 5701 5533 カスタマーサービスセンター TEL 048 255 8512 http www seaandsea co jp SEA SEA SUNPAK Co Ltd 1 4 6 Kitasenzoku Ohta ku Tokyo Japan 145 0062 TEL 81 3 5701 5533 World Customer Service Center TEL 81 48 255 8512 http www seaandsea jp ...

Reviews: