background image

Section 01

ELECTRICAL SYSTEM

Sub-Section 01

(INSTRUMENTS AND ACCESSORIES)

01-01-1

INSTRUMENTS AND ACCESSORIES

1

GENERAL

It is possible to activate the Info Center gauge
when the engine is not running.

Make sure the safety lanyard is removed, then de-
press the start / stop button.

The gauge will be activated during 33 seconds;
the time the delay timer of the MPEM will stay on.

INSPECTION

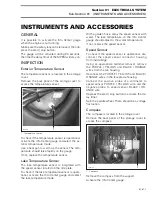
Exterior Temperature Sensor

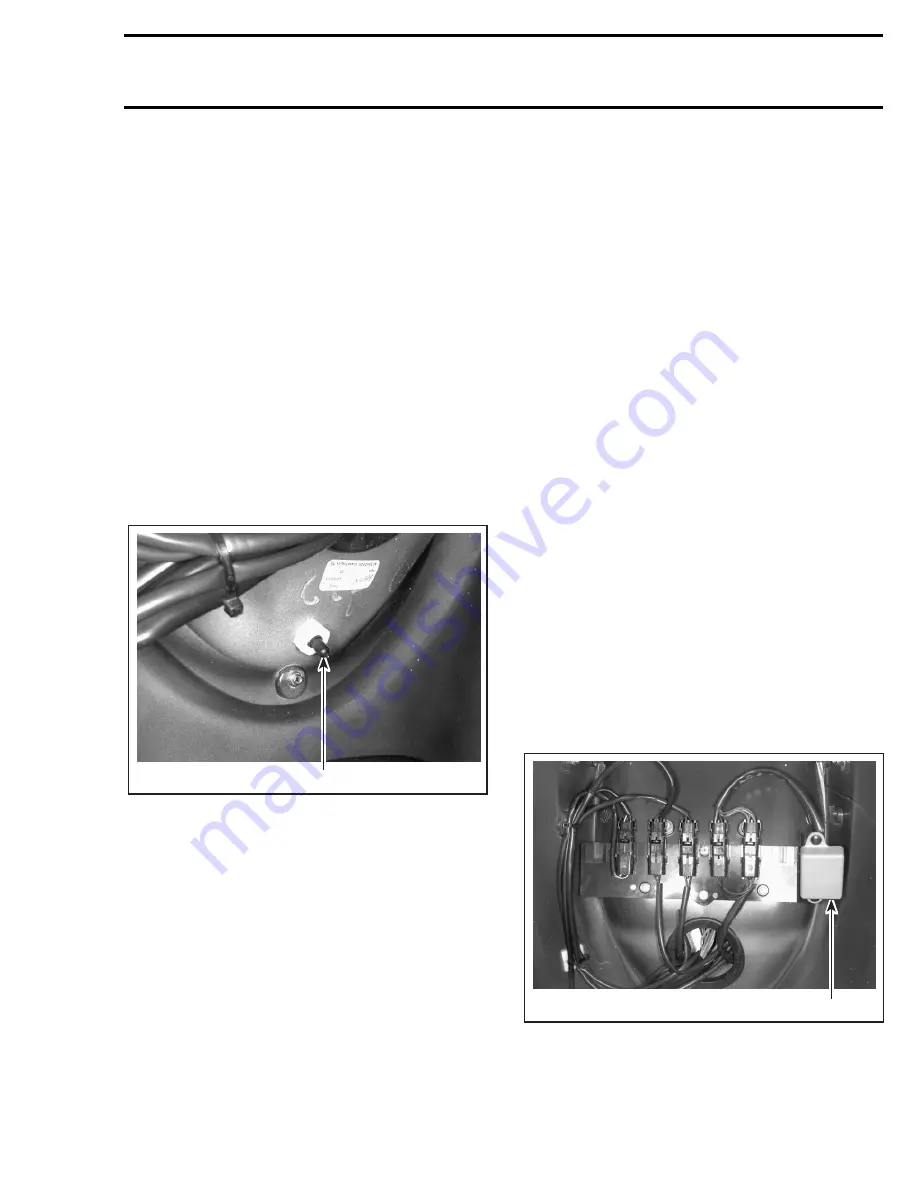
The temperature sensor is located in the storage
cover.

Remove the back panel of the storage cover to
access the temperature sensor.

1. Temperature sensor

To check if the temperature sensor is operational,
activate the Info Center gauge and select the ex-
terior temperature mode.

Use a heat gun to warm up the sensor. The tem-
perature should raise rapidly on the gauge.

If not, replace the temperature sensor.

Lake Temperature Sensor

The lake temperature sensor is integrated with
the speed sensor located on the ride plate.

To check if the lake temperature sensor is opera-
tional, activate the Info Center gauge and select
the lake temperature mode.

With a garden hose, spray the speed sensor with
water. The lake temperature on the Info Center
gauge should adjust to the water temperature.

If not, replace the speed sensor.

Speed Sensor

To check if the speed sensor is operational, dis-
connect the speed sensor connector housing
from inside bilge.

Using an appropriate terminal remover, remove
the PURPLE / YELLOW and BLACK / ORANGE
wires from the tab housing.

Reconnect the PURPLE / YELLOW and BLACK /
ORANGE wires in the receptacle housing.

Connect the positive probe of a voltmeter to
speed sensor PURPLE / YELLOW wire and the
negative probe to speed sensor BLACK / OR-
ANGE wire.

Depress the start / stop button to activate the de-
lay timer.

Spin the paddle wheel. There should be a voltage
fluctuation.

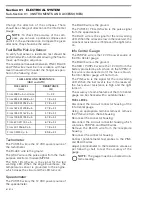
Compass

The compass is located in the storage cover.

Remove the back panel of the storage cover to
access the compass.

1. Compass

Remove the compass from the support.

Activate the Info Center gauge.

F07H01A

1

F07H02A

1

Summary of Contents for GSX 5620

Page 1: ......

Page 2: ...0 0 SHOP MANUAL SUPPLEMENT 0 219 100 034 ...

Page 3: ...ay be reproduced in any form without the prior written permission of Bombardier Inc Bombardier Inc 1996 Printed in Canada Registered trademarks of Bombardier Inc Loctite is a trademark of Loctite Corporation Snap on is a trademark of Snap on Tools Corporation Gelcote is a trademark of Gelcote International Limited ...

Page 4: ...II 01 ELECTRICAL SYSTEM 01 Instruments and Accessories 01 01 1 02 PROPULSION SYSTEM 01 Reverse System GTX Model 02 01 1 03 STEERING SYSTEM 01 GSX and GTX Models 03 01 1 04 HULL BODY 01 Components 04 01 1 05 TECHNICAL DATA 01 GSX and GTX Models 05 01 1 06 WIRING DIAGRAMS 06 00 1 ...

Page 5: ... be installed or replaced with new ones where specified If the efficiency of a locking device is impaired it must be renewed This manual emphasizes particular information denoted by the wording and symbols WARNING Identifies an instruction which if not followed could cause serious personal injury including possibility of death CAUTION Denotes an instruction which if not followed could severely dam...

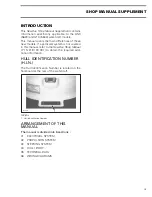
Page 6: ...vered in this manual refer to the Sea Doo Shop Manual P N 219 100 031 to obtain the required addi tional information HULL IDENTIFICATION NUMBER H I N The Hull Identification Number is located on the floorboard at the rear of the watercraft TYPICAL 1 Hull Identification Number ARRANGEMENT OF THIS MANUAL The manual is divided into 6 sections 01 ELECTRICAL SYSTEM 02 PROPULSION SYSTEM 03 STEERING SYST...

Page 7: ...or located on the ride plate To check if the lake temperature sensor is opera tional activate the Info Center gauge and select the lake temperature mode With a garden hose spray the speed sensor with water The lake temperature on the Info Center gauge should adjust to the water temperature If not replace the speed sensor Speed Sensor To check if the speed sensor is operational dis connect the spee...

Page 8: ...e oil sensor resistance is infinite and the light turns on Info Center Gauge The PURPLE wire is the 12 VDC power source of the Info Center gauge The BLACK wire is the ground The RED PURPLE wire is the 12 VDC from the battery protected by a 5 A fuse on the MPEM If this wire is disconnected or if the fuse is blown the Infor Center gauge will not turn on The PINK wire is the signal for the red warnin...

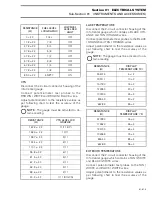
Page 9: ...RIOR TEMPERATURE Disconnect the 2 circuit connector housing of the Info Center gauge which contains a TAN WHITE and BLACK WHITE wires Connect potentiometer test probes to the TAN WHITE and BLACK WHITE wires Adjust potentiometer to the resistance values as per following chart to test the accuracy of the gauge RESISTANCE Ω FUEL LEVEL LCD GRAPHIC LOW FUEL LEVEL RED LIGHT 0 2 2 FULL OFF 17 8 2 2 7 8 O...

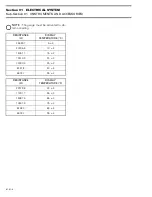
Page 10: ...E The gauge must be activated to ob tain a reading RESISTANCE Ω DISPLAY TEMPERATURE C 25590 1 5 2 20005 8 10 2 15761 7 15 2 12510 2 20 2 10000 0 25 2 8047 8 30 2 6518 7 35 2 RESISTANCE Ω DISPLAY TEMPERATURE F 22919 8 45 4 17491 7 55 4 13487 5 65 4 10501 5 75 4 8252 0 85 4 6518 7 95 4 ...

Page 11: ...e 242 11 13 Synthetic grease 2 5 N m 22 lbf in Loctite 242 3 5 N m 31 lbf in 20 Sealant 732 23 12 18 17 6 N m 53 lbf in 3 N m 27 lbf in Loctite 242 4 N m 35 lbf in 14 2 21 5 3 7 N m 62 lbf in 10 N m 88 lbf in 2 5 N m 22 lbf in Loctite 242 6 6 N m 53 lbf in 1 22 5 N m 44 lbf in 4 9 N m 80 lbf in 9 8 7 4 9 N m 80 lbf in 16 10 PARTS ...

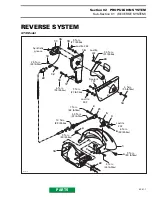
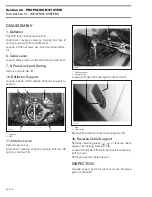
Page 12: ...tains deflector support to venturi 1 Support 2 Bolt 11 Interior Lever Remove glove box Disconnect reverse cable by loosing bolt no 12 and lock nut no 13 1 Reverse cable 2 Interior lever Loosen bolt no 14 retaining the interior lever 1 Bolt 2 Shift lever Remove the interior lever and spring no 15 16 Reverse Cable Support Remove retaining block no 17 of reverse cable support by loosing bolts no 18 L...

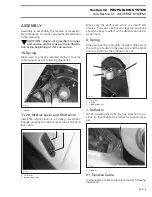
Page 13: ...ent Engage properly the interior lever tabs in the shift lever slots 1 Shift lever 2 Interior lever tabs Make sure the shift lever action is smooth and precise Forward neutral and reverse positions should be easy to select with a detent position be tween each 8 Spring Make sure spring is properly installed One end of the spring is hooked in the pawl lock and the other end is retained by the stoppe...

Page 14: ...ck nut ADJUSTMENT Put shift lever in forward position The pawl lock no 7 should be engaged in the an chor no 22 If not adjust reverse cable Loosen 2 bolts no 18 at reverse cable support no 16 Turn adjustment nut no 23 as required 1 Reverse cable support 2 Loosen bolts 3 Adjustment nut F07J08A 4 5 3 4 2 1 F07J09A 1 2 3 2 ...

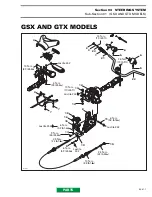
Page 15: ...4 7 7 12 13 14 8 18 16 15 17 9 10 11 10 N m 88 lbf in 10 N m 89 lbf in Loctite 242 4 N m 35 lbf in 14 N m 10 lbf ft Loctite 242 3 N m 26 lbf in Loctite 242 6 N m 53 lbf in 6 N m 53 lbf in Loctite 242 6 N m 53 lbf in Loctite 242 26 N m 19 lbf ft 14 N m 10 lbf ft 23 21 22 2 5 N m 22 lbf in 2 5 N m 22 lbf in 19 PARTS ...

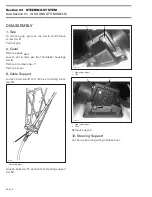
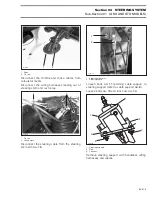
Page 16: ...oosen set screws no 5 of handlebar housings no 6 Remove 4 screws no 7 Remove cover 8 Cable Support Loosen bolts no 9 and remove retaining block no 10 1 Retaining block Loosen bolts no 11 each side of steering support no 12 1 Steering support 2 Bolt 1 Steering support 2 Bolts Remove support 12 Steering Support Cut tie rap securing wiring harness boot F01K18C 1 F07K02A 1 2 1 2 F07K03A ...

Page 17: ... tie rap 1 Tie rap 2 Connectors Disconnect the steering cable from the steering stem arm no 15 1 Steering stem arm 2 Steering cable Loosen bolts no 11 retaining cable support to steering support refer to cable support no 8 Loosen bolts no 13 and lock nuts no 14 1 Steering support 2 Bolt 3 Lock nut Remove steering support with handlebar wiring harnesses and cables F07K04A 1 2 F07K05A 2 1 F07K06A 1 ...

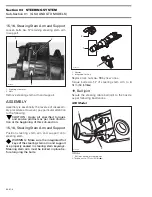
Page 18: ... this sub section 15 16 Steering Stem Arm and Support Position steering stem arm and support onto steering stem WARNING Make sure the integrated flat keys of the steering stem arm and support are properly seated in steering stem keyways Steering stem arm must be locked in place be fore torquing the bolts 1 Keyway 2 Integrated flat key Replace lock nuts no 18 by new ones Torque bolts no 17 of steer...

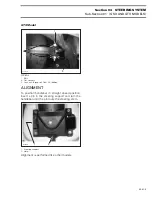
Page 19: ...lat washers 3 Lock nut Torque to 2 N m 18 lbf in ALIGNMENT To position handlebar in straight ahead position insert a pin in the steering support and turn the handlebar until the pin locks the steering stem 1 Steering support 2 Hole Alignment is performed like other models F00J01A 2 1 3 F07K0AA 1 2 ...

Page 20: ... Model F06L01S Loctite 242 5 N m 44 lbf in 5 N m 44 lbf in Loctite 242 Loctite 242 5 N m 44 lbf in 5 N m 44 lbf in Loctite 271 5 N m 44 lbf in 5 N m 44 lbf in 3 5 N m 44 lbf in Loctite 271 8 N m 71 lbf in Loctite 271 7 8 9 10 5 N m 44 lbf in Loctite 242 Sealant 732 6 PARTS ...

Page 21: ...4 HULL BODY Sub Section 01 COMPONENTS 04 01 2 F06L02S Loctite 271 13 8 N m 71 lbf in Loctite 242 12 Sealant 732 15 Sealant 732 2 5 N m 22 lbf in Loctite 271 Sealant 732 15 N m 11 lbf ft 4 5 12 12 14 12 5 4 PARTS ...

Page 22: ...Loctite 271 Loctite 242 8 N m 71 lbf in Loctite 271 5 N m 44 lbf in 5 N m 44 lbf in Loctite 271 8 N m 71 lbf in Loctite 271 Loctite 242 3 10 10 5 N m 44 lbf in Loctite 242 Sealant 732 Loctite 271 Left side only 15 N m 11 lbf ft Body Sealant 732 5 N m 44 lbf in 7 8 9 6 PARTS ...

Page 23: ...b Section 01 COMPONENTS 04 01 4 Loctite 271 Loctite 242 8 N m 71 lbf in Loctite 271 15 N m 11 lbf ft Loctite 271 Sealant 732 Sealant 732 1 5 N m 13 lbf ft Sealant 732 F07L04S 12 13 8 N m 71 lbf in 12 4 5 4 5 12 14 12 15 PARTS ...

Page 24: ...b Section 01 COMPONENTS 04 01 5 F07L05S 1 4 N m 12 lbf in 8 N m 71 lbf in 0 8 N m 7 lbf in Loctite 242 5 N m 44 lbf in Loctite 242 5 N m 44 lbf in 8 N m 71 lbf in Loctite 242 Loctite 242 5 N m 44 lbf in 3 N m 26 lbf in PARTS ...

Page 25: ...tion 04 HULL BODY Sub Section 01 COMPONENTS 04 01 6 4 N m 35 lbf in Loctite 242 4 N m 35 lbf in Loctite 242 5 N m 44 lbf in Loctite 242 5 N m 44 lbf in Loctite 242 5 N m 44 lbf in Loctite 242 F07L06S PARTS ...

Page 26: ... 01 7 F07L07S Body Sealant 732 Loctite 598 Ultra Black 8 N m 71 lbf in Loctite 598 Ultra Black Body Sealant 732 Loctite 598 Ultra Black 8 N m 71 lbf in Loctite 598 Ultra Black Loctite 518 31 N m 23 lbf ft Loctite 271 Loctite 242 4 N m 35 lbf in PARTS ...

Page 27: ...4 in GTX MODEL FRONT AND REAR SEATS 1 Front hook 2 Adjustment nut apply Loctite 271 3 Nut apply Loctite 242 and torque to 8 N m 71 lbf in A 25 1 mm 63 64 3 64 in 2 Lock Pin Adjust seat lock pin as per following specifica tions GSX MODEL 1 Lock pin 2 Adjustment nut apply Loctite 271 A 33 5 1 mm 1 5 16 3 64 in GTX MODEL FRONT SEAT 1 Lock pin 2 Adjustment nut apply Loctite 271 A 39 1 mm 1 35 64 3 64 ...

Page 28: ...d be installed with its sharp edge opposite to the steering support 1 Lock pin apply Loctite 242 2 Rubber washer 3 Flat washers A 39 2 1 mm 1 35 64 3 64 in REMOVAL 4 Inlet Grate Loosen screws no 5 and remove inlet grate NOTE An impact screwdriver should be used to loosen tight screws 6 Riding Plate Remove the speed sensor from the riding plate GTX model Loosen screws no 7 Pry out riding plate NOTE...

Page 29: ...erse of removal procedures However pay particular attention to the following Follow the torquing sequence for the support no 8 and riding plate no 6 as shown in the next illus trations CAUTION Apply all specified torques and service products as per main illustra tions at the beginning of this sub section Apply Loctite 598 Ultra Black on the following components as indicated by the shaded area in t...

Page 30: ...atio 5 9 1 Cylinder head warpage maximum 0 05 mm 002 in Piston ring type and quantity 1 Semi trapez 1 Rectangular Ring end gap New 0 25 0 40 mm 010 016 in Wear limit 1 00 mm 039 in Ring piston groove New 0 025 0 070 mm 001 003 in Wear limit 0 2 mm 008 in Piston cylinder wall clearance New 0 060 0 108 mm 0024 0043 in Wear limit 0 2 mm 008 in Cylinder taper maximum 0 100 mm 004 in Cylinder out of ro...

Page 31: ...ery Yuasa Exide 12 V 19 A h Fuse Starting system 5 A Charging system 15 A 2 VTS system 7 5 A Not applicable Holder relay 5 A ADDITIONAL INFORMATION CARBURETION GSX 5620 GTX 5640 Carburetor Type Mikuni BN 40I 38 diaphragm Quantity 2 Main jet 142 5 Pilot jet 70 Adjustment Low speed screw 1 turn 1 4 High speed screw 0 Idle speed in water 1500 RPM Idle speed out of water 3000 RPM Fuel Type Regular unl...

Page 32: ...8 0 44 mm 007 017 in Wear limit 1 02 mm 040 in Impeller shaft end play new 0 12 0 54 mm 005 021 in Impeller shaft side play 0 05 mm 002 in Impeller pitch material Progressive pitch 17 25 stainless steel ADDITIONAL INFORMATION Do not mix different brands or oil types DIMENSIONS GSX 5620 GTX 5640 Number of passenger driver incl 2 3 Overall length 267 cm 105 in 312 cm 122 8 in Overall width 116 cm 45...

Page 33: ... INFORMATION STANDARD EQUIPMENT GSX 5620 GTX 5640 Safety lanyard Standard Tool kit Standard Fuel tank reserve Standard Monitoring beeper Standard Speedometer Optional Standard Info Center gauge Standard Tachometer Standard Variable trim system VTS Standard Not applicable Reverse Not applicable Standard Storage compartment Standard Rear grab handle Standard Extinguisher holder Standard ADDITIONAL I...

Page 34: ... m 16 lbf ft 1 VTS ring screws 14 N m 10 lbf ft 1 Not applicable Deflector screws Not applicable 9 N m 80 lbf in 1 Pump housing cover screws 4 N m 35 lbf in 1 Inlet grate screws 8 N m 71 lbf in 1 Ride shoe screws 22 N m 16 lbf ft 1 STEERING Cable retaining block bolts 6 N m 53 lbf in Steering cable stem arm bolt 3 N m 26 lbf in Steering stem arm bolts 6 N m 53 lbf in Handlebar clamp bolts 26 N m 1...

Page 35: ......

Page 36: ......

Page 37: ......

Page 38: ......

Page 39: ......

Reviews: