32
Viper 200 LTO Product Manual
Case 2. Cartridge is loaded and seated and tape is threaded
Follow these steps if the cartridge is loaded and seated, and the tape is entirely or
partially threaded into the drive. You will need a small, flat-blade screw driver and an
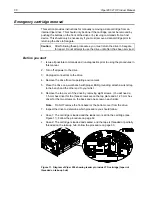
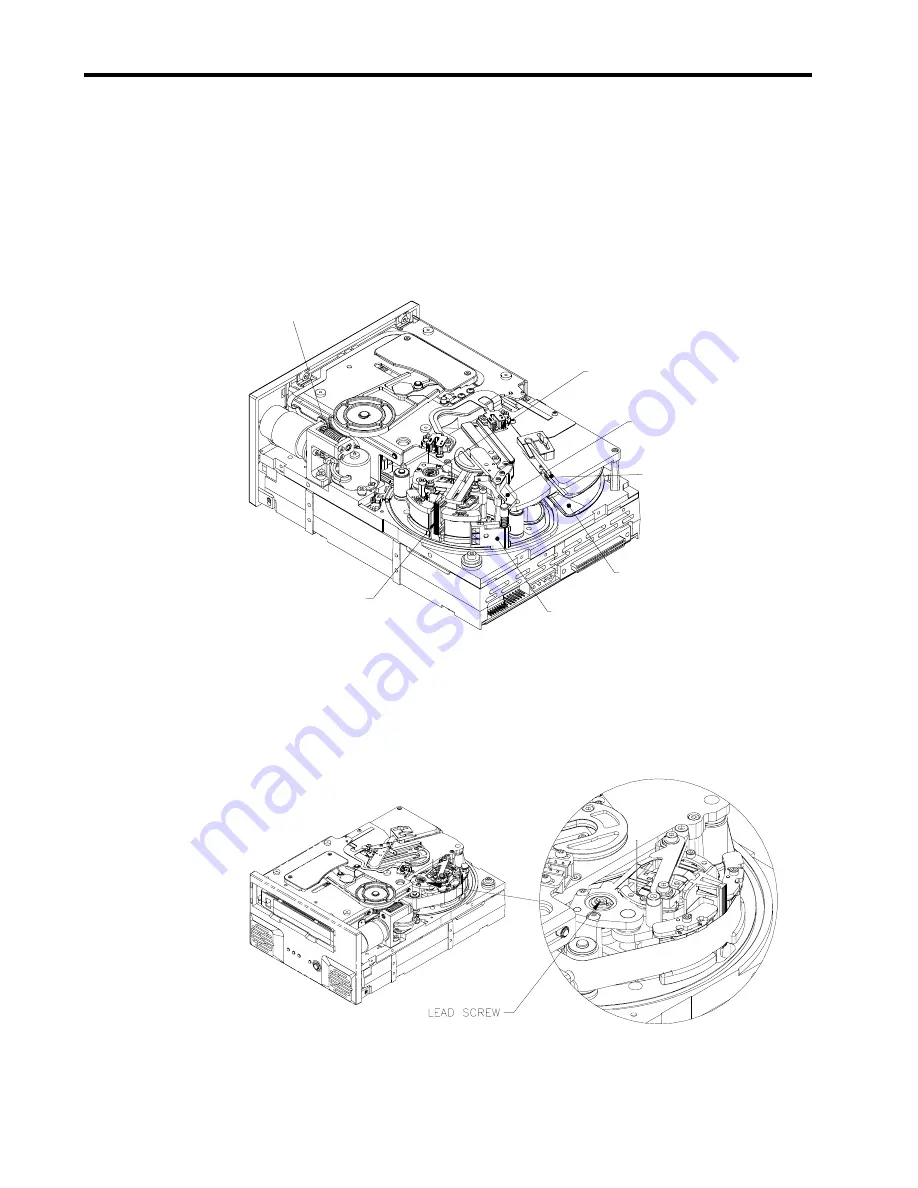
M2 hex-head screw driver. Figure 13 shows key components of the drive mechanism
that are referred to in the text below.
Note. Do not touch any part of the drive mechanism except for the components
specified in the instructions.
Worm gear
Head assembly
Tape grabber
Lead screw
Load arm
Take-up reel
and hub
Slot in
drive chassis
Figure 13. Diagram of Viper 200 showing key components used in manual cartridge
tape removal (no tape cartridge in drive).
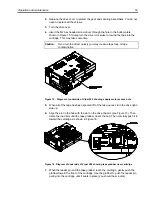
1.
Make sure the head assembly is in the lowered position by turning the lead
screw (shown in Figure 14) clockwise with the flat blade screwdriver. This is
necessary to allow the load arm to clear the head assembly when it is moved
back toward the cartridge.
Figure 14. Diagram of Viper 200 showing lead screw (tape threaded on take-up reel)


