5. AsseMbLY
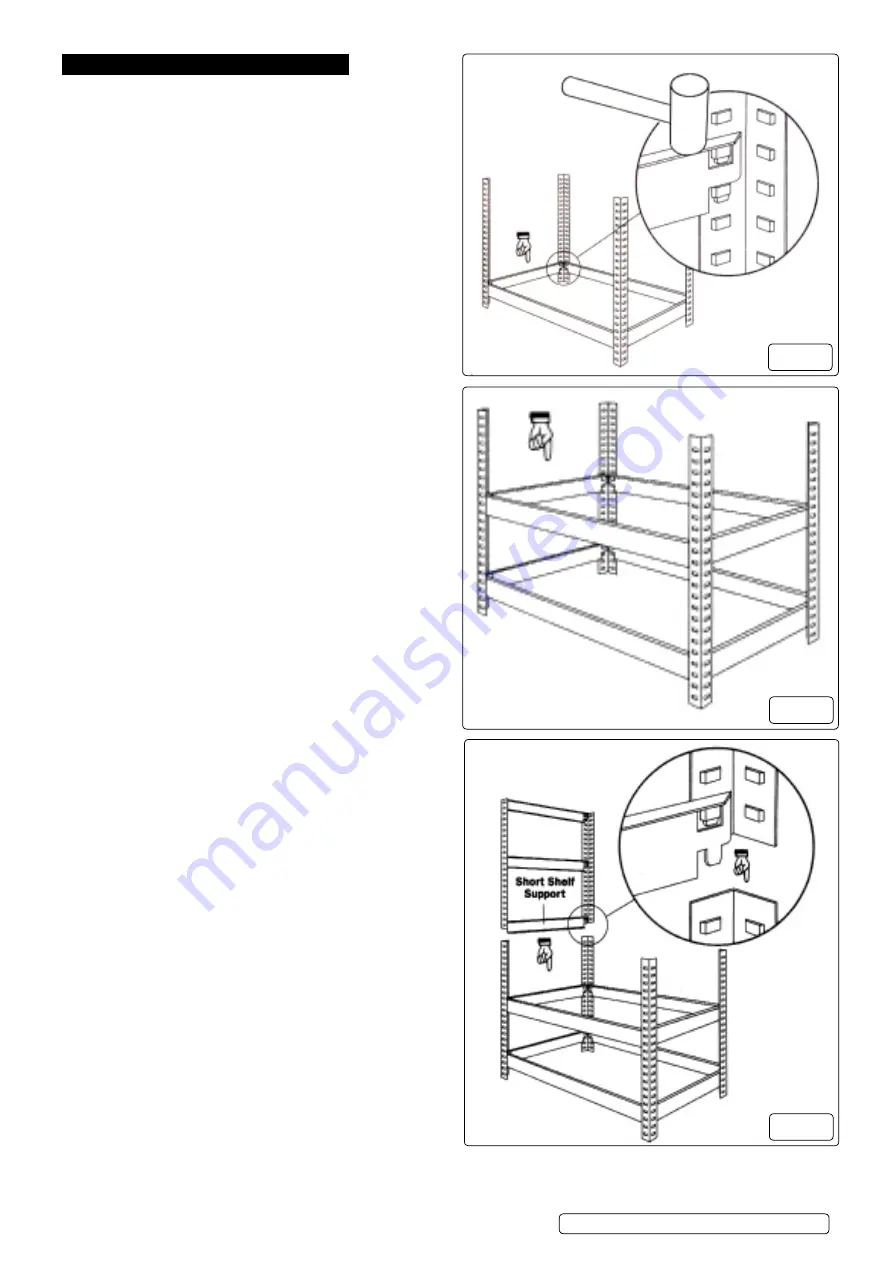
5.1. Assemble the frame using a soft faced hammer or mallet as shown
in fig.1. if only a hard faced hammer is available hammer onto a
piece of wood to avoid damaging the paint surface. Always hammer
gently as close as possible to the uprights. make sure that the shelf
support tabs are in line with the leg angle slots. if the tabs and slots
are not lining up do not use force as this may damage the tabs. if the
tabs are out of line bend them slightly to line up with the slots.
5.2. see fig.1. decide on the position/height of the bottom shelf.
make an end frame by fitting 1 short shelf support between 2 leg
angle sections. make a second end frame ensuring that the shelf
support is at the same height as the first end frame. Join the two
end frames together using 2 long shelf supports fixed at the
same height as the short shelf supports.
5.3. see fig.2. decide on the height of the second shelf. fit another
2 short shelf supports at the desired height then fit 2 long shelf
supports at the same height.
5.4. decide the shelf positions for the upper section of the shelves
and assemble two more end frames, each using 2 leg angle
sections and 3 short shelf supports ensuring that the shelf supports
are at the same height on both frames. the upper half can be joined
to the lower half by using the lower shelf supports as shown in fig.3.
if the lower shelf is not positioned at the centre of the frame use the
special joining pieces supplied as shown in fig.4.
5.5. When both upper end frames are in place join them together with the
remaining 6 long shelf supports ensuring that they are at the same
height as the short shelf supports.
Original Language Version
© Jack sealey limited
AP6350, AP6350Gs | issue 2 17/08/16
fig.1
fig.2
fig.3


