

4.3.
ATTACHING AND REMOVING NOZZLES
4.3.1.
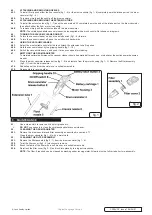
To install, firmly push either the floor nozzle (fig 1 - 5) or the crevice nozzle (fig 1 - 6) completely onto the intake port on the drum
cannister (fig 1 - 4).
4.3.2.
To remove simply pull the nozzle off the drum cannister.
4.4.
ATTACHING AND REMOVING THE EXTENSION TUBE
4.4.1.
To install the extension tube (fig 1 - 7) push the end marked ‘32’ completely onto the end of the intake port on the drum cannister,
then attach either the floor or crevice nozzle.
4.4.2.
To remove simply pull the extension tube off the drum cannister.
NOTE:
The cordless handheld vacuum cleaner is also supplied with a brush nozzle. Not shown on diagrams.
4.5.
TURNING THE VACUUM CLEANER ON/OFF
4.5.1.
To turn the vacuum cleaner on, push the on/off switch (fig 1 - 9) forward.
4.5.2.
To turn the vacuum cleaner off, push the on/off switch backwards.
4.6.
USING THE VACUUM CLEANER
4.6.1.
Select the most suitable nozzle for the task. Attach the extension tube if required.
4.6.2.
Hold the vacuum cleaner by the gripping handle (fig 1 - 10).
4.6.3.
Switch the vacuum cleaner on, and push it at an even speed for cleaning.
4.7.
EMPTYING THE DRUM CANNISTER
To maintain optimal performance the vacuum cleaner should be emptied after each use, or whenever the suction power becomes
weaker.
4.7.1.
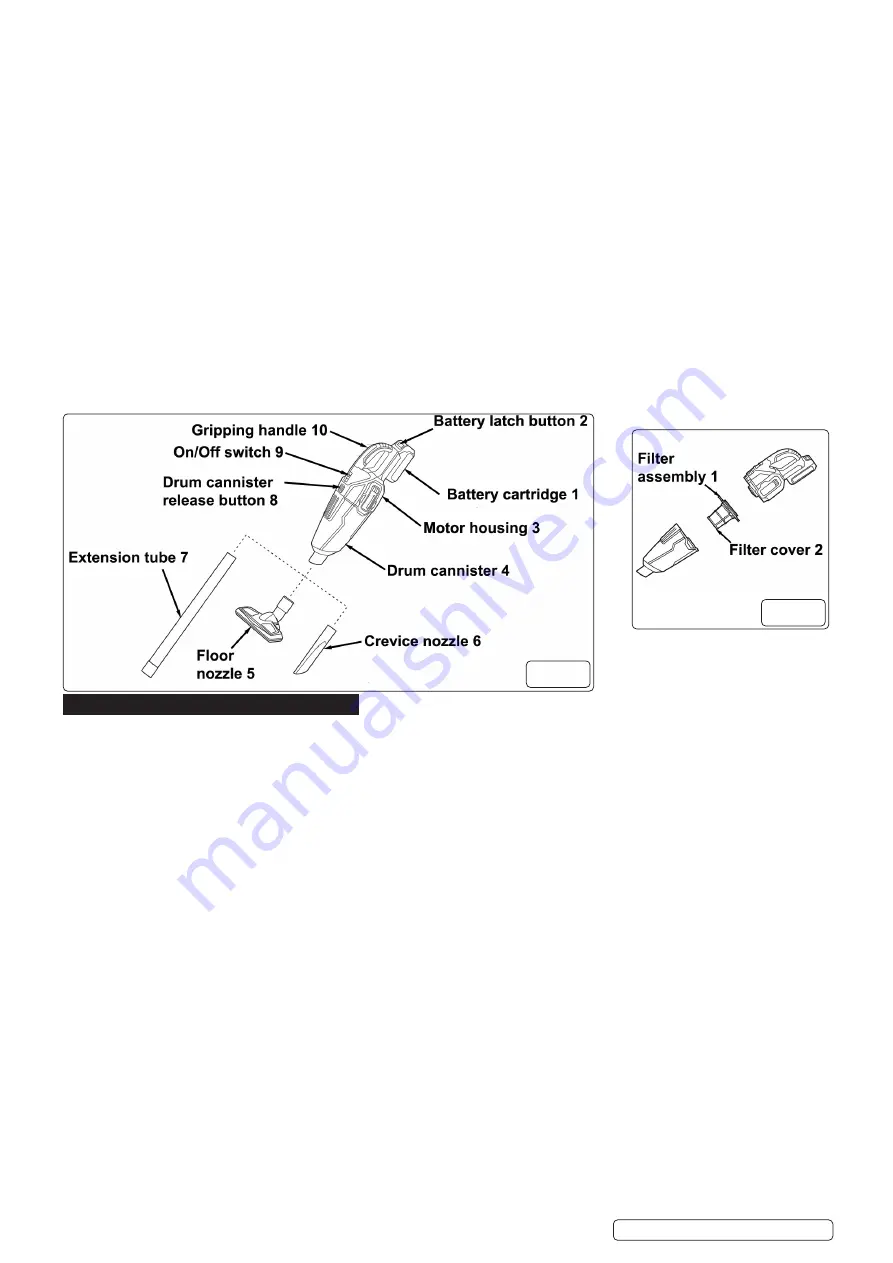
Press the drum cannister release button (fig 1 - 8) and remove from the motor housing (fig 1 - 3). Remove the filter assembly
(fig 2- 1) from the drum cannister.
4.7.2.
Shake/tap out the drum cannister over a suitable waste bin.
4.7.3.
Re-assemble in reverse order.
5. MAINTENANCE
5.1.
Use a clean cloth to remove dirt, dust oil, grease etc.
8
DO NOT
use solvents to clean the cordless handheld vacuum cleaner.
5.2.
CLEANING THE DRUM CANNISTER
5.2.1.
Remove the drum cannister and filter assembly as described in section 4.7.1.
Clean the drum cannister (fig 1 - 4) with a moist cloth.
5.3.
CLEANING THE FILTER ASSEMBLY
5.3.1.
Remove the filter assembly (fig 2 - 1) from the drum cannister (fig 1 - 4).
5.3.2.
Twist the filter cover (fig 2 - 2) clockwise to remove.
5.3.3.
Brush the fabric of the filter with a soft brush over a suitable waste bin.
5.3.4.
Re-attach the filter cover (fig 2 - 2) and lock into place by turning anti-clockwise.
NOTE:
The filter, if required, can be cleaned by washing under running water. All parts must be fully dried prior to re-assembly.
CP20VCV Issue 1 06/05/21
Original Language Version
© Jack Sealey Limited
fig.1
fig.2


