
1.2.3.
Transformer Plug & BS Adaptor:
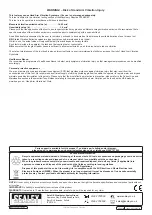
The battery charger is supplied with a European standard Schuko plug. To use the battery charger
in the UK the BS adaptor must be used. Open the adaptor and insert the two pin plug on to the terminal connectors. Close the
adaptor over the plug mouldin
g and clamp with fitted screw. See illustration on the right.
1.2.4.
If the cable or plug is damaged during use, switch the electricity supply and remove from use.
1.2.5.
Replace a damaged plug with a BS1363/A 13 Amp 3 pin plug. If in doubt contact a qualified electrician.
1.2.6.
Class II products are wired with live (brown) and neutral (blue) only are marked with the Class II symbol;
A) Connect the BROWN live wire to the live terminal ‘L’.
B) Connect the BLUE neutral wire to the neutral terminal ‘N’.
C) After wiring, check that there are no bare wires and ensure that all wires have been correctly connected.
Ensure that the cable outer sheath extends inside the cable restraint and that the restraint is tight.
8
DO NOT
connect either wire to the earth terminal.
1.2.7.
Sealey recommend that repairs are carried out by a qualified electrician.
1.2.8.
Battery Charger Safety Instructions
WARNING!
DO NOT use the charging base to charge any battery other than that required for the tool. Other types of batteries may
explode!
9
Inspect the plug, cable and the charging base for wear and damage to ensure items are safe before connecting to the mains power
supply. If worn or damaged
DO NOT
use, immediately replace, or contact a qualified electrician.
9
Check cables are always protected against short circuit and overload.
9
Uncoil the power cable between the plug and the charging base before use.
8
DO NOT
pull or carry the charging base by the charger power lead, or pull the plug from the mains socket by the power lead.
8
DO NOT
use any other type of transformer with the charging base.
8
DO NOT
try to open or dis-assemble the plug or charging base.
8
DO NOT
use the plug to power any other electrical item.
9
Disconnect the plug from the charging base and the mains power supply when not in use.
8
DO NOT
expose the charging base to damp or wet conditions (for indoor use only).
8
DO NOT
pull or carry the charging base by the power lead.
8
DO NOT
operate the charging base if it has been dropped, or has received a sharp knock, or is damaged. Contact an authorised
service agent.
8
DO NOT
dismantle the charging base as this may cause damage or personal injury and will invalidate your warranty.
8
DO NOT
insert foreign objects or material into the slot reserved for the battery.
8
DO NOT
immediately charge a second battery. Consecutive charging will overheat the charging base. Allow the unit to cool for 15
minutes before charging the next battery.
9
Ensure that the insulation on all cables and on the appliance is safe before connecting it to the power supply.
9
Ensure that cables are always protected against short circuit and overload.
8
DO NOT
use worn or damaged cables, plugs or connectors. Immediately have any faulty item repaired or replaced by a qualified
electrician.
1.2.9.
Battery Safety Instructions
WARNING!
Battery contains lithium-ion which is dangerous. Handle with care to avoid damage, fire, corrosion or personal injury.
9
Charge battery prior to its first use. The battery will have been shipped in a low charge state.
To reduce the risk of burns or fire:
8
DO NOT
Attempt to open, disassemble, modify or service the battery pack.
8
DO NOT
Crush, puncture, short external contacts or dispose of in fire or water.
8
DO NOT
Expose to temperatures above 40°C (104°).
9
Replace only with the battery pack designated for this product.
9
Recycle or dispose of used battery as stipulated by local regulation.
9
Use only the charging base provided to charge the drill battery.
8
DO NOT
attempt recharging the battery by means of an engine generator or a DC power source.
WARNING!
Dispose of spent batteries correctly as they contain Lithium-ion.
DANGER!
DO NOT attempt to disassemble the battery.
For safety and environmental reasons
DO NOT discard in domestic waste or by burning. ONLY discard or recycle according to local
authority regulations.
WARNING!
DO NOT allow a leaking battery to contact your person. If you come into contact with battery liquid take the following
immediate action:
a) Skin contact:
Wash immediately with soap and water, then wash flesh in either lemon juice or vinegar.
b) Eye contact:
Wash with a strong solution of boric acid, and seek immediate medical attention.
© Jack Sealey Limited
Original Language Version
CP6018V Issue: 2 (I)- 14/01/16