7. MAINTENANCE
WARNING
If fuel remains in the tank, tilting of the mower may cause fuel leaks. Avoid fuel leaks on plastic and rubber parts.
7.1. Maintenance
7.1.1. Ensure all fixings are tight and secure.
7.1.2. Replace any damaged or worn parts immediately.
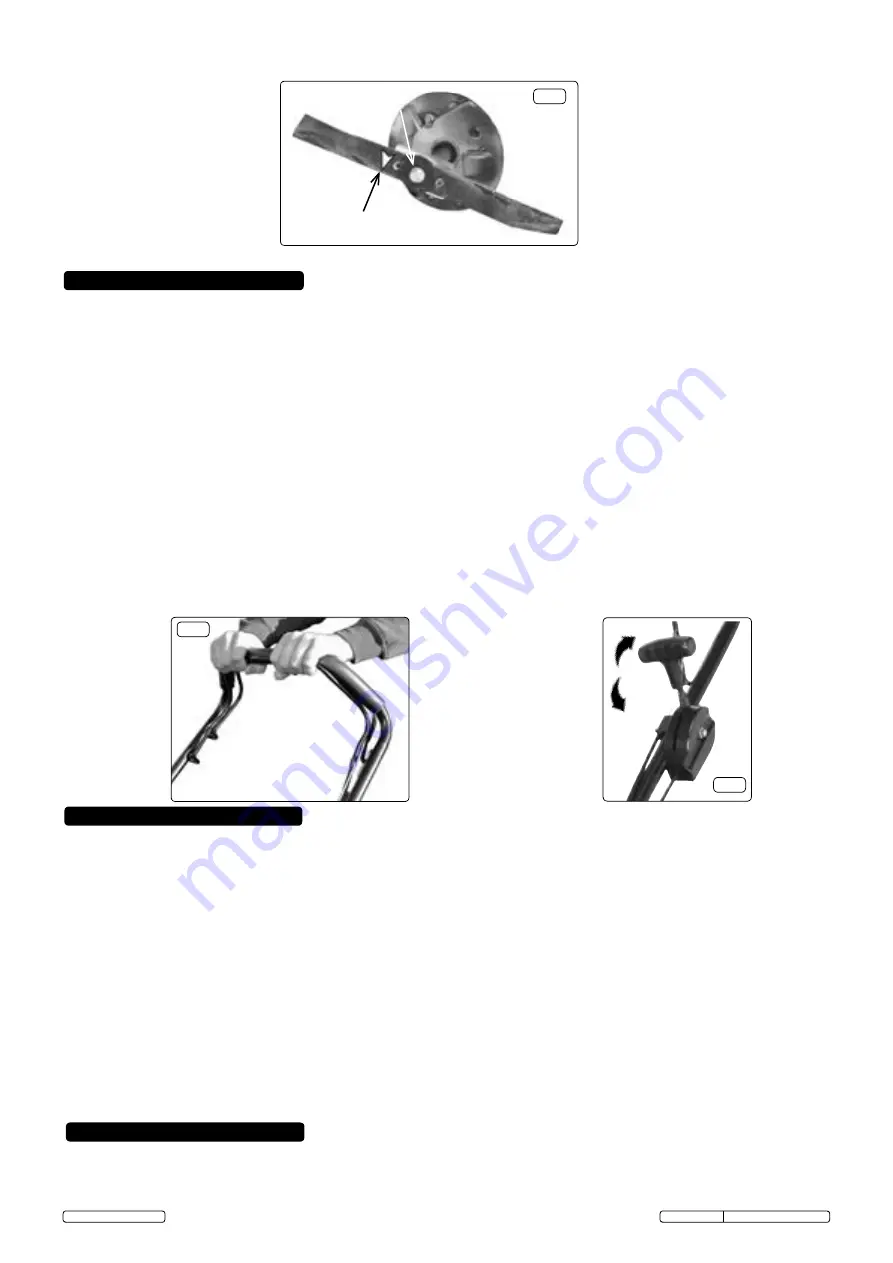
7.1.3. Check blade during and after each use, see section 5.3.2. for removal. Blade symmetry is essential for balance.
7.1.4.
Check the cable clip and cable run, especially the throttle cable for fraying.
7.1.5.
Check the pull cord for wear and retaining handle knot integrity.
7.1.6.
Check the stone guard and grass box for integrity.
7.1.7. There are no customer serviceable parts other than the blades and frame fixings, use qualified service personnel for all other aspects of
maintenance.
7.1.8.
If the fuel tank has to be drained, this should be done outside and the engine should be cool.
7.2.
Cleaning
WARNING
If fuel remains in the tank, tilting of the mower may cause fuel leaks.
7.2.1.
After each use, clear accumulated grass cuttings from inside cutter deck.
DO NOT
allow the grass to dry on the mower.
Note!
Inside cutter deck will lose the protection of the paint finish over time. Use a rust resistant paint to repair.
7.2.2. Clear any accumulated grass cuttings from the area of the engine, with caution around finely balanced springs and linkages.
7.2.3. Clean any grass cuttings from the wheels and bell crank axles.
7.2.4. Clean the mower externally before storing with special attention to grass box woven mesh, which could affect airflow and grass
collection rate.
8. WARNING SYMBOLS
The mower should be used with due care. Symbols placed strategically on various parts of the machine reminds the user of the main
precautions to be taken at point of operation. Symbols and meanings are listed below. These meanings also add emphasis to the safety
regulations and safety information given in earlier sections of these instructions. Some warnings in the instructions may appear more than once.
6. OPERATION
NOTE:
This appliance is not intended for use by persons (including children) with reduced physical, sensory or mental capabilities or lack of
experience and knowledge, unless they have been given supervision or instruction concerning the use of the appliance by a person responsible
for their safety. Children should be supervised to ensure that they do not play with the appliance.
WARNING: DANGER!
Refuel engine outdoors only, using a funnel
.
If fuel is spilled, move the mower away avoiding creating any
source of ignition until the fuel is evaporated and dispersed. Never remove the fuel cap or add fuel while the engine is running or engine
is hot. Replace fuel caps immediately and securely.
7
DO NOT
operate the engine in a confined space where dangerous carbon monoxide fumes can collect.
7
DO NOT
run with mower.
7
DO NOT
mow slopes greater than 20°.
7
DO NOT
adjust any settings, links, cables etc..
7
DO NOT
Pick up the mower with the engine running.
3
The operator or user is responsible for accidents or hazards occurring to other people or their property.
6.1
With the instructions to this stage read, the mower assembled, assembly integrity inspected, cutter height set, fuel tank filled and oil
level checked the engine is ready to be started. For engine running see separate instructions.
6.2.
The mower engine will only start with the operator present lever gripped against the upper handle frame with one hand (fig.7), leaving
the other hand free to pull the recoil cord handle (item 8). The mower cutter face must be down on a flat surface with no obstacles,
stone guard down or grassbox fitted. Pump fuel primer three times. See the engine manufacturers' manual for pull cord starting.
6.3.
With the motor running at full speed, adjust the speed of the cutting blade (fig.8) to suit and mowing the lawn can proceed.
6.4.
Release your grip on the throttle lever to stop the motor. The blade will rotate for a few seconds after the motor has stopped.
6.5.
If leaving unattended, disconnect spark plug lead. If finished using; disconnect spark plug lead and go to section 5 for maintenance and
cleaning.
Slow
Fast
fig.8.
GL112 Issue No: 1 -15/04/15
Original Language Version
© Jack Sealey Limited
fig.7.
Direction of rotation arrow
visible on blade.
fig.6.
Retaining
bolt


