8
DO NOT
use the machine in the presence of flammable liquids or gases, or on premises where explosive substances are stored.
8
DO NOT
open the main unit or loosen or remove any of its retaining screws.
8
DO NOT
wipe plastic parts with any solvents such as petrol, thinners, carbon tetrachloride, alcohol or ammonia.
8
DO NOT
mix or thin paint in an area where there may be functioning appliances producing a naked flame or electrical sparking. This
includes equipment that is electric motor powered.
8
DO NOT
switch on the spray gun when paint is being mixed or thinned.
9
Ensure that any vapours have dispersed before switching on the spray gun.
9
Tightly recap all containers immediately after thinning or mixing paint, and store away from the spraying area.
8
DO NOT
spray near any sources of ignition such as an open fire, cigarettes, cigars or pipes, sparks, glowing wires or hot surfaces
or naked lighting.
9
Ensure that the air hose is firmly connected to the unit and the gun to avoid the possibility of any spilt material being drawn into the unit.
9
When not in use, thoroughly clean the spray gun and then store it in a safe, dry, childproof location.
2.
in
INTRODUcTION
Utilises 600Watt electric motor with high performance turbine to deliver continuous volumes of air. Spray gun uses composite body, which has
low affinity for paint, enabling quick and easy cleaning. Gun includes air and paint controls for fine adjustment of spray pattern. Suitable for interior
and exterior use, applying water and oil based paints, lacquers and stains. Supplied with air hose, viscosity cup and shoulder strap.
3.
s i
SPEcIFIcATION
Model no: ........................................................ HVLP2000.V2
S
pray Gun Set-Up:
..........................................................2mm
Pot Capacity: .................................................................
700ml
Voltage: ...........................................................................
230V
Power Consumption: .....................................................
600W
A
ir Hose Length:
............................................................. 2.4m
W
eight: ...........................................................................2.7kg
4.
s i
PAINT PREPARATION
4.1.
checking paint viscosity.
As most paints are made for brush or roller, it will normally be necessary to thin the paint to achieve proper atomisation and good
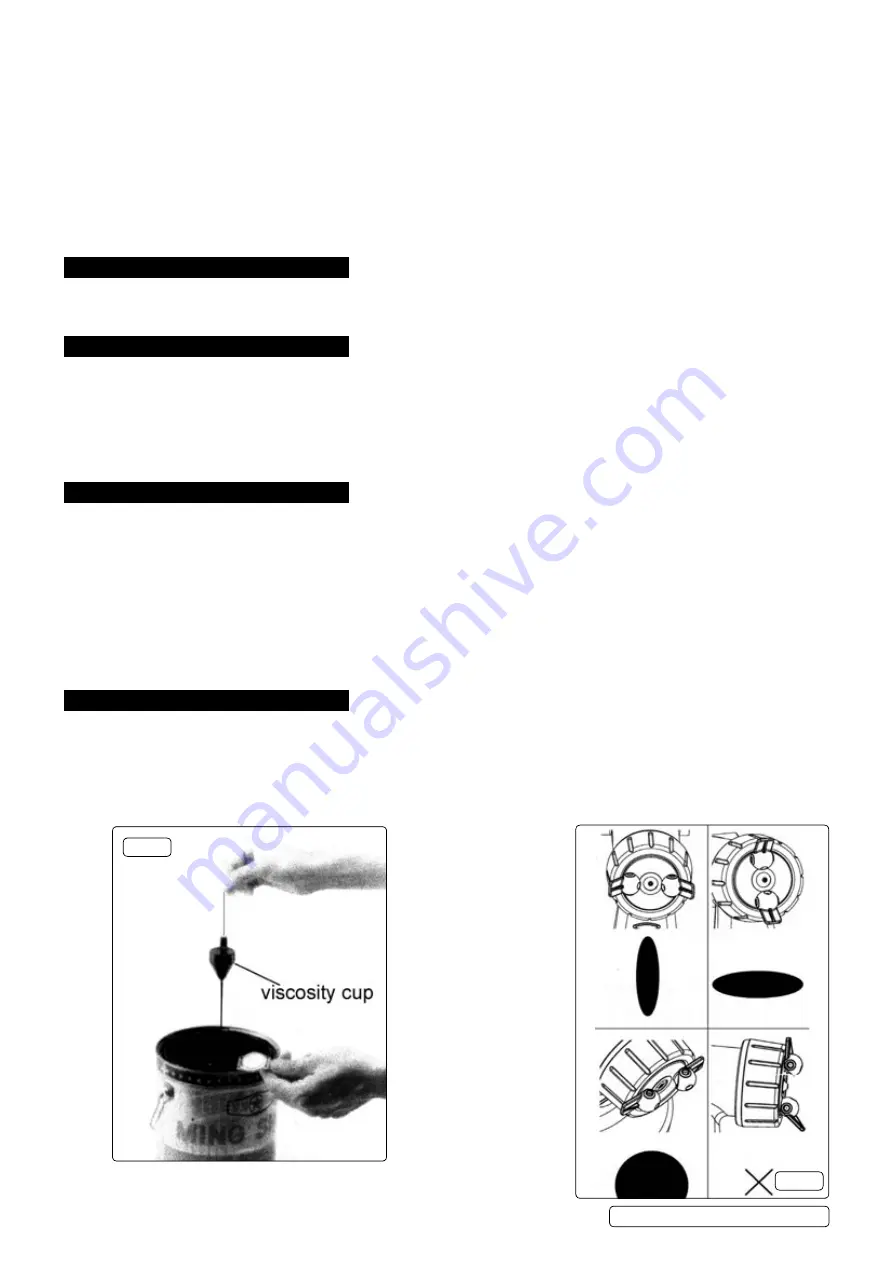
coverage. Use the viscosity cup provided to check the viscosity of the material prior to thinning. dip the cup into the paint to completely fill
it and then time how long it takes for the paint to flow out again (fig.1). If the paint is the correct viscosity, the flow time should be
approximately between 8 and 20 seconds. If the flow time is more than 20 seconds the paint is probably too thick. Thin the paint
slightly and retest until the flow time is within the limits stated. If the flow time is less than eight seconds the paint is too thin.
4.2.
Paint condition.
Any debris in the paint will clog the spray gun, which will then require a complete strip down and clean, before the spray gun will
function again properly. This is particularly important when using paint that has previously been opened. The paint should be
thoroughly mixed and free from any lumps. If necessary, strain the paint through a 60 mesh paint strainer, to ensure a smooth finish.
The paint should be strained into a clean container and if any paint is left over, it should be stored in a clean container.
5. ASSEMbLY / PREPARATION
5.1.
Remove the spray gun from the unit and adjust the air cap by rotating it (or move the spray jets) to give the required spray pattern as
shown in fig.2.
5.2.
Unscrew the paint container. fill container with paint (see Section 4 regarding paint preparation). Refit the paint container to the gun
and tighten.
Lay out the air hose and connect one end to the back of the unit using a push and twist action. Similarly connect the other
end of the hose to the spray gun.
5.3.
Plug the unit into the mains supply and switch it on. The unit is now ready to use.
fig.1
fig.2
H
VLP2000.V2 | Issue 2 - 21/10/15
Original Language Version
© Jack Sealey Limited


