3.1.3 firmly clamp the assembly together.
3.1.4 switch on both lasers and observe the position of the
projected beams in relation to the calibration marks at the
head of the rig. see the inset diagram in fig.2. If either of the
beams are out of alignment they will have to be adjusted as
described in the next section.
3.2
Calibrating the lasers:
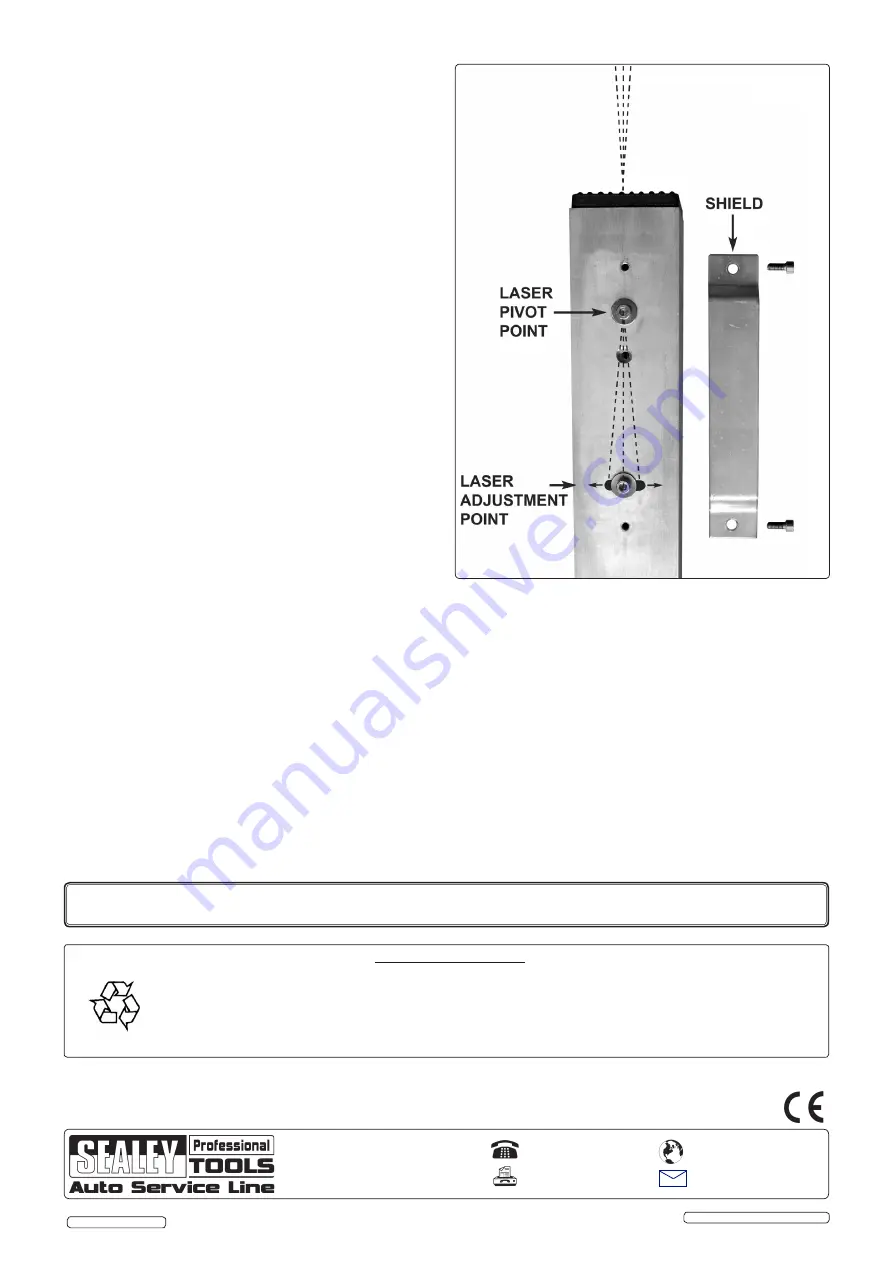
firstly, remove the calibration shield
from the laser that needs adjusting (see fig.3) by undoing the
two socket cap screws that hold the shield in place using a
3mm hex key.
3.2.1 using the 3mm hex key loosen the laser pivot point just
enough to allow the laser to pivot within the laser casing.
3.2.2 Loosen the laser adjustment point and, by sliding the screw
head, move the laser in very small increments until the
projected beam is dead on the calibration marking on the rig
head. If the beam needs to move to the right, slide the screw
head to the left and vice versa.
3.2.3 tighten the laser pivot point first.
3.2.4 carefully tighten the laser adjustment point keeping an eye
on the beam to ensure that the calibration does not change.
3.2.5 fix the shield back in place and tighten the fixings.
3.2.6 remove the laser units from the rig.
NOTE: It is our policy to continually improve products and as such we reserve the right to alter data, specifications and component parts without prior notice.
IMPORTANT:
no liability is accepted for incorrect use of this product.
WARRANTY:
Guarantee is 12 months from purchase date, proof of which will be required for any claim.
INFORMATION:
for a copy of our latest catalogue and promotions call us on 01284 757525 and leave your full name and address, including postcode.
01284 757500
01284 703534
sales@sealey.co.uk
Sole UK Distributor, Sealey Group,
Kempson Way, suffolk Business
Park
,
Bury st. Edmunds, suffolk,
IP32 7Ar
www.sealey.co.uk
Web
Environmental Protection.
recycle unwanted materials instead of disposing of them as waste. All tools, accessories and packaging should
be sorted, taken to a recycle centre and disposed of in a manner which is compatible with the environment.
When the product is no longer required, it must be disposed of in an environmentally protective way. contact
your local solid waste authority for recycling information.
Parts support is available for this product. To obtain a parts listing and/or diagram, please log on to www.sealey.co.uk, email
sales@sealey.co.uk or phone 01284 757500.
Original Language Version
© Jack sealey Limited
Ms070cr Issue: 2 - 20/07/12
fig.3


