Original Language Version
re300 Issue: 1 - 30/11/09
fig.6
5. OPERATION
5.1.
Compressing a strut spring.
Note! Before removing the strut from the vehicle it is recommended that the upper strut locking plate nut is loosened a
quarter turn. DO NOT loosen more than a quarter turn.
5.1.1. With the strut and spring removed from the vehicle, select the most suitably sized bracket or the strut clamp according
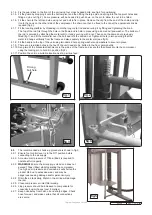
to the size of the spring and fit it onto the compressor using the locking pin to hold it in position (fig.7).
5.1.2. Position the lowest coil of the spring in the lower bracket. and rotate the strut and spring, so that the coil is held as low
as possible (fig.8).
5.1.3. swing the small upper arms into position and locate the upper brackets on the uppermost available coil (fig.9). ensure
that the coil is placed inside the recesses of the brackets to ensure that the coil will not break free under compression.
5.1.4. Having correctly positioned the spring on the lower and upper brackets, tighten all the locking knobs (fig.10).
5.1.5. relocate the locating platform if required, so that it is just underneath the bottom of the strut and secure it in place.
5.1.6. use the chain to secure the spring by pulling it across the spring and hooking it onto the clip. shut the safety guard ensuring
that it locks in place.
5.1.7. check to make sure that the spring is safely secured and then start to compress the spring coils. Gradually press the
correct pedal on the foot control to start the compression, stopping to check the spring is still securely held.
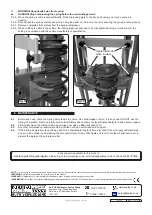
WARNING! Keep hands away from the spring whilst compressing.
DANGER! Stop compressing the spring before the coil windings touch.
WARNING! If the spring/strut is not located correctly in the jaws, it is possible that the strut/top retaining cap
could be subject to sideways forces. Watch closely as the spring reaches it's final phase of compression and
ensure the top cap assembly rotates freely before attempting to remove it.
5.1.8. When the strut is loose within the spring, unscrew the strut locking plate nut and remove the locking plate from
the top of the strut, gradually discharge the pressure on the spring by operating the foot control pedal. When all the
pressure has been released, taking care to support the strut and spring assembly when it becomes loose, move the
locating platform and withdraw the strut and release the spring from the retaining brackets if required.
fig.7
fig.8
locking
Pin
5.2.
Fitting a strut spring.
5.2.1. offer the new strut spring up to the compressor's brackets and fit it in the same position as that of the old spring.
Position the lowest coil of the spring in the lower bracket. and rotate the spring, so that the coil is held as low as
possible. swing the small upper arms into position and locate the upper brackets on the uppermost available coil.
ensure that the coil is placed inside the recesses of the brackets to ensure that the coil will not break free under
compression. tighten all the locking knobs (fig.10).
Note:
there must be coils free at either end to allow them to seat on the strut plates, without the strut and compressor
brackets interfering.
5.2.2. Insert the strut up inside the spring, and move the locating platform just underneath the bottom of the strut to support
it and secure it in place by turning the knob.
5.2.3. use the chain to secure the spring by pulling it across and hooking it onto the clip. shut the safety guard, ensuring that it locks
in place.
5.2.4. compress the spring using the correct pedal on the foot control unit, ensuring that the spring is securely held in place
within the bracket recesses at all times.


