4.3.2.
sAFetY Wire
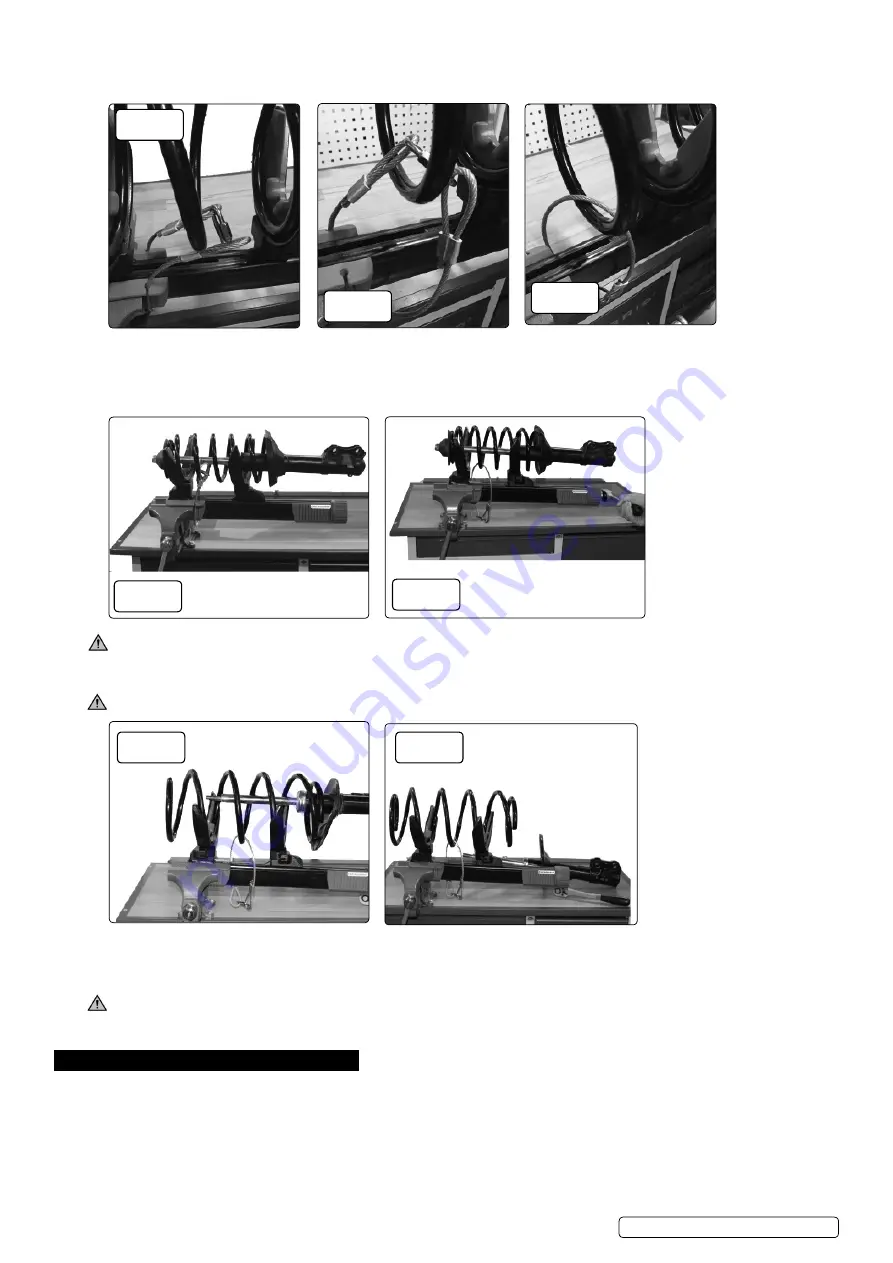
4.3.2.1. Always make sure that the safety wire is securely installed around the spring, and that the quick link is locked before starting the
compressing or decompressing process. Make sure that the wire does not get pinched during the process, see fig.’s F, G & H.
4.3.2.2. if needed, the wire can be slid out of the retaining slots in order to allow more space for the compressing process. Always remember to
snap the wire back in place upon completion of your work.
4.3.3.
rotate the drive nut to drive the jaws apart to match the length of the spring and to compress as many windings as possible. see
figure i below.
4.3.4.
Compress the spring by rotating the drive nut using a socket wrench, see fig.J. It is also possible to use an air wrench. (Limit torque to
120 nm, in order not to overload the safety pin).
8
Do not
continue to drive when the upper or lower travel ends of spring compressor are reached.
4.3.5.
When the spring has been safely compressed, remove the top bearing of the strut.
4.3.6.
Before removing the bearing recheck that the spring is still firmly seated in the jaws. See figure K.
4.3.7.
Remove damper and carefully release tension on the spring. See figure L.
4.3.8.
replace worn parts and repeat above procedure in reversed order for safe reassembly.
4.3.9.
store coil spring compressor in safe and proper place after use.
importAnt
take care throughout the whole operation and avoid standing in hazardous places in case the spring releases
unintentionally.
5. mAintenAnce
5.1.
Maintenance personnel should be qualified and trained in the compressor functions and failure modes, their rectification, operation and
maintenance of the product.
5.2.
Regular check period: 1 month. If you find any damage or deformation, please stop use immediately and ask your supplying stockist
for help. never try to repair the product yourself.
5.3.
Always keep the unit clean. make sure the coil spring compressor is dry.
5.4.
store the unit in a dry place to prevent corrosion. Always pack away the jaws with the coil spring compressor as supplied.
5.5.
Grease the guide spindle (using lithium grease) if necessary, or at least every six months. Always clean the spindle before applying
grease.
fig. F
fig. g
fig. H
fig. i
fig. J
fig. k
fig. l
Original Language Version
© Jack sealey limited
re225.V3 | issue:2 (2) 12/12/17


