4. CHARGING
4.1.
INITIAL CHARGING OF THE ROADSTART UNIT
NOTE:
This product may arrive partially charged. The unit must be fully charged immediately after purchase and before using for
the first time.
4.1.1.
Initially, the unit should be charged using the AC charger supplied for a period of 38 hours. Charge subsequently until the green charge
light illuminates. Never charge the unit for more than 40 hours.
4.2.
READING THE LED POWER LEVEL INDICATORS
4.2.1
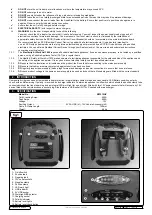
The charge level of the unit during use can be seen at any time by pressing the battery level check button (fig.1.14) and noting
which power level lights that are illuminated. The lights will illuminate in combination to show the charge level.
4.2.2
When just the green LED is illuminated the unit is fully charged and is ready to be used for starting a vehicle.
4.2.3.
If the amber LED is illuminated the unit is partially discharged but can be used to operate most 12 volt accessories.
4.2.4.
If only the red LED is illuminated the power level is low and only a short operating time remains. The unit should be recharged
as soon as practical.
4.3.
RECHARGING WITH THE AC CHARGING ADAPTOR
Note:
Only charge with the adaptor supplied with your specific model. Charging adaptors are not interchangeable.
4.3.1.
Ensure the battery clamps are securely attached to the clamping bars on the unit as shown in fig.1.
4.3.2.
Turn the on/off switch (fig1.1.) to OFF.
4.3.3.
Plug the AC charger cable into the charging socket (fig.1.11) on the front control panel.
4.3.4.
plug the charger itself into any 230 Volt AC wall outlet. Charging will now commence but the charge level must be regularly
monitored to prevent overcharging. The battery level lights will display whilst the charger is plugged in.(fig.1.14).
4.3.5.
Charging a unit with a very low charge (i.e. showing red LED only) should take 34 to 36 hours. When just the green charge
indicator is illuminated the unit is fully charged and the charger should be disconnected from the unit and from the AC supply.
5. OPERATION
5.1.
PREPARATION AND PRECAUTIONS
WARNING
! Ensure that the Roadstart and vehicle voltages are the same.
5.1.1.
Apply the vehicle hand brake and place in neutral gear (or “park” if automatic transmission).
5.1.2.
Turn ignition and electrical accessories off.
5.1.3.
Use in a well ventilated area and wear eye protection and clothing.
WARNING!
Do not allow the red and black clamps to touch each other. Ensure that the correct clamps are placed on the
correct battery terminals.
5.1.4.
press the battery level check button. If the green light does not illuminate the unit must be charged before it can be used for jump
starting
NOTE:
A defective battery may not accept a charge from the portable power source. Ensure that the engine is functioning
and that the vehicle battery is not damaged.
5.2.
JUMP STARTING
WARNING!
Vehicles equipped with on board computers may be affected if the engine battery is jump started. Read your vehicle
owner’s manual before attempting to start the vehicle to determine if external starting assistance can be used.
Failure to follow these instructions may cause damage or explosion.
NOTE:
For optimum performance, the unit should not be stored below 10°C when using the unit as a jump starter.
5.2.1.
Turn off the vehicle ignition.
5.2.2.
Ensure on/off switch is in the off position.
WARNING!
Do not place the unit where it will become unstable when the engine starts. Route power cables away from moving
parts such as fans and belts.
5.2.3.
Attach the RED (po) clamp to the positive terminal of the battery.
Note:
On vehicles with multiple batteries connect positive clamp to positive battery terminal which is connected to vehicle
electrical system.
5.2.4.
Attach the bLACK (negative -) clamp to the vehicle chassis, engine block or a non-moving metal part of the vehicle which is
verified to be grounded, as far away from the battery as possible.
DO NOT
clamp directly to the negative battery terminal,
carburettor, fuel lines, or sheet metal body parts.
5.2.5.
Observe the polarity indicator on the control panel (fig.1.12). If the dual colour LED is green the connection is correct. If the LED is red
and the alarm sounds do not proceed until the connections are correct.
5.2.6.
Ensure that all cables are clear of moving belts and rotating fans.
5.2.7
Turn the on/off switch the ‘ON’ position.
5.2.8.
maintain a safe distance from the battery whilst jump starting.
5.2.9.
Turn on the ignition to start the vehicle.
NOTE:
If the vehicle does not start after 4 to 5 seconds, allow the RoadStart unit to cool for 3 to 4 minutes, before attempting to
jump start the vehicle again. If this is not done, the unit could sustain damage.
5.3. DISCONNECTING
VERY IMPORTANT! Failure to observe the following could result in the RoadStart battery exploding.
5.3.1.
When the vehicle has started, remove the negative (black) clamp within 15 seconds.
5.3.2.
Switch the on/off switch to ‘Off’.
5.3.3.
Remove the positive (red) clamp and return both clamps to their housings on the back of the unit.
5.4.
12V Power sockets
The PowerStart is fitted with 2 x 12V power sockets (fig.1.4). They will each accommodate a male 12V accessory plug up to a
combined total of 15A.
RS1312HV Issue: 1 - 15/12/16
Original Language Version
© Jack Sealey Limited

