4.2
Emergency Jump Starter
IMPORTANT:
The unit will only jump start a battery if the Roadstart battery voltage is greater than 7V. If the Roadstart battery is delivering
less than 7V, refer to Section 4.1 and follow the instructions to recharge the Roadstart battery.
nOTE:
For optimum performance, the unit should not be stored below 10°C when using the unit as a jump starter.
iMPORTAnT: USE OF RS125:
IMPORTANT:
Be sure to check the voltage switch of the RS125 is turned to the correct voltage before connecting the cables to the vehicle.
IN THE EVENT OF INADVERTENT CONNECTION TO 24VOLT SYSTEM WITH THE SELECTION IN THE 12VOLT POSITION:
DO nOT
•
TOUCH THE ROTARY SWITCH.
DiSCOnnECT
•
THE BATTERY AND LEAVE THE ROADSTART UNIT TO REST FOR AT LEAST ½ AN HOUR.
DAnGER OF EXPLOSiOn iF THESE inSTRUCTiOnS ARE nOT OBSERVED.
4.2.1 Turn off the vehicle ignition.
4.2.2 Attach the RED (po) clamp to the positive terminal of the battery.
4.2.3 Attach the BLACK (negative -) clamp to the vehicle chassis.
4.2.4 Ensure that all cables are clear of moving belts and rotating fans.
4.2.5 Maintain a safe distance from the battery whilst jump starting.
4.2.6 Turn on the ignition to start the vehicle.
nOTE:
If the vehicle does not start after 6 seconds, allow the RoadStart unit to cool for 3 minutes, before attempting to jump start the vehicle
again. If this is not done, the unit could sustain damage.
4.2.7 When the vehicle has started, disconnect the BLACK (negative -) clamp from the vehicle chassis.
4.2.8 Remove the RED (po) clamp from the battery terminal.
4.2.9 Return the clamps to the side storage lugs.
4.3
Alternative Vehicle Power Supply
4.3.1 When a vehicle battery is disconnected, the memory systems in radios, electronic ignition systems and alarms are frequently lost.
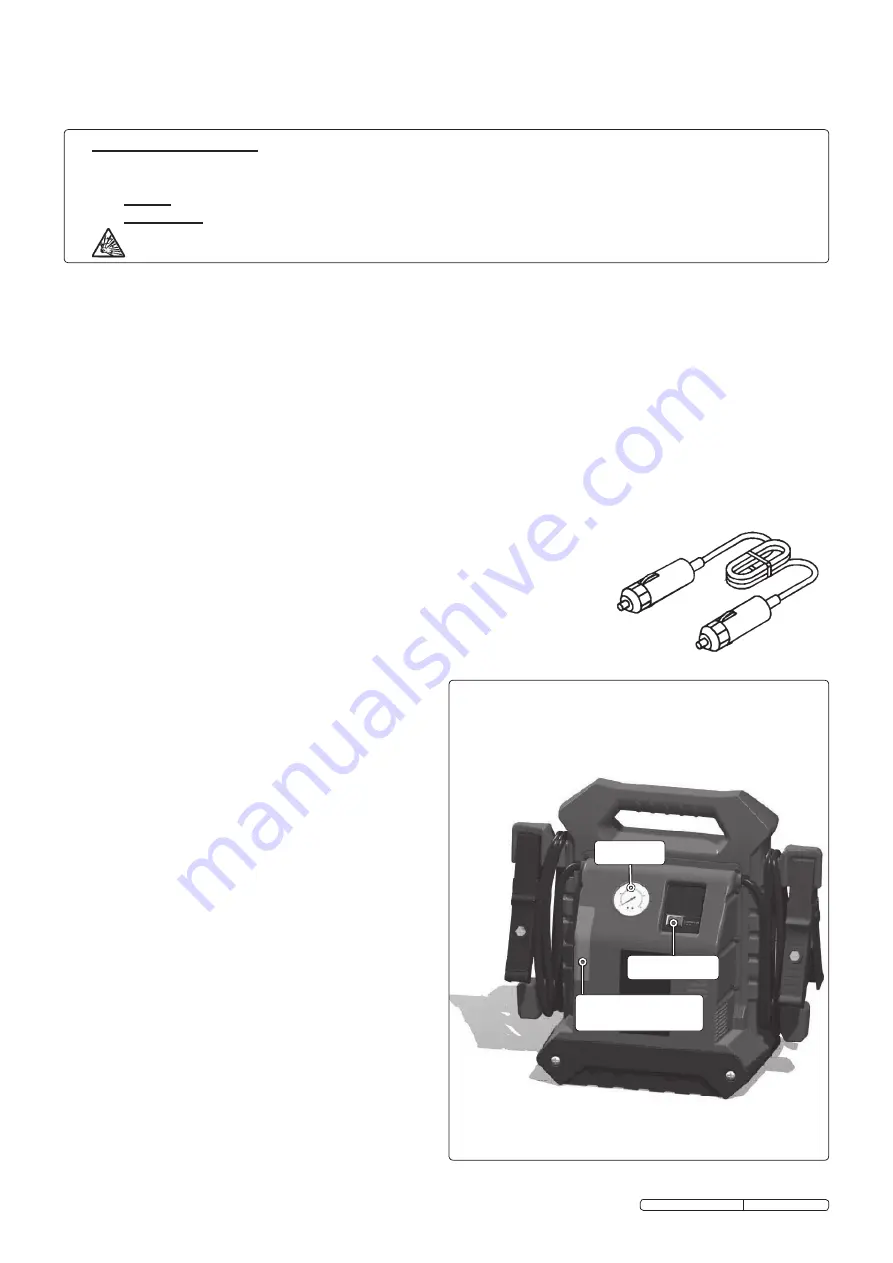
4.3.2 When replacing a battery the RoadStart unit can be used as an alternative power supply by connecting the unit dc extension lead into
the cigarette lighter socket.
4.3.3 This will prevent loss of memory in the systems outlined in Paragraph 4.3.1.
WARninG!
The positive battery cable will be live and MUST be insulated (e.g. in a heavy
duty plastic bag).
4.4
Multipurpose Power Supply
4.4.1 The RoadStart units can be used as a multipurpose power supply to power up any equipment
with a built-in 12Vdc male adaptor.
4.4.2 Used with an inverter, the RoadStart unit can operate equipment usually powered by either
110VAC or 230VAC.
nOTE:
The inverter power draw must not exceed 300 Watts.
4.5
Compressor Operation (RS122 OnLY)
4.5.1 Place the unit on a sound, flat surface.
The inflation hose and nozzle accessories are located in the
back panel of the RoadStart. Open the rear panel door and
withdraw the inflation hose.
4.5.2 Push the universal quick-connector fully onto the inflation
valve stem, and lock with the connector lever.
IMPORTANT: Inflation will only be effective if the connector
head is fully fitted and locked onto the valve.
4.5.3 Check the pressure gauge to determine the amount of
pressure already in the tyre.
4.5.4 Switch the compressor on. View the pressure gauge to
determine when the correct pressure has been achieved.
4.5.5 Switch the compressor off to stop the supply of air.
4.5.6 Unlock and remove the quick-connector from the inflation
valve, ensuring you do not loose any air in the process.
Replace any dust cap onto the valve. When you have
finished using the compressor, pack the inflation hose and
accessories back in the storage compartment.
General information.
To inflate a completely flat tyre there must not be any weight
on the wheel. A flat tyre on a vehicle must therefore be
jacked up to take the weight off of the tyre.
The time it will take to inflate a tyre will depend upon the
amount of air required.
nOTE:
The compressor may also be used to inflate items
such as inflatable dinghies, sports balls, air beds etc.
Use the appropriate inflation nozzle for the item.
CAUTiOn:
Some items may not indicate pressure required or the
maximum pressure. Be careful not to over-inflate.
DO nOT leave the compressor running unattended.
nOTE:
The pressure gauge is not a calibrated instrument.
We recommend use of an approved dial/pressure gauge for a
definitive reading.
OPEN FOR PRESSURE
HOSE AND NOZZLE
ADAPTORS
PRESSURE
GAUGE
COMPRESSOR
ON/OFF SWITCH
RS122 REAR ViEW
Original Language Version
RS121, RS122, RS125 Issue: 3 - 08/04/10


