5.4.
pLunge-cutting:
5.4.1.
only soft materials such as plasterboard or the like may be processed using the
plunge-cutting method.
8
Do not
process any metals using the plunge-cutting method.
5.4.2.
Use short saw blades for plunge-cutting.
5.4.3.
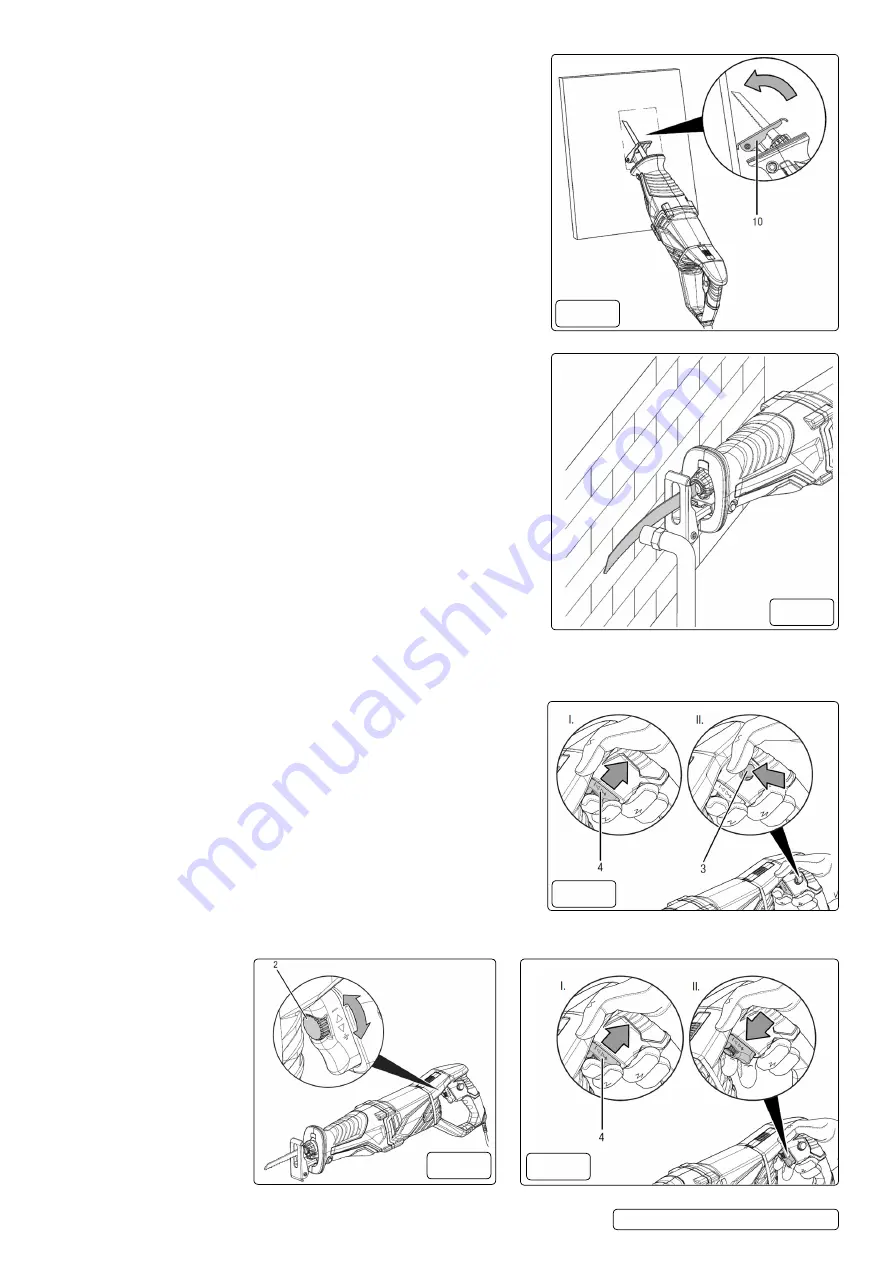
First place the edge of the guide shoe (fig.10.10) on the workpiece before
switching the power tool on, see Schematic representation plunge-cutting.
note:
The saw blade must not be in contact with the workpiece.
5.4.4.
Select the maximum stroke rate and allow the saw blade to slowly plunge into
the workpiece. To do so, bring the saw blade closer to the workpiece while
maintaining contact between the edge of the guide shoe (fig.10.10) and
the workpiece.
5.4.5.
As soon as the guide shoe (fig.10.10) rests on the workpiece, you can continue
working along the cutting line.
5.5.
fLuSH cutting
5.5.1.
Using elastic bi-metal saw blades you can saw off protruding objects such as
water pipes or the like directly at the wall.
5.5.2.
Make sure that the saw blade extends beyond the diameter or thickness of the
object, otherwise there is a risk of kickbacks.
5.5.3.
Apply lateral pressure on the power tool until the bi-metal saw blade and the side
of the guide shoe are positioned against the wall, see Schematic representation
flush cutting.
5.5.4.
Saw through the object applying constant lateral pressure.
5.6.
SwitcHing continuouS opeRation on anD off
5.7.
When continuous operation is activated, the on/off switch does not have to be
held permanently, which makes working more comfortable.
5.7.1.
Proceed as described in the chapter Switching the device on and off, steps 1 to 6.
5.7.2.
Press the locking switch (fig.12.3) with your thumb until it locks in place
completely.
5.7.3.
Let go of the on/off switch (fig.12.4) and continue holding the device.
•
The on/off switch is locked in place.
•
The device keeps running and continuous operation is activated.
5.7.4.
Press the on/off switch (fig.12.4) again to deactivate continuous operation.
•
The stroke rate increases briefly.
5.7.5.
Let go of the on/off switch (fig.12.4) to stop the device.
5.7.6.
SeLecting tHe StRoke Rate
5.7.7.
The required stroke rate depends on various factors. For example, the workpiece
as well as the activity and the working conditions have an impact on the required
stroke rate. Working with plastic or aluminium, for instance, requires a low stroke rate. Entering the material during plunge-cutting, for
instance, requires a high stroke rate.
5.8.
DuRing noRMaL opeRation:
5.8.1.
During normal operation the stroke rate is controlled by pressing the on/off
switch (fig.12.4):
•
Light pressure = low stroke rate
•
Firm pressure = high stroke rate
•
Press in completely = maximum stroke rate
5.9.
foR continuouS opeRation:
5.9.1.
You can select the stroke rate for continuous operation via the setting wheel (2):
5.9.2.
Turn the setting wheel (Fig.13.2) towards the + or - to increase or reduce the
stroke rate.
5.10.
SHutDown
5.10.1. S
witch off the device.
5.10.2. Hold onto the mains plug while pulling the power cable out of the mains socket.
5.10.3. If required, allow the device to cool down.
5.10.4. Remove the tool from the tool holder (see Start-up chapter).
5.10.5. Clean the device according to the Maintenance chapter.
fig.10
fig.11
fig.12
fig.13
fig.14
S
RS850 Issue 1 28/09/18
Original Language Version
© Jack Sealey limited


