Vs912 | issue 1 20/05/16
Original Language Version
© Jack sealey limited
4. operaTion
4.1.
install Battery
4.1.1.
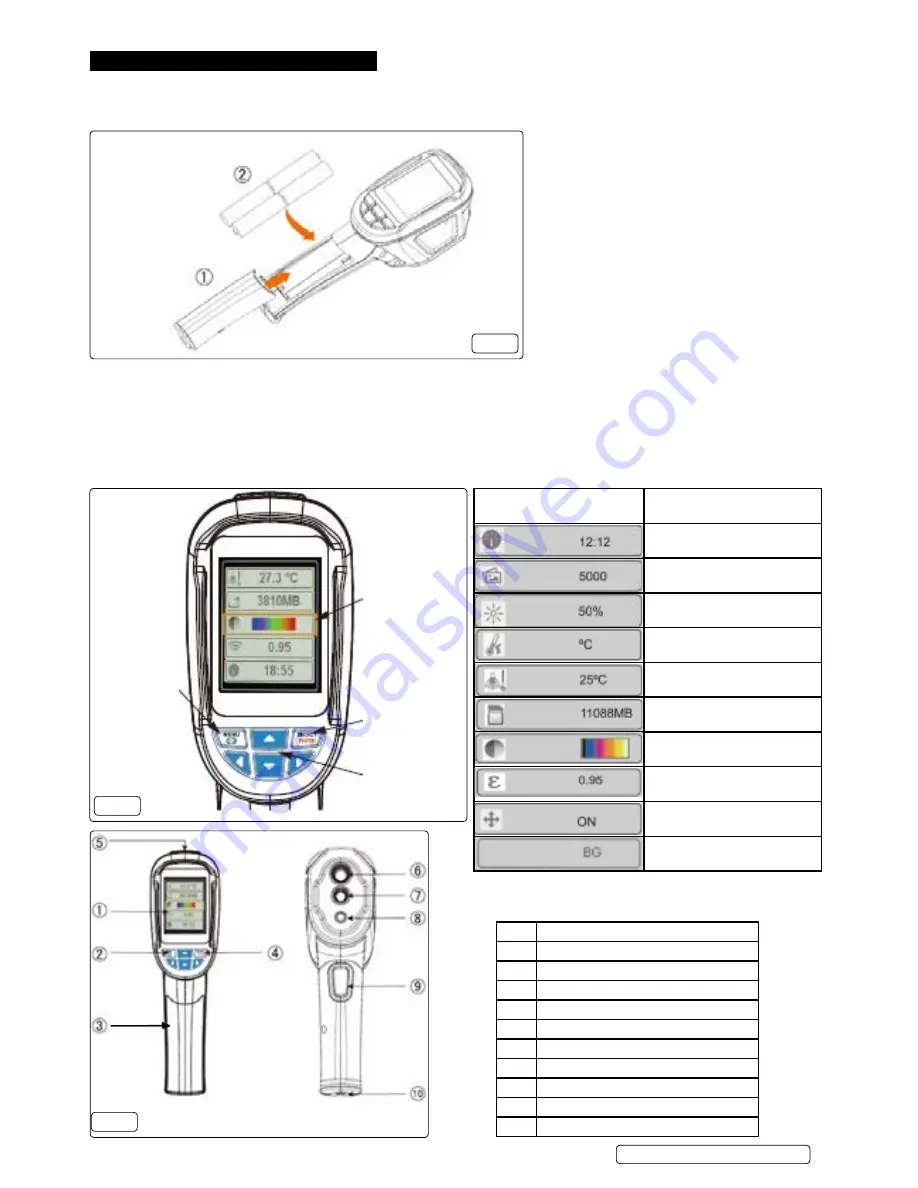
Install the four battery`s into the Thermal Imaging Camera (fig.1) ensuring the correct polarity.
fig.1
Yellow op-
tion box
Select/Input
Navigation
keys
Start-up/en-
ter menu
4.2.
Basic functions
4.2.1.
Press “start-up” key for 5 seconds and the instrument starts up.
4.2.2.
Press “menu” key for 1 second to enter basic settings menu, five options will be shown on the screen
4.2.3.
Press up or down key to scroll the menu.
4.2.4.
Press “select” key to select option within yellow option box.
4.2.5.
To edit the selected option press “up” or “down” key After adjustment, confirm the new value by pressing “menu” key to exit the edit
mode.
4.2.6. to turn camera off press start up key for 5 seconds.
fig.2
fig.3
item
description
1
t
FT high definition colour screen
2
start-up / menu key
3
Battery cover
4
select / enter key
5
small sd card
6
infrared imaging
7
Visible light camera
8
led
9
image capturing
10
interface for the installation of tripod
icon
description
time setting
save image
Background light setting
temperature unit setting
Background temperature setting
capacity of memory card
colour palette setting
emissivity setting
marking of spot temperature
Background temperature


