4.3.
removing bush
4.3.1.
obtain access to the bush assemble following manufactures instructions, including removing rubber washer.
4.3.2.
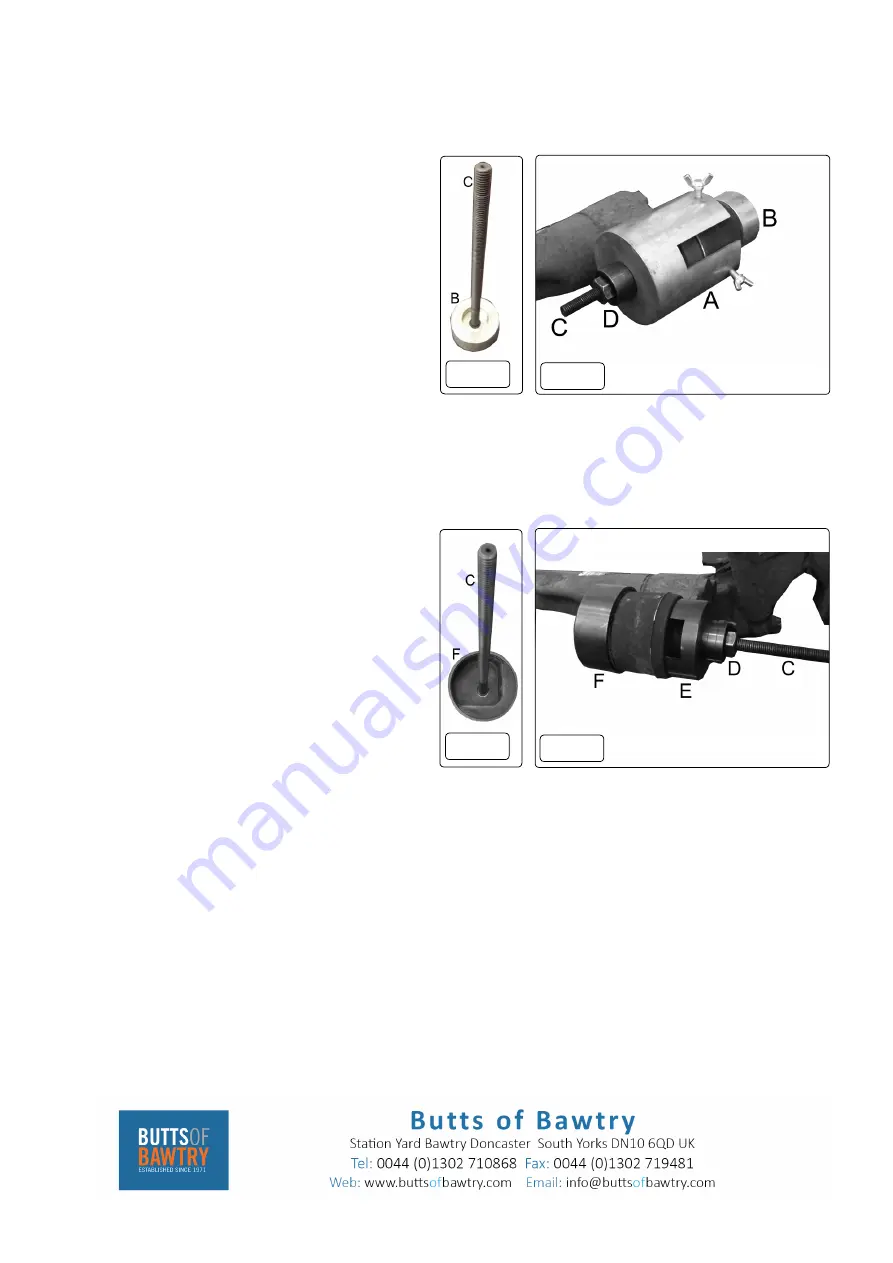
Thread the Adaptor(B) onto the short threaded end of the force screw (C). (fig.2) Pass the bolt through the bush from the rear and
then position the large Adaptor (A) over the force screw, fitting it around the bush housing.(fig.3)
4.3.3. thread the flange nut (d) onto the force screw and wind it up to the adaptor. tighten wing nuts to align and hold the extraction tool
in place. double check to make sure that everything is aligned.
4.3.4.
using a 24mm spanner, turn the nut clockwise. the
extractor will start to extract the bush through the
housing (fig.3). progress can be monitored though the
slot in adaptor(A)
4.3.5.
Keep turning until the bush has been extracted all the way
out of the housing. take care as the bush and assembly
may fall if wing nuts are not tight.
4.3.6.
Loosen wing nuts and remove Bush Tool and bush,
4.3.7.
remove nut(d) pull tool a part and remove bush, dispose
of bush in the appropriate manor.
4.3.8.
note!
if any undue resistance is felt, remove the assembly
and check everything is correctly aligned. the bush will
only push out in one direction.
` ` ` ` ` ` ` ` `
4.4.
i
nstalling new bush.
4.4.1.
Before installing a new bush, clean the inside of the housing.
4.4.2.
. Adaptor (F) is threaded onto the short threaded end of the bolt (C).(fig.4) Pass the bolt through the housing from the rear then
through the new bush and then position the Adaptor (E) over the bolt, fitting it against the bush.
4.4.3.
to facilitate correct positioning of the bush, the installation adaptor (f) has a recess that aligns with the face of the new bush
the bush should then be aligned in the housing. thread the nut (d) onto the bolt and wind it up to the
adaptor. double check to make sure that everything is aligned and that the bush is sitting squarely against the housing.
4.4.4.
using a 24mm spanner, turn the nut clockwise. the bush
will start to be pushed into the housing.
4.4.5.
note!
if any undue resistance is felt, remove the
assembly and check that everything is correctly aligned.
4.4.6.
continue to turn the nut to install the bush, when the bush
reaches the housing, resistance will be felt and the bush
is fully installed. (fig.5)
4.4.7.
disassemble the tool, clean and lubricate before returning
the parts to the storage case.
Re-fit rubber washer and wish-bone as per
the vehicle
manufacturer’s service instructions or a proprietary manual.
fig.3
fig.5
fig.2
fig.4


