ATLANTIC 3000
3000mm Diameter Ocean Buoy
Latest products and information available at
www.sealite.com
15
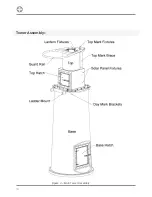
Tower Assembly:-
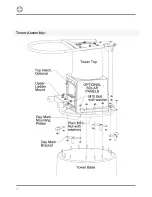
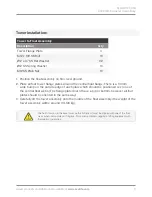
1. Place the main tower in an upright position on firm level ground.
2. Lift the tower top assembly onto the top of the main tower with the guard rail located
at right angles to the hatch on the main tower (weight of the tower top is around 50-60
kg). The M10 bolt tails protruding through the top of the main tower should pass through
mating holes in the tower top. If necessary, tap the bolt tails into alignment using a block
of wood and hammer.
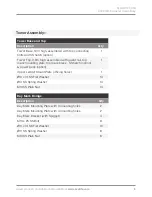
3. If day marks are to be installed, then fit the four day mark mounting plates over the
exposed M10 bolt tails.
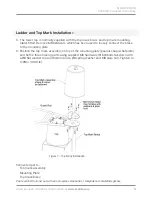
4. Fit the ladder upper mount plate (4 fixing holes) over the exposed M10 bolt tails under
the guard rail hoop (ladder mounting lugs should be pointing down).
5. Place an M10 flat washer and spring washer over each M10 bolt tail (14 places).
Coat each nut & exposed bolt tail with an anti-seize compound or molybdenum disulphide grease.
6. Fit an M10 nut over each of the exposed M10 bolt tails and tighten until firm.
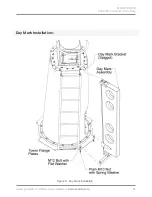
7. If day marks are to be installed then fit the day mark brackets. Take two M10 x 25 SS
Cap Screws and fit a Ø10 flat washer to each. Insert tail-down through two adjacent
holes in the day mark mounting plates and fit a day mark bracket on the under side of
the day mark mounting plate with the spiggot pointing down.
Coat each cap screw tail with an anti-seize compound or molybdenum disulphide grease.
8. Fit a Ø10 flat washer, Ø10 spring washer and plain M10 nut to each of the socket screws.
Tighten to 35 Nm (26 ft.lb).
9. Repeat for remaining day mark brackets.
Summary of Contents for ATLANTIC-3000
Page 2: ...2 Version No Description Date Author Approved 1 0 Manual Launch October 2018 G Percy G Percy ...
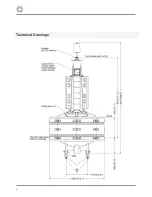
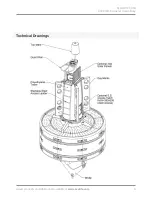
Page 8: ...8 Technical Drawings ...
Page 14: ...14 Tower Assembly ...
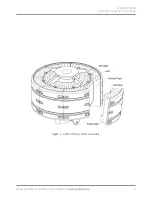
Page 16: ...16 Tower Assembly Figure 4 Main Tower Assembly ...
Page 20: ...20 Ladder and Top Mark Installation Figure 6 Ladder Installation ...
Page 32: ...32 Electronic Equipment Installation ...
Page 34: ...34 Notes ...


