22
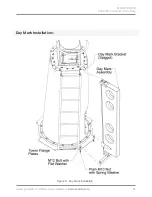
Day Mark Installation:-
Day Marks
Description
Qty
Day Mark Assembly
4
M12 x 40 SS Bolt
8
Ø12 x 37 SS Flat Washer
16
Ø12 SS Spring Washer
8
M12 SS Plain Nut
8
1. Fit a day mark to the buoy tower by placing the top end of the day mark frame tube
over the day mark mount spiggot. Align holes in the bottom beam of the day mark with
holes in the adjacent tower flange plate.
2. Fit a Ø12 flat washer to each of two M12 x 40 SS bolts and use to attach the bottom
beam of the day mark to the tower flange plate (install tail-down).
Coat each bolt tail and nut with an anti-seize compound or molybdenum disulphide grease.
3. Fit a Ø12 flat washer, Ø12 spring washer and plain M12 nut to each of the bolts and
tighten to 61 Nm (45 ft.lb).
4. Repeat for remaining day marks.
Summary of Contents for ATLANTIC-3000
Page 2: ...2 Version No Description Date Author Approved 1 0 Manual Launch October 2018 G Percy G Percy ...
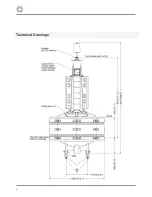
Page 8: ...8 Technical Drawings ...
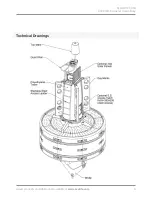
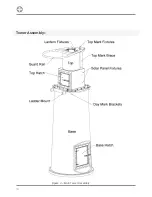
Page 14: ...14 Tower Assembly ...
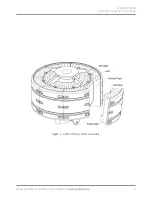
Page 16: ...16 Tower Assembly Figure 4 Main Tower Assembly ...
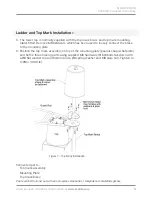
Page 20: ...20 Ladder and Top Mark Installation Figure 6 Ladder Installation ...
Page 32: ...32 Electronic Equipment Installation ...
Page 34: ...34 Notes ...

