background image

Version 1.0

TRIDENT-3000-HEX 

3000mm dia. Ocean Buoy 

with hexagonal aluminium tower

Installation & Service Manual

Summary of Contents for TRIDENT-3000-HEX

Page 1: ...Version 1 0 TRIDENT 3000 HEX 3000mm dia Ocean Buoy with hexagonal aluminium tower Installation Service Manual ...

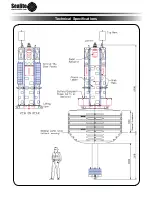
Page 2: ...Technical Specifications ...
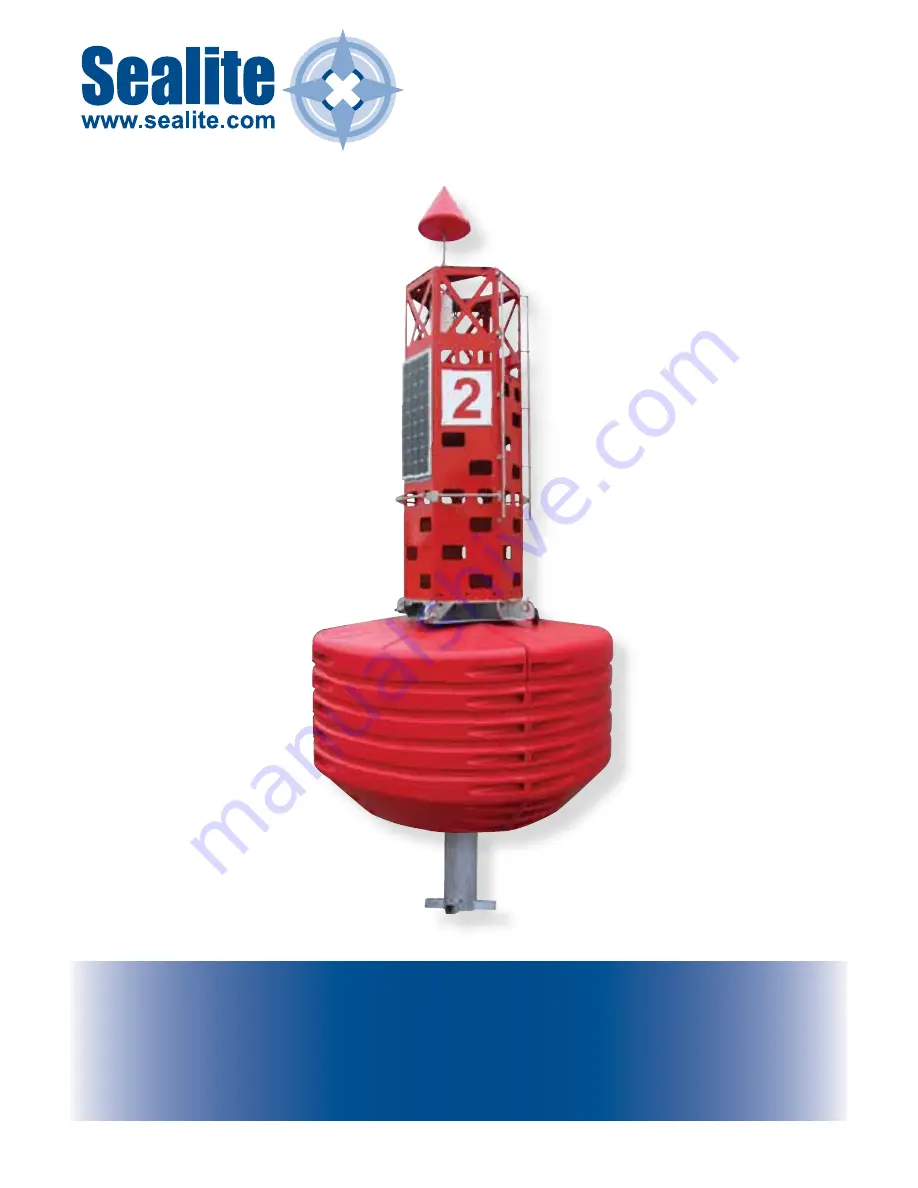
Page 3: ... Buoy Division Page 4 Why Choose Polyethylene Buoys Page 4 Mooring Requirements Regulations Page 4 TRIDENT 3000 HEX Ocean Buoy Page 5 Assembly Instructions Page 6 Mooring Diagram Page 21 Standard Wiring Diagram Page 22 GSM Wiring Diagram Page 23 Marine Buoy Maintenance Page 24 Sealite Buoy Warranty Page 26 Version No Description Date Approved 1 0 Manual Launch Dec 2014 G Percy ...

Page 4: ...low maintenance high visibility solution to marine navigation The Sealite buoy division provides turn key production of navigation buoys From tooling development raw materials selection and production to final testing and inspection Sealite guarantees superior quality and fast turn around times Sealite s buoy products are available in a wide range of configurations and sizes and can be economicall...

Page 5: ...st 3 meter wide float section standing 1 8m tall Each quadrant is moulded from UV stabilised virgin polyethylene and has an 18mm wall thickness The hexagonal tower design provides a large robust superstructure and is built from marine grade aluminium subject to powder coating in high visibility colours The tower is capable of supporting additional payload Number of Lifting Points 4 SWL for 2 or mo...

Page 6: ... Turn the 4 x Float Sections upside down to match the mooring post Position the 4 x Float Sections around the Mooring Post and start securing 2 x float sections together using M16 x 80 Bolts washers and nuts Coat each bolt in Anti Seize or molybdenum disulphide Grease before fitting Nuts Float Section and Mooring Post Description Qty Float Sections 4 Mooring Post 1 M16 x 80mm Long S S Bolt 32 24 Ø...

Page 7: ...t end of the moon pool mount this prevents the mooring post from spinning in the float during service Place a flat washer on the bolt before sliding it through the hole in the Float Section then fit a second flat washer and a Spring washer on to the bolt before securing with a nut Hand tighten 2 4 bolts M16 x 80 per side until all four Float sections are secured around the mooring post When a moon...

Page 8: ...Float Section and join the loose side using a Tie Rod and 2 x nuts Repeat for the second Float Strap When the Float Straps are fitted in position tighten the nuts on the Tie Rods and add a Spring Washer and second nut to each side Tighten all nuts securely STEP 5 Use a crane to turn the Float and Mooring Post upright Please Note The buoy weighs around 3 tonnes when fully assembled Please be carefu...

Page 9: ...ew 2 x flat washers a spring washer and plain nut 4 places 3 x Number Plates and backing plates with M6 Socket Head Cap Screw 2 x flat washers and self locking nut 12 places Hexagonal Tower Description Qty Hexagonal Tower with vertical grab rails lantern spacer insulating spacers on base optional passive radar reflector 1 Horizontal Grab Rail 5 M8 x 40mm Long S S Cap Screw 12 Ø8 S S Flat Washer 12...

Page 10: ... Long S S Cap Screw 12 Ø8 S S Flat Washer 24 Ø8 S S Spring Washer 12 M8 S S Plain Nut 12 Optional Tower Mounted Electronic Equipment Assembly Parts required for assembly STEP 8 Install all tower mounted electronic equipment as optioned Navigation Lantern with M8 Socket Head Cap Screw 2 x flat washers a spring washer and plain nut 4 places All antennae using individually kitted fasteners All sensor...

Page 11: ...Tower to Mooring Post STEP 9 The hexagonal tower is to be located on the mooring post deck with the ladder centred across one of the deck lifting eyes Position the float assembly so that the required location for the ladder lifting eye is pointing up Look for a pre determined location for the tower ladder which is sometimes indicated on the mooring post ...

Page 12: ... second sling with optional spreader length to suit Hexagonal Tower to Mooring Post Description Qty M16 x 120mm Long S S Bolt Shanked 6 Ø16 x 30mm OD S S Flat Washer 6 Ø16 S S Spring Washer 6 M16 S S Plain Nut 6 Length may vary depending on configuration Pre fitted to Hexagonal Tower Base Description Qty Insulating Spacer 6 M5 x 25mm Long S S Counter Sunk Socket Head Screw 18 M5 S S Self Locking N...

Page 13: ...00mm dia Ocean Buoy Raise the hexagonal tower into position and fix to the mooring post using M16 bolt plain washer spring washer and plain nut 6 places Tighten to 152Nm 112 ft lb Coat each bolt and nut with an anti seize compound before fitting Check that all M16 bolts nuts and washers have been secured correctly ...

Page 14: ...side of the mooring post deck with M12 Bolt spring washer and plain nut 4 places ea tighten to 61 2Nm 45 ft lb Coat each bolt and nut with an anti seize compound before fitting Battery Equipment Box Assembly Battery Equipment Boxes Description Qty External Battery Box with Lid and Mounting Rack Per Order M12 x 50mm Long S S Bolt 4 per Battery Box Ø12 S S Spring Washer 4 per Battery Box M12 S S Pla...

Page 15: ...r and self locking nut 2 places Run sensor cable through cage and along the cage link Tie the cable in place using UV stabilized cable ties Insert the cage and link into the top of the moon pool tube and secure the cap in place using M10 bolt spring washer and self locking nut 2 places Run sensor cable through the mount pipe under the deck beam and past the deck beam to the data logger Tie in plac...

Page 16: ...Latest products and information available at www sealite com 16 TRIDENT 3000 HEX with hexagonal aluminium tower 3000mm dia Ocean Buoy ...

Page 17: ...d wiring Tie all cables in place using UV stabilized cable ties STEP 14 Install and secure batteries in place using supplied battery clamps STEP 15 Connect all negative and positive leads to the battery terminals Cover the terminals with a protective grease after connection and testing is finalised STEP 16 Test the lantern by covering it with a dark cloth or jacket and wait 1 minute for activation...

Page 18: ...the joint perpendicular to the first pair ie criss cross the joints Secure the plates to the mooring post using 4 x 20mm Ballast Rods Nuts Flat and Spring Washers Weld the nuts to the Ballast Rod when the assembly is complete Coat each bolt and nut with an anti seize compound before fitting Mooring Post Ballast Assembly Mooring Post Ballast Collars Description Qty Mooring Post Ballast Collar Half ...

Page 19: ...scription Qty Anode 150x150x25 NW11B1 4 M20 x 70mm Long S S Bolt 4 S S Flat Washer 4 Ø20 S S Spring Washer 4 M20 S S Plain Nut 4 STEP 18 Parts required Fit sacrificial anodes to the base of the mooring post using M20 bolt tail up penny washer spring washer and plain nut 4 places Coat each bolt and nut with an anti seize compound before fitting ...

Page 20: ...ring Washer 1 Ø5 16 x 3 Long S S Roll Pin 1 STEP 19 Parts required Fit and secure the Mooring Pin in the base of the Mooring Post Position and Secure the Mooring Pin to the base of the Mooring Post using the M10 Bolt and Spring Washer Tighten the M48 Nut on to the Mooring Pin and secure it by drilling and fitting a 5 16 Roll Pin Please do not leave the Buoy lying on the Float Sections which may de...

Page 21: ...Latest products and information available at www sealite com 21 TRIDENT 3000 HEX with hexagonal aluminium tower 3000mm dia Ocean Buoy Trident 3000 Mooring Diagram ...

Page 22: ...Latest products and information available at www sealite com 22 TRIDENT 3000 HEX with hexagonal aluminium tower 3000mm dia Ocean Buoy Standard Wiring Diagram ...

Page 23: ...Latest products and information available at www sealite com 23 TRIDENT 3000 HEX with hexagonal aluminium tower 3000mm dia Ocean Buoy GSM Wiring Diagram ...

Page 24: ...nual Maintenance Check and clear the tail and ride chains from shells and algae Check for wear on any swivel and shackle axis and check the tapered pins on the mooring pin Any worn swivels and shackles must be replaced Check the free movement of each swivel around its head If any swivel head sticks it must be replaced Check every link of the thrash length of the chain Check the diameter of the nip...

Page 25: ...Latest products and information available at www sealite com 25 TRIDENT 3000 HEX with hexagonal aluminium tower 3000mm dia Ocean Buoy Notes ...

Page 26: ...0 HEX with hexagonal aluminium tower 3000mm dia Ocean Buoy Head Office Sealite Pty Ltd 11 Industrial Drive Somerville Vic 3912 Australia Tel 61 3 5977 6128 Fax 61 3 5977 6124 Email info sealite com Internet www sealite com Refer to website www sealite com Sealite Buoy Warranty ...

Reviews: