GB
NL
Belangrijk!
• Lees deze instructie goed voordat u met de installatie
begint.
• Verwijder voor installatie al het verpakkingsmateriaal en
controleer of u het juiste product gaat installeren (type
douchebak, kleur en maatvoering).
• Controleer de douchebak tevens nauwkeurig op eventue-
le schaden of onvolkomenheden. De douchebakken kunnen
zowel in als op de vloer worden bevestigd. Zorg in beide
gevallen ervoor dat de douchebak volledig waterpas staat,
het totale bodemoppervlak en alle randen van de douche-
bak ondersteunt zijn.
DE
Wichtig!
• Lesen Sie diese Anleitung gründlich, bevor Sie mit der In-
stallation beginnen.
• Entfernen Sie vor der Installation das Verpackungsmaterial
und kontrollieren Sie, ob Sie das richtige Produkt installie-
ren (Duschwannentyp, Farbe und Abmessungen).
• Kontrollieren Sie die Duschwanne auch sorgfältig auf
eventuelle Schäden oder Unvollkommenheiten. Die Du-
schwannen können sowohl im Boden als auch auf dem Bo-
den befestigt werden. Sorgen Sie in beiden Fällen dafür, dass
die Duschwanne völlig waagrecht liegt sowie die gesamte
Bodenfläche und alle Ränder der Duschwanne unterstützt
sind.
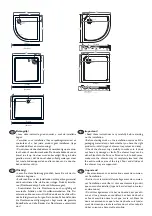
Important!
• Read these instructions very carefully before starting
on the installation.
• Before starting work on the installation, remove all the
packaging material and check whether you have the right
product to install (type of shower tray, colour and size).
• Check the shower tray carefully to make sure it does
not have any damage or faults. The shower trays can be
either fitted into the floor or fitted on to it. In both cases,
make sure the shower tray is completely level and that
the entire surface area of the tray’s floor and all sides of
the shower tray are supported.
FR
Important!
• Lire attentivement ces instructions avant de commen-
cer l’installation.
• Retirer tout le matériel d’emballage avant de commen-
cer l’installation et vérifier si c’est exactement le produit
que vous voulez installer (type de bac de douche, couleur
et dimensions).
• Contrôler également si le bac de douche n’est pas abî-
mé et s’il ne présente aucun défaut. Les bacs de douche
se fixent aussi bien dans le sol que sur le sol. Dans les
deux cas, assurez-vous que le bac de douche soit totale
-
ment de niveau, que toute la surface du sol et les rebords
du bac soient une base stable et solide.
130
90
(Front)
)
800
A-A
42
34
80
15
140
A
900
900
220
220
800
600
800
40
200
700
900
900
?
130
?
90
R550
130
90
(Front)
(Section
)
130
90
)
t
n
o
r
F
(
(Section
)
40
180
600
1200
900
800
(Front)
(Section
)
200
200
900
40
90
130
900
800
800
130
90
(Front)
)
800
A-A
42
34
80
15
140
A
900
900
220
220
Summary of Contents for Get Wet Fusion
Page 8: ...www sealskin com getwet ...


