4
MAJOR COMPONENTS AND
WHAT THEY DO
Impeller and Jet
Impeller turns with motor shaft, causing water to fly
out from its rim by centrifugal force. Impeller rotation
creates a vacuum which pulls in more water. Part of the
water is diverted back to the jet where it passes
through the nozzle and venturi. This creates more vac-
uum to draw in more water.
In shallow wells (less than 20 feet deep), the vacuum
created at the pump is enough to pull water to the
pump. Therefore, for shallow well use the jet is built
into the pump.
Pre-Charged Tank
The tank serves two functions. It provides a reservoir
of water under pressure and maintains a cushion of air
pressure to prevent pipe hammering and possible dam-
age to plumbing components. When water is drawn off
through the house fixtures, the pressure in the tank is
lowered and the pump starts.
Pressure Switch
The pressure switch provides for automatic operation.
Pump starts when pressure drops to 30 pounds and
stops when pressure reaches 50 pounds.
Check Valve or Foot Valve
This pump is equipped with a built-in check valve.
Install a check valve
as close to well as possible
on
well point installations. A foot valve must be installed
in the well
on dug or cased wells. See Figures 2A and
2B. For long horizontal pipe runs, install check valve as
close to well as possible (all types of wells).
INSTALLATION
Piping in the Well
The Sears 1/2 HP Shallow Well Water System can be in-
stalled on a dug well, drilled well or with a driven
point. In a dug or cased well, a foot valve and strainer
should be installed for easy priming. It should be in-
stalled five to ten feet below the lowest level to which
the water will drop while the pump is operating
(pumping water level). To keep sediment from clog-
ging the strainer, be sure it is five to ten feet above the
bottom of the well. Before installing the foot valve,
make sure that it works freely.
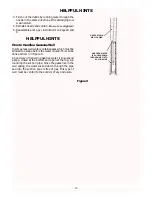
When using a foot valve, a priming tee and plug as
shown in Figure 1A, Page 3, are recommended.
When installed on a driven point well, your Shallow
Well Water System should have a check valve installed
as shown in Figure 2A, Page 3.
For a pump at sea level mounted directly over the well,
be sure the total lift from the pumping water level to
the pump does not exceed 20 feet. This will be less if
the pump is offset from the well.
The maximum lift of any pump decreases at the rate of
about 1’ less lift for every 1,000 feet of elevation above
sea level. For example, at Denver, Colorado (Elev.
5,000’) the pump loses five feet of lift. The maximum
depth from which it would pump water would there-
fore be 15 feet.
PUMP/TANK INSTALLATION
Pump
NOTICE:
Use Teflon tape supplied with the pump or
Plasto-Joint Stik
1
for making all pipe-thread connections
to the pump itself. To avoid stress-cracking, do not use
pipe joint compounds on the pump.
1
Lake Chemical Co., Chicago, Illinois
BASIC TOOLS AND MATERIALS NEEDED
Plastic Pipe Installation
Tools
Materials
Pipe Wrenches
Plastic Pipe and Fittings (as required to complete job).
Screwdriver
Knife or Saw to Cut Plastic Pipe
Teflon Tape (DO NOT use joint compound on plastic fittings).
Tire Pressure Gauge
Galvanized Steel Pipe Installation
Tools
Materials
Pipe Wrenches
Galvanized Pipe and Fittings (as required to complete job).
Screwdriver
Pipe Cutting and Threading Tools
Pipe Joint Compound or Teflon Tape
Tire Pressure Gauge


