background image

Summary of Contents for Kenmore 385.17628

Page 1: ...A COUDR Model Modelo ModUle 385 17628 CAUTION Before using sewing machine read this manual and follow all its Safety Rules and Operating Instructions Safety Instructions o Warranty Specifications Oper...

Page 2: ...service center for examination repair or electrical or mechanical adjustment 4_ Never operate the sewing machine with any air opening blocked Keep ventilation openings of the sewing machine and foot...

Page 3: ...r ajuste mecAnico o el_ctrico 4_ Nunca opere la m_quina con cualquier salida de aire bloqueada Mantenga las aberturas de ventilaci6n de la m_quina de coser y el control de pedal tibres de acumulaci6n...

Page 4: ...r agr6e le plus proche pour une v_rification une reparation un r6gtage electrique ou m_canique 4 N utilisez jamais une machine dont les ouvertures de ventilation sont obstruees Maintenez les odfes d a...

Page 5: ...ODAS LAS PARTES Y AJUSTES MECANICOS Durante 90 dias desde la fecha de ta compra Sears ofrece libre de costo reempiazar cualquiera porte y proveer el _ servicio mec_nico necesario para ta apropiada ope...

Page 6: ...tadas Integradas Ojales Dimensiones de la mAquina Peso Especificaci6n M s de 730 s p m 4 mm MAxima 5 mm MAxima 28 Funci6n de ojal incorporado de I paso 16o6 422 mm de ancho x 8 72 mm de profundidad x...

Page 7: ...n for Zigzag Stitch 30 Correct Tension 30 Tension is too tight 30 Tension is too loose 30 Stitch Selector 32 Stitch Width Dial 34 Stitch Length Dial 34 Adjusting Stretch Stitch Balance _ 36 Reverse St...

Page 8: ...correcta 31 o El hilo est demasiado tenso 31 El hilo est demasiado flojo 31 Selector de puntada 33 Control de la anchura de puntada 35 Control de la Iongitud de puntada 35 Equilibrio de los patrones...

Page 9: ...on est trop 6levee 3l o Si la tension est trop faible 31 S61ecteur de point 33 R6giage de la largeur du point 35 R6gtage de la Iongueur du point 35 Pour corriger un motif d_form_ _ 37 Bouton de marche...

Page 10: ...ntrol Stitch width control _ Bobbin winder spindle _ Spool pin O Upper thread guide Thread take up lever Thread tension dial Face cover Thread cutter Needle plate _ Hook cover plate O Hook cover plate...

Page 11: ...puntada Interruptor de corriente Enchufe de la m quina Placa de identificaci6n Palanca de mando para los dientes del transporte Brazo libre Palanca de etevaci6n del prensatelas Tornillo del enmangue _...

Page 12: ...5004 000009803 647808009 820832005 741814003 802424004 822020503 822019509 _2t3502003 4 213501116 _ 213504005 i _ 2t3505006 _ 213506007 _t_213503015 200002008 _1 200003009 200005001 200013105 21487201...

Page 13: ...lIo 2 mm Pie de doble arrastre Pie para fruncidos Enhebrador de aguja _ Estos artfculos no se proveen con lamb quina pero pueden ser ordenados con las instrucciones arriba descritas Toutes ces pi_ces...

Page 14: ...power switch and unplug from the power supply When leaving the machine unattended When attaching or removing any parts When cleaning the machine Do not place anything on the foot control when not sew...

Page 15: ...gular la velocidad de la costur La velocidad se regula pulsando el pedal de control con la planta del pie amAs presiSn mAs velocidad t Branchez la machine au secteur _ Prise 61ectrique _ Interrupteur...

Page 16: ...es and lowers your presser foot You can raise it about 1 4 0 6 cm higher than the normat up position for easy removal of the presser foot or to help you place heavy fabric under the foot Thread Cutter...

Page 17: ...pied presseur _ Position haute normale _ Position haute maximum Le levier de relevage du pied presseur remonte et abaisse le pied presseur Vous pouvez le remonter d environ 1 4 _ 0 6 cm plus haut que...

Page 18: ...nsistent Never use a bent or blunt needle A damaged needle can cause permanent snags or runs in knits fine silks and silk like fabrics To Remove and Attach the Foot Holder _ Thumb screw 0 Foot holder...

Page 19: ...e et la surface dolt tre constant N utifisez jamais une aiguille tordue ou 6mouss_e Une aiguilte d_fectueuse peut _tre une cause continue d ennuis et de points saut6s de ills tir6s dans les jerseys et...

Page 20: ...clusively for straight stitching with center needle position For Straight stitch page 38 Topstitching page 40 Straight stretch page 66 Buttonhole Foot Foot B Use this foot for manual buttonholing it i...

Page 21: ...osici6n de la aguja en central Para Puntada recta p gina 39 Costura a la vista p gina 41 Extensi6n recta pAgina 67 o Pie para ojales Pie B Utilice este pie para hacer ojales a mano Est marcado para ay...

Page 22: ...d keep it from puckering especially when sewing on knit fabrics For Overcasting stitch page 54 Serging page 70 o Automatic Buttonhole Foot Foot R Use this foot for one step automatic buttonholing Simp...

Page 23: ...pour ourlet invisible Pied G Avec ce pied vous ferez des ourlets parfaits sans que te fil apparaisse Des petites nervures sous le pied emp6chent le tissu de glisser de cot6 et le guide bord donne des...

Page 24: ...ften caused by damaged needles Always purchase good quality thread It should be strong smooth and consistent in thickness WEIGHT Very Light Light FABRIC Chiffon Georgette Fine Lace Organdy Organdy Net...

Page 25: ...jas con frecuencia para comprobar que no est6n embotadas o despuntadas Las agujas daSadas suelen causar enganches y carreras irreparables en tejidos de punto sedas finas y de imitaci6n a seda Adquiera...

Page 26: ...ns les tricots les soles fines et les _toffes semblables b la sole sont d_finitifs et sont souvent provoqu_s par des aiguilles abimees Achetez toujours du fil de bonne qualit 11 dolt etre solide tisse...

Page 27: ...blankpage pAginablanca pageblanche 19...

Page 28: ...ead on the spool pin with the thread coming off the spool as shown Attach the large spool holder _ and press it firmly against the spool of thread The small spool holder _ is used with narrow or small...

Page 29: ...de bobine _ Petite rondelle de blocage de bobine Soulevez fe porte bobine O Placez y la bobine de ill avec le fil sortant de la bobine comme i lustr_ Enfi ez la grande rondelle de blocage de bobine _...

Page 30: ...nd cut thethread closeto the holein the bobbin _ Depressthe foot control again Whenthe bobbin isfullywound it stops automatical yo Returnthe bobbinwinderto its originalpositionbymoving the spindleto t...

Page 31: ...Is canette de I int6rieur vers I ext_rieur _ Placez la canette sur I axe de l enrouleur de canette _ Poussez la canette vers la droite _ En tenant I extr6mit6 tibre du fil la main appuyez sur la p6da...

Page 32: ...the thread into the notch _ on the front side of the bobbin holder Draw the thread to the left sliding it between the tension spring blades Continue to draw the thread lightly until the thread slips i...

Page 33: ...a gauche en le gtissant entre ta chapa muelle de tensiSn del portacaniltas entre les lames du ressort de tension ContintJe tirando del hilo tigeramente hacia atr s hasta Continuez tirer doucement sur...

Page 34: ...from right to left over the take up lever and down into the take up lever eye _ Slide the thread behind the needle bar thread guide on the left _ Thread the needle from front to back or use a needle t...

Page 35: ...e comme itlustr6 _ Tenez le fit de I aiguitle et passezqe sous le guide du ill 0 Alors que vous retenez le fil pros de la bobine tirez te fil vers le has et de la droite vers la gauche autour du dispo...

Page 36: ...n Results depend on stiffness and thickness of the fabric number of fabric layers type of stitch o Tension is too tight D Needle thread Top thread _ Bobbin thread Bottom thread To loosen Right side To...

Page 37: ...nd plus ie fil de Faiguilie sera tendu Le r _sultat d6pend de la duret6 et de 1 6paisseur de l 6toffe du nombre d 6paisseurs de tissu du type de point employ6 El hilo est_ demasiado tenso _ Hiio de la...

Page 38: ...the amount of needle thread visible on the wrong side of fabric without causing excessive puckering or causing bobbin thread to show on the right side of fabric Results vary with fabric thread and sew...

Page 39: ...eportez vous aux figures ci contre pour voir _ quoi ressemble un point ex_cut_ correctemento R_giez la tension du fit de dessus pour obtenir l aspect d_sir_ Tension correcte qDEndroit du tissu _ Enver...

Page 40: ...Window _ shows the desired stitch length for the selected stitch_ _ Window shows the desired stitch width for the selected stitch Stitch patterns are color coded to a recommended setting zone at the s...

Page 41: ...s decorativas geom6tricas Azul Ojal incorporado Qro Puntada elastica _ Selector de puntada _ aarca roja ZONAS Roja S_lecteur de point comment choisir des points Remontez l aiguille le plus haut possib...

Page 42: ...ning the stitch width control be sure to raise the needle above the fabric_ 0 Indicating mark _ J Stitch Length Control how to adjust the stitch length Turn the stitch length control until the desired...

Page 43: ...nt de tourner te r_glage de ta largeur du point assurez vous que vous avez retev6 I aiguille au dessus du tissu _ Marque de rep_re Control de la Iongitud de puntada cbmo ajustar la Iongitud de puntada...

Page 44: ...m with the feed balancing dial To adjust distorted patterns If patterns are drawn out correct by turning the dial in the direction of If patterns are compressed correct by turning the dial in the dire...

Page 45: ...e puntada hacia e signo Pour corriger un motif d_form_ Comment r6gler I quilibre d un motif extensible Si les motifs extensibles sont irr_guliers Iorsque vous piquez un tissu particulier corrigez les...

Page 46: ...w the threads to the back and cut them with the thread cutter The threads are cut in a proper length for the next seam I f I 1 t I I I D C1 CI_ _ WIDI H _J LENGTH or _ O Use the Seam Guide C Guide lin...

Page 47: ...lisez le pied point droit assurez vous que le r_glage de la largeur du point est 0 Autrement I aiguille heurtera le pied et se cassera certainement Commencer une couture Levez le pied presseur et plac...

Page 48: ...resser foot Evenly guide the fabric along the edge to produce an even row of topstitching 3 _ 1cm from the edge f 1 I t 1 I I 1 1 I _WIDTH _ LENGTH _ or Quilting _ Stitch width _ Stitch length _ Needl...

Page 49: ...ssez le pied presseur et gardez le bord du tissu pros du bord droit du pied Cousez ainsi pour faire une surpiq_re r_guli_re 3 8 lcm du bord Acolchado _ Control de la anchura 6 5 0 Control de la Iongit...

Page 50: ...ce right sides of fabric together and sew to the end of the zipper opening _ o Reverse stitch to lock the stitches increase stitch length to 4 and set top thread tension at 0 Sew the zipper opening wi...

Page 51: ...la cremallera _ contra el segundo doblez y sQjetetos Enganche el pie por la parte derecha del pasador Baje el pie contra la cremallera de forma que la aguja coincida encima del doblez que sobresale y...

Page 52: ...the fold is even _ Wrong side of fabri Close the zipper and spread the fabric flat with the right side facing up Move the zipper foot to the left pin Guide the edge of the foot along the zipper teeth...

Page 53: ...ela _ quede hacia arrib _ Endroit du tissu Fermez la fermeture et piacez le tissu plat c6t_ endroit _ vers le haut Cambie de posici6n el pie fijAndolo en la parte izquierda del pasador Cosa la tela de...

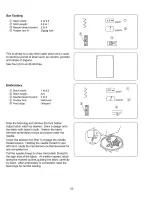
Page 54: ...nsion 2 to 6 O Pressure adjusting lever 0 _ Presser foot F Satin stitch foot _ Feed dogs Dropped Drop the feed dogs Place fabric with the hole in the center on an embroidery hoop as shown Lower the pr...

Page 55: ...as F _ Los dientes de transporte 0 Pie para puntada decorativa Bajados Reprisage i_ Largeur du point 6 5 _ Longueur du point Toute _ Tension du fil de I aiguille 2 6 _ Levier de r_glage de la pressio...

Page 56: ...trims appliques and cut work or as a decorative stitch II f _ WIDTH _ LENGTH _ Satin Stitch D Stitch width _ Stitch length _ Needle thread tension Presser foot F Pressure adjusting lever 2 to 6_5 0 5...

Page 57: ...itud _ Tension del hih de la aguja 0 Pie prensatelas F Palanca det ajuste de la presi6n 2 a 6 r5 0 5al 3a8 Pie para puntada decorativa lo2 Point lanc_ Largeur du point 2 6 5 _ Longueur du point 05 1 _...

Page 58: ...r s chaIk Form each pattern with the satin stitch adjusting stitch width _ WIDTH _ _ LENGTH _ Applique C Stitch width 2 to 6 5 _ Stitch length 0_5to t _ Needle thread tension 2 to 6 O Presser foot F S...

Page 59: ...vec une craie de taitleur Suivez chaque motif avec le point lanc en r_glant la largeur du point Apticaciones _ Control de la anchura _ Control de la longitud _ Tensi6n del hilo de la aguja _ Pie prens...

Page 60: ...d dog and remove the foot holder Adjust stitch width as desired Draw a design onto the fabric with tailor s chalk Stretch the fabric between embroidery hoops and place under the needle Lower the press...

Page 61: ...Dibuje e disefio sobre ta teia con una tiza de costurao Cotoque fa tela templada sobre un aro de bordar y col6que la debajo de la aguja Baje la planca de elevaci6n de prensatelas para que agarre el h...

Page 62: ...Bring the needle thread to the wrong side of the fabric and knot the threads After button sewing is completed raise the feed dogs for normal sewing Overcasting Stitch _ Stitch width Stitch length _ Ne...

Page 63: ...des trous du bouton et enroulez le autour de la tige du bouton_ Faites passer le fil de t aiguille sur t envers du tissu et nouez fes fils A la fin de la couture du bouton remontez les gfiffes d entra...

Page 64: ...abric when the needle comes over to the extreme left side Lower the presser foot _ When the needle comes to the left _ When the needle comes to the right Sew guiding the folded edge along the guide Fo...

Page 65: ...cher le bord brut devrait _tre surfit_ d abord Puis pliez l ourlet comme illustr C C6t_ envers du tissu _ 1 4 7 16_ 04 07 cm _DTissu fin _ Tissu pais La couture Placez le tissu sur la machine de fagon...

Page 66: ...close to stitching _ WtDTH _ LENGTH Multiple Zigzag Stitch _ Stitch width _ Stitch length _ Needle thread tension _ Presser foot A 5 to 6 5 0o5to 1 2to6 Zigzag foot Seam finishing This stitch is used...

Page 67: ...tud de la puntada 045 a 1 Tensi6n del hilo de ta aguja 2 a 6 Q Pie prensatelas A Pie para zig zag Point zig zag multiple _ Largeur du point 5 6 5 Q Longueur du point 05 1 _ Tension du fit de l aiguill...

Page 68: ...d tension slightly Allow the needle to just clear the folded edge of the fabric at the zigzag stitches If you sew rows of shell stitches space the rows at least 5 8 1 5 cm apart You can also sew shell...

Page 69: ...geros en cualquier direcci6n Utiiisez un tissu _ger comme du jersey PIiez le tissu et piquez sur te biais Vous aurez peut _tre besoin d augmenter 16g_remer_t la tension du fil de l aiguitleo Laissez I...

Page 70: ...away backing 1 8 0 3 cm apart Sew slowly guiding the fabric so the needle catches the folded edge on each side Two point Shell Stitch Q Stitch width _ Stitch length _ Needle thread tension _ Presser...

Page 71: ...a zig zag Papier de sole _ 1 8_ 0 3 cm Utilisez ce point pour relier avec cr tivit6 deux morceaux de tissu avec une couture ajour Repliez chaque bord du tissu sur I 2 1 3 cm et repassez les pinglez te...

Page 72: ...as a seam finish to prevent fraying f r _ WIDTH _ LENGTH O Decorative Stitch of Geometric Patterns _ Stitch width _ Stitch length _ Needle thread tension 0 Presser foot F 3 to 6 5 Green zone 3to8 Sati...

Page 73: ...s effiloche Puntadas decorativas de disefios geomdtricos _ Anchura de la puntada 3 a 65 O Longitud de la puntada Zona verde _ Tensi6n del hilo de la aguja 3 a 8 _ Pie prensatelas F Pie para raso punta...

Page 74: ...oth elasticity and strength are necessary to insure comfort and durability Use it to reinforce areas such as crotch and armhole seams as well as to eliminate puckering on knits and stretch fabrics Als...

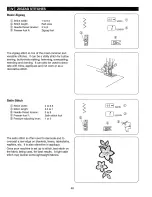
Page 75: ...s oL_la sotidit_ et I _iasticit6 sont n_cessaires au confort et la r_sistance dans le temps 0sela para reforzar Areas como braguetas puSos de camisa y tambi_n para evitar deshilachamientos en telas de...

Page 76: ...vents skipped stitching f 3 _ WIDTH _ LENGTH Smocking _ Stitch width _ Stitch length _ Needle thread tension _ Presser foot A _ Presser foot F 3 to 6 5 Gold stretch stitch position 2to6 Zigzag foot Sa...

Page 77: ...out bleu qui 6vite efficacement les points manqu_s _ Anchura de la puntada 3 a 35 _ Longitud de la puntada Posici6n oro de puntada el_stica _ Tensi6n det hilo de la aguja 2 a 6 _ Pie prensatelas A Pie...

Page 78: ...r the raw edge _ WIDTH _ _ U NGTH _ ou Elastic Stretch Stitch O Stitch width _ Stitch length _ Needle thread tension _ Presser foot A 3 to 6 5 Gold stretch stitch position 3to6 Zigzag foot _ WIDTH I_...

Page 79: ...II est aussi parfait pour ies maillots en spandex Placez le tissu sous le pied presseur C afin que les points soient form s par dessus le bord brut Point extensible pour la fixation des _iastiques _ L...

Page 80: ...e up and sew 3 8 1 cm from the edge Then trim close to stitching Note Be careful not to cut the stitches _ WIDTH 10 LENGTH _ Decorative Stretch Patterns _ Stitch width _ Stitch length _ Needle thread...

Page 81: ...es InstaElez le tissu I endroit vers le haut et piquez 3 8 1 cm du bord Puis recoupez auras des points l Remarque Faites attention de ne pas couper les points I Disefios decorativos el_sticos O Anchur...

Page 82: ...s the pin on the foot when lowering the presser foot a TO Sew D Button holder _ Buttonhole lever The buttonhole size is automatically set by placing the button in the rear of the automatic buttonhole...

Page 83: ...e trasera del pie prensatelas para ojales autom ticos En el alojamiento del bot6n se pueden colocar botones de hasta 1 2 5 cm de di metroo Antes de coser los ojales en la prenda que desee practique co...

Page 84: ...fthereis a gap _ the lengthof the rowswill be different as shownin Sewslowlyandstop the machineat the starting pointwhena buttonholeis completed Removethe fabricand placea pin just beforethe bartackat...

Page 85: ...e _ entre le curseur _ et fe support du ressort 2 S il y a un espace _ il se produira une difference dans la longueur des tangles comme indiqu6 sur la figure _ Appuyez sur ta p_dale de contr61e jusqu...

Page 86: ...Turn the dial in direction for a coarser density _ Turn the dia in direction _ for a tighter density _ If the sides of the buttonhole are not balanced do the following If the buttonhole looks like _ m...

Page 87: ...direction du pour des points moins denses _ Toumez la molette en direction du _ pour des points plus denses _ Haga to siguiente si los tados del ojal no quedan equilibrados Si el ojal se parece a el...

Page 88: ...he automaticbuttonholefoot Rto holdthemtight Lowerthe needleintothe garmentwherethe buttonholewill startand lowerthefoot _ Spur Depressthe foot controlgentlyand sewthe buttonhole Eachsideof the button...

Page 89: ...ed iaissant ainsi I avant du pied libre Bloquez le cordonnet de remplissage darts tes fourches l avant du pied boutonniere automatique R pour le maintenir tendu Abaissez r aiguille clans le tissu au p...

Page 90: ...r _ If the stitch is already on at H reset the machine in accordance with the instructions on page 76 Attach the buttonhole foot B Pull the buttonhole lever downward as far as it will go_ Lower the ne...

Page 91: ...llement comme suit Tournez le volant vers vous pour relever l aiguille au maximum Relevez le pied presseur _ R_glez le point sur _ Si le point sur H red_marrez au d_but selon tes instructions de la pa...

Page 92: ...uide block _ Two pins A _ Hook _ Lever Gear Base plate Buttonhole foot Buttonhole Style and Size _ Round end buttonhole Template Size 213 504 005 3 8 1 2 5 8 3 16 213 505 006 t5 16 1 1 16 1 1 4 1 1 2...

Page 93: ...Crochet _ Levier 1 Pignon _ Plaque de base Pied boutonniere Estilo y tamaSo del ojal _ Ojal de punta redonda Ptantilla TamaSo 2I 3 504 005 3 8 1 2 5 8 13 16 213 505 006 15 16 1 1 13 1 1 4 1 1 Z _ Oja...

Page 94: ...holes _ Rectangular hole _ Two pins fitting with the two round holes _ Lever _ Hook fitting with the rectangular hole Base plate Remove the extension table accessory box Raise the needle to its highe...

Page 95: ..._ para alinear el garlic con el agujero rectan gular lnserte la placa base _ haciendo coincidir los dos pasadores _ en la parte trasera de la placa base e introduci6ndotos en los dos agujeros redondos...

Page 96: ...Q into the guide slot of template _ and fit the guide block _ into the center of the guide slot Needle thread _ Bobbin thread _ Buttonhole foot _ Gear _ Slot _ Starting point Attach the buttonhole foo...

Page 97: ...base 0 et faites passer le doigt de guidage _ au centre de la fente de guidage T_ _ Hilo de la aguja _ Hilo de la cani la Pie para ojales _ Dentada _ Ranura _ Punto de partida Acople et pie para ojat...

Page 98: ...u want buttonholes to be sewn at I Z 1 12cm from the fabric edge line up the fabric with the 1 2 markings each time you start to sew a buttonhole Interfacing is recommended when making buttonholes If...

Page 99: ...emplacement de la boutonniere sur le tissu En passant le tissu par derriere la machine glissez le entre la plaque guide et le pied boutonniere comme sur I iltustration Alignez le trac_ _D avec le rep...

Page 100: ...sert an additional spool pin in the hole for the additional spool pin Place a piece of felt and a spool on the additional spool pin Prepare the needle thread for the additional spool pin For threading...

Page 101: ...cando uno en cada gufa de hilo a los lados de la barra de aguja _ Cambie la aguja por una doble aguja _ _ Hile cada una de las agujas de atr s a adelante NOTA Para cambiar la direcci6n de cosido gire...

Page 102: ...nd turn it counterclockwise to remove Put in a new bulb by pushing it up and turning it clockwise Cleaning the Bobbin Holder To insure that the machine operates at its best you need to keep the essent...

Page 103: ...oussez I ampoule vers te haut et tournez la en sens antihoraire pour la retirer_ Installez une nouvelle ampoule en la poussant vers le haut et en tournant dans le sens horaire Limpiando el portacanill...

Page 104: ...race _ with a lint brush Wipe out gently with a soft dry cloth _ Feed dogs _ Hook race J J Line up the triangle marks and position the bob bin holder so that the notch fits next to the stopper in the...

Page 105: ...osse Essuyez doucement avec un chiffon doux et sec _ Griffes d entra_nement _ Piste du crochet Atinee las marcas triangutares _ y coloque el portacanillas de forma que el saliente ajuste junto at tope...

Page 106: ...ot suitable for the work being sewn 4 A blue needle is not being used for sewing stretch very fine fabrics and synthetic 5_ The needle thread is not threaded properly 6 The presser foot pressure is no...

Page 107: ...st_ cosiendo 4 No se est_ utilizando una aguja de tai6n azut para coser tejidos e _sticos tejidos finos y telas sint_ticas 5 El hito de ta aguja no est enhebrado correctamente 6 La presi6n del prensat...

Page 108: ...pas une aiguilte bout bleu pour une couture extensible un tissu tr_s fin ou synth_tique 5 Le fil de l aiguille n est pas pass6 correctemenL 6 La presslon sur le pied eat insuffisante 7 Vous utilisez...

Page 109: ...n a domicilio 1 800 676 5811 For the location of a Sears Parts and Repair Center in your area Call 24 hours a day 7 days a week 1 800 488 1 For information on purchasing a Sears Maintenance Agreement...

Reviews: