The
Correlator
46
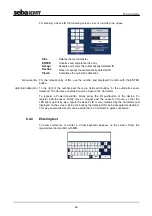
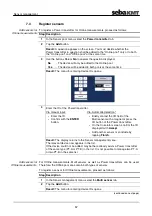
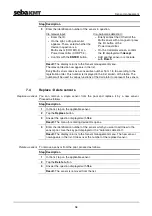
For entering a device ID the following screen view, or a similar one, opens:
DEL
... Deletes the last character
ENTER
... Confirms and completes the entry
Accept
... Accepts and enters the automatically detected ID
Decline
... Does not accept the automatically detected ID
Finish
... Completes the automatic detection
For the manual entry of IDs, use the number pad displayed. Confirm with the ENTER
button.
To the right of the number pad, there are fields and buttons for the automatic sensor
detection. The devices concerned must be close to the Correlator.
To register a Power transmitter, briefly press the I/O pushbutton of the device. To
register a Multi sensor, briefly move a magnet past the sensor's I/O area, so that the
LED lights up briefly. As a result, the device's ID is sent, detected by the Correlator and
displayed on the screen. Using the buttons the detected ID can be accepted or declined.
This way several device IDs can be added to the Correlator in quick succession.
6.4.3 Entering
text
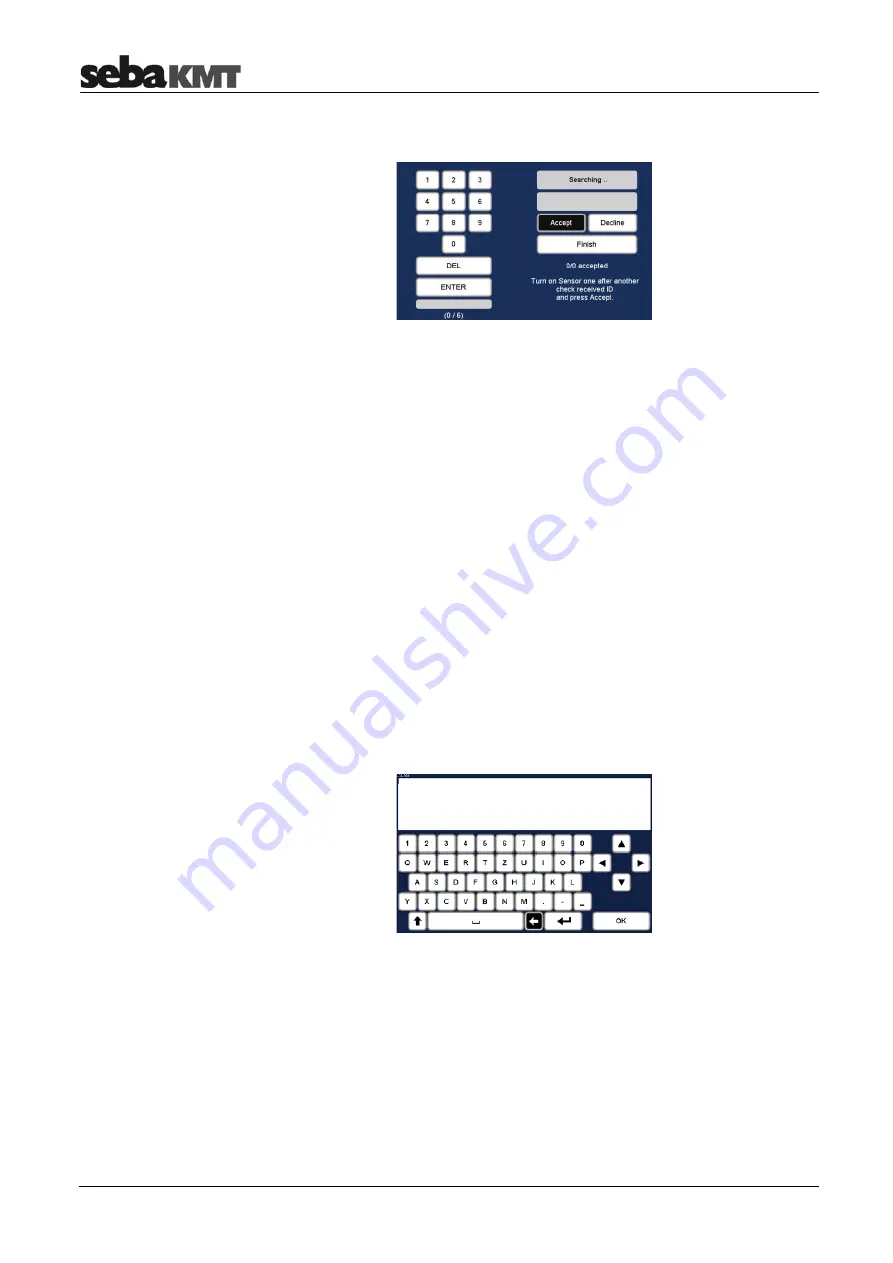
To enter comments or similar, a virtual keyboard appears on the screen. Enter the
required text and confirm with
OK
.
Manual entry
Automatic detection
Summary of Contents for Correlux C-3
Page 2: ...Consultation with SebaKMT 2 ...
Page 8: ...Terms of Warranty 8 ...
Page 14: ...Frequently used menus 14 ...
Page 18: ...Frequently used menus 18 ...
Page 20: ...Frequently used menus 20 ...
Page 22: ...Frequently used menus 22 ...
Page 24: ...Frequently used menus 24 ...
Page 26: ...Frequently used menus 26 ...
Page 40: ...The Multi sensors 40 ...
Page 60: ...Sensor management 60 ...
Page 68: ...Online correlation 68 ...
Page 76: ...Offline correlation Multipoint measurement 76 ...
Page 84: ...Real time measurement 84 ...
Page 92: ...Sound velocity measurement 92 ...
Page 100: ...Storage Management of correlations History 100 ...
Page 102: ...Reset of correlation settings and data 102 ...
Page 110: ...Pinpointing 110 ...
Page 120: ...Firmware update 120 ...


