Programming the logger using the SebaDataView-3 software
61
The
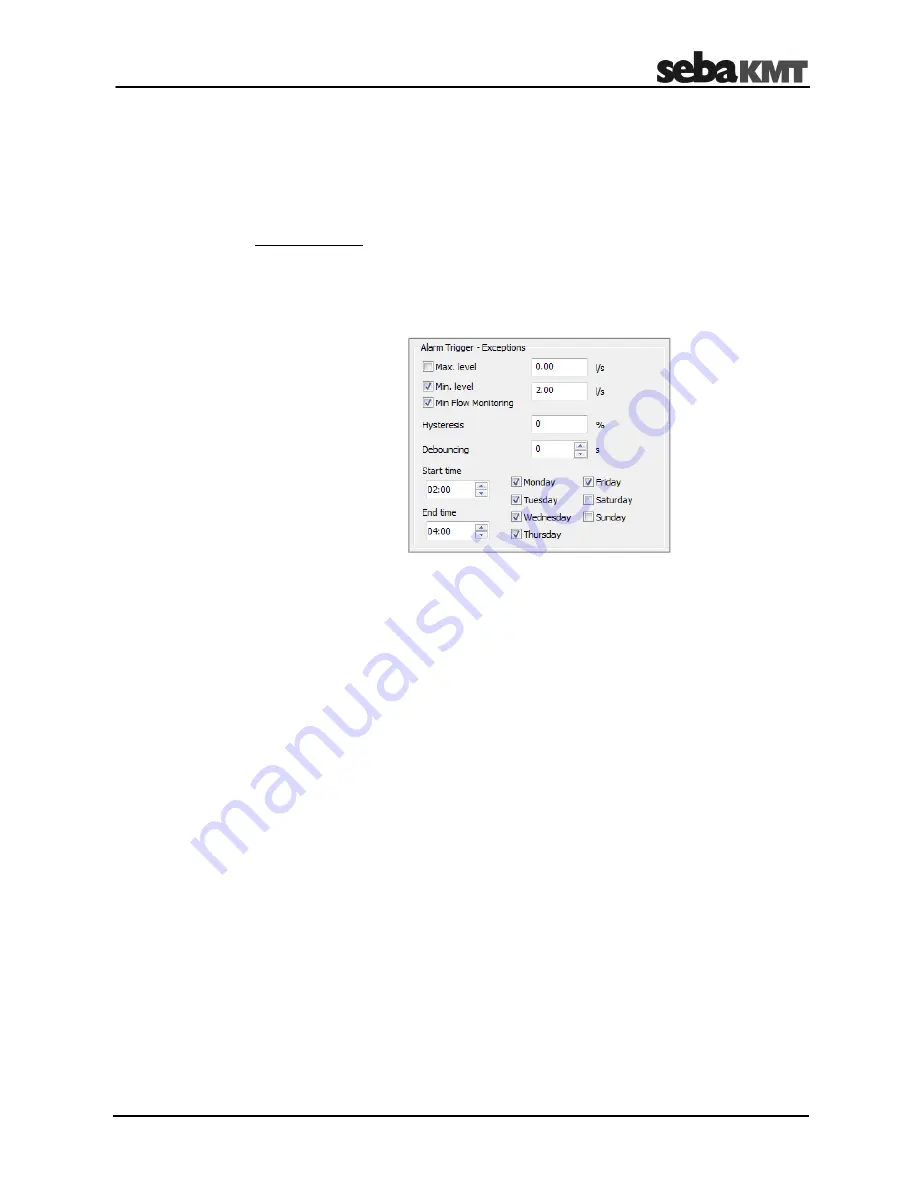
Min. Flow Monitoring
checkbox in the
Alarm trigger - Exceptions
segment is
only relevant in the context of flow measurements.
When the connected sensor is not a flow sensor, please disable this checkbox,
i.e. make sure it is unchecked.
When this checkbox is activated, the alarm case occurs when the specified minimum
flow IS NOT reached within the specified period.
More specifically: The alarm is triggered immediately after the end of the measurement if
the value never dropped below the "min. level" between "start time" and "end time".
Example:
In your experience, the flow rate at the measuring point drops between
2 am and 4 am under the value of 2.0 l/s. An alarm should be triggered if the flow
rate does not fall below 2.0 l/s during the entire period.
Procedure:
•
tick the
Min. Flow Monitoring
checkbox
•
type the value 2.0 in the
Min. level
field
•
specify 2:00 as
Start time
of monitoring
•
specify 4:00 as
End time
of monitoring
•
tick the weekdays on which this monitoring alarm should apply
(here: Monday to Friday)
Result: If the flow value drops below 2.0 l/s one or more times between 2 and 4 am,
no alarm is triggered.
If the flow value never drops below 2.0 l/s between 2 and 4 am, an alarm is
triggered.
8.4.3
Finishing the sensor configuration
Confirm and save the configuration of a channel by clicking the
OK
button.
Perform the configuration for the remaining channels.
8.5
Configuring the alarm inputs
Depending on its configuration a logger can be equipped with up to two switching inputs
(alarm inputs) which can be connected to active circuits. For each of these inputs it can
be specified which input voltage value causes an alarm.
As known from the channel configuration, an alarm can trigger up to two internal relays.
If your logger is equipped with a GSM modem, alarm messages can be sent via SMS
and / or e-mail. Furthermore, an unscheduled measuring data upload to your FTP server
can be performed in case of alarm. For that, GSM connectivity must be established and
properly configured.
Minimum flow
monitoring
Introduction
Summary of Contents for Sebalog D-3
Page 2: ...Consultation with SebaKMT 2...
Page 8: ...Terms of Warranty 8...
Page 26: ...Commissioning the logger 26...
Page 34: ...Connecting the logger and installing it on site 34...
Page 70: ...Programming the logger using the SebaDataView 3 software 70...
Page 78: ...Retrieving and evaluating data 78...
Page 88: ...Changing the battery 88...


