34
Most basic functions of the ENTRACOMP
®
28SA-PLUS may be programmed
by placing the Program cards on the TOUCH CARD
®
reader plate in a proper
sequence.
However, some things (such as configuring the inputs, configuring the Time
Zones, Holidays, Limited Use, anti-passback or setting the password) may
only be programmed using a personal computer or terminal.
The facility code of your Program Cards is normally the same as the facility
code of your Access Cards. Your unique facility code is what prevents Program
Cards from other systems from being used to reprogram your system.
It is helpful to think of placing a Program Cards on the TOUCH CARD
®
reader
plate as depressing a key on a keyboard or keypad. You may begin programming
at any time by placing the first Program Card of the sequence on the TOUCH
CARD
®
reader plate. At this point the LED indicator will show an amber color.
When you remove the Program Card from the TOUCH CARD
®
reader plate the
LED indicator will flash the amber color awaiting the next Program Card. As
you place subsequent Program Cards on the TOUCH CARD
®
reader plate, the
amber LED to will stop flashing and become solid until the card is removed.
In this manner, the remainder of the Program Cards for the programming
sequence are placed on the TOUCH CARD
®
reader plate. At the end of the
programming sequence the LED indicator will flash green to indicate that the
programming instruction has been accepted.
When programming, it is necessary to place the next card of the programming
sequence on the TOUCH CARD
®
reader plate while the LED indicator is
flashing amber (you have approximately 10 seconds between each card). If
the amber LED times out (stops blinking) it will be necessary to restart the
programming sequence. Should an error be made in the programming sequence,
the LED indicator will flash red, instead of green.
Summary of Contents for ENTRACOMP 28SA Plus
Page 2: ...COPYRIGHT 2002 SOUNDCRAFTINC PRINTED IN U S A...
Page 11: ...7 FIGURE 2...
Page 18: ...14 FIGURE 5 FIGURE 6 FIGURE 7 FIGURE 8...
Page 19: ...15 FIGURE 9 FIGURE 10...
Page 23: ...19 FIGURE 11 FIGURE 12...
Page 24: ...FIGURE 13 FIGURE 14 20...
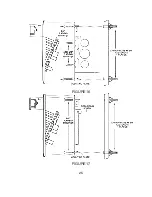
Page 29: ...25 FIGURE 16 FIGURE 17...
Page 33: ...29 FIGURE 18 FIGURE 19...
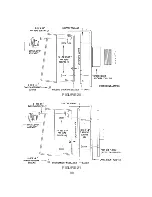
Page 34: ...30 FIGURE 20 FIGURE 21...


