11 Menu Authentication
Securepoint 10
Securepoint
Security Solutions
165
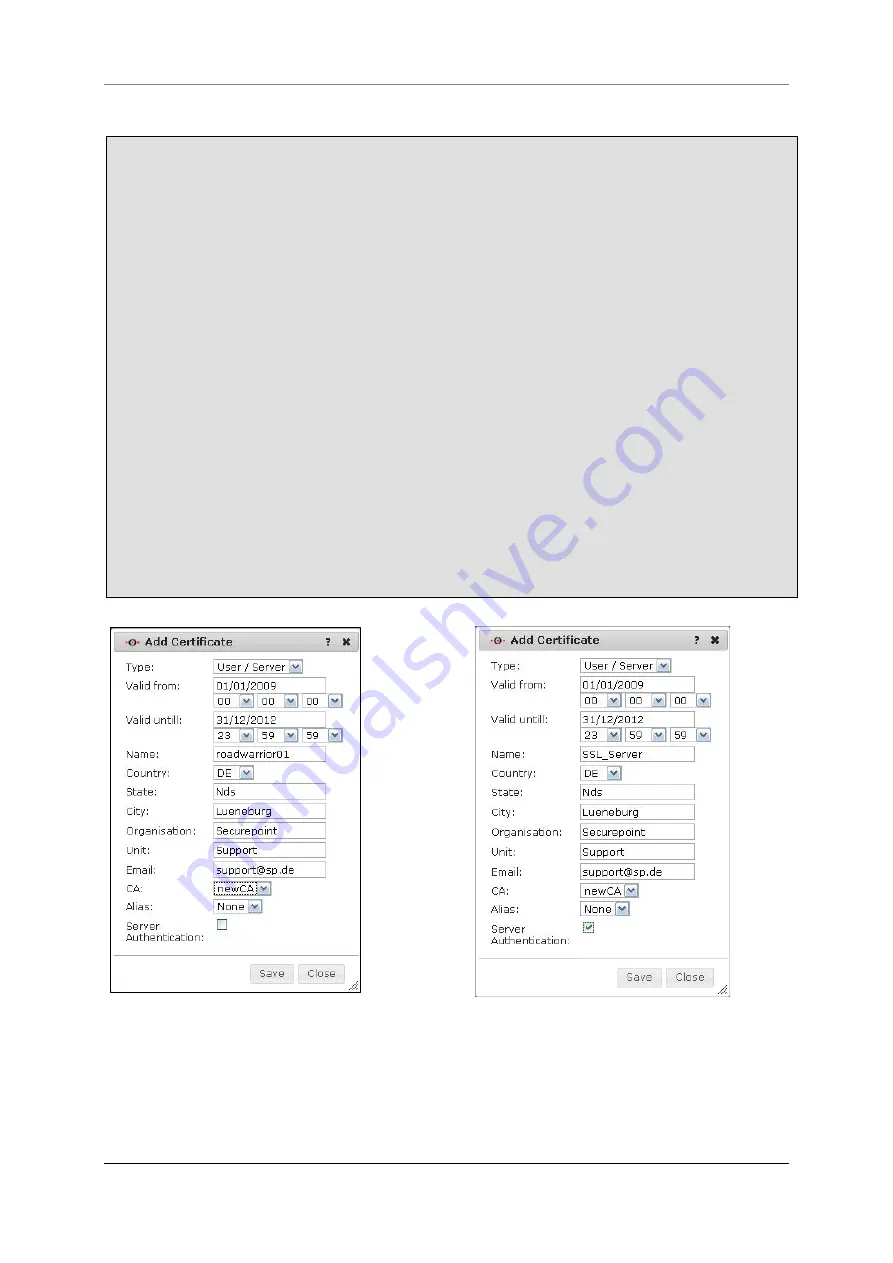
11.3.2 Create Certificates
Click in the tab
Cert
onto
Add
.
The dialog
Add Certificate
appears.
The fields
Valid from
and
Valid until
define the duration of validity of the certificate.
You can enter the date directly into the first field. Or click into the field and a calendar
appears where you can select the date. The following three fields are reserved for the
time (hour, minutes, and seconds).
Enter a name for the certificate into the field
Name
.
Select your country identifier from the field
Country
.
Enter your region into the field
State
.
Enter the name of your city into the field
City
.
Enter the name of your company into the field
Organisation
.
Enter the department into the field
Unit
.
Enter you e-mail address into the field
.
Select the
CA
to sign the certificate with.
Select an
Alias
optionally (You will need it under the operating system MacOS).
Activate the checkbox
Server Authentication
if you want to create a server certifi-
cate.
Click
Save
to create the certificate.
fig. 178 create client certificate
fig. 179 create server certificate


