108
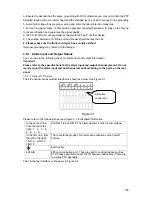
a. Ensure the decoder has the same grounding with DVR, otherwise you may not control the PTZ.
Shielded twisted wire is recommended and the shielded layer is used to connect to the grounding.
b. Avoid high voltage. Ensure proper wiring and some thunder protection measures.
c. For too long signal wires, 120
Ω
should be parallel connected between A, B lines on the far end
to reduce reflection and guarantee the signal quality.
d. “485 A, B” of DVR cannot parallel connect with “485 port” of other device.
e. The voltage between of A,B lines of the decoder should be less than 5v.
4. Please make sure the front-end device has soundly earthed.
Improper grounding may result in chip damage.
3.8.1 Alarm Input and Output Details
You can refer to the following sheet
X
for alarm input and output information.
Important
Please refer to the specifications for the alarm input and output channel amount. Do not
merely count the alarm input and out channel amount according to the ports on the rear
panel.
3.8.1.1
General 1U Series
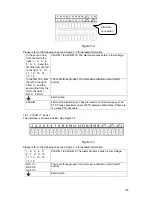
The 4/8-channel series product interface is shown as below. See Figure 3-1.
Figure 3-1
Please refer to the following sheet and Figure 3-1 for detailed information.
In the second line,
from the left to the
right,: 1
,
2
,
3
,
4
,
5
,
6
,
7
,
8.
ALARM 1 to ALARM 8. The alarm becomes active in low voltage.
In the first line, from
the left to the right:
1-NO C
,
2-NO C
,
3-NO C
There are three groups of normal open activation output (on/off
button)
Earth cable.
485 A/B
485 communication port. They are used to control devices such as
PTZ. Please parallel connect 120T
Ω
between A/B cables if there are
too many PTZ decoders.
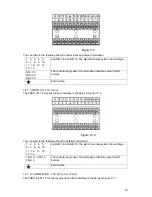
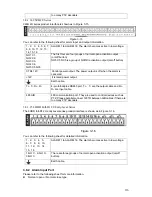
The 16-channel interface is shown as in Figure 3-2.
AB cable
connection
Summary of Contents for DVR-HD016240M
Page 97: ...86 Figure 2 30 2 3 4 HD SDI 1080P 1U Series The connection sample is shown as in Figure 2 31...
Page 99: ...88 Figure 2 32 2 3 6 General 1 5U series Please refer to Figure 2 33 for connection sample...
Page 130: ...119 HD SDI 1 5U Mini 2U Series Figure 3 18...
Page 152: ...141 Figure 4 27 Figure 4 28 Figure 4 29...
Page 157: ...146 Figure 4 34 Figure 4 35 Figure 4 36...
Page 165: ...154 Figure 4 52...
Page 169: ...158 Figure 5 3 Figure 5 4 Figure 5 5 Figure 5 6...
Page 177: ...166 Figure 5 16 Figure 5 17 Figure 5 18 5 3 5 3 NTP Setup...
Page 218: ...207 Figure 6 11...
Page 288: ...277 Maxtor DiamondMax 20 STM3250820AS 250G SATA...


