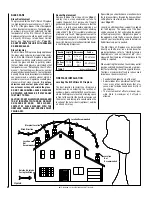
The duct system must be installed respecting
the following:
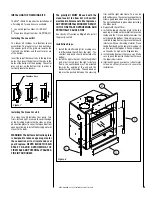
1. Remove the plates closing up the 8” dia.
holes on top of the fireplace. Then, cut
the insulation and remove the plate under
the insulation in order to obtain two 8” dia.
openings. Fix the adaptors on the fireplace
openings by turning clockwise (
Figure 20
).
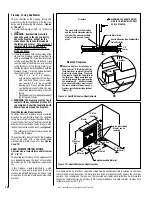
2. Maintain at least a 2” (50 mm) clearance
between the ducts and any combustible
material; the required hole size is 13” x 13”
(330 mm x 330 mm).
Exception #1: For the grills, the fram-
ing can be 10-3/4” x 10-3/4” (275 mm
x 275 mm) to provide the clearance as
required by the integral spacers on the
double outlet duct system.
3. The maximum number of elbows in a run
of duct is two.
4. Maintain at least 6-1/2” (160 mm) clearance
from the outlet grill framing to a combustible
ceiling, side wall or mantel.
5. When traversing a combustible wall or floor,
a firestop must be installed at the wall or
floor penetration. The hole size must be
13” X 13” (330 mm x 330 mm).
6. Do not connect the hot air ducts to a central
heating system. Malfunction of the heating
system’s blower will cause the fireplace to
overheat. A furnace duct is only single wall
and not double wall as is required for the
BIS
®
Ultima CF fireplace hot air exhaust.
7. Use only Security Chimneys International
Limited grills and components as described
in this manual. Other grills or registers, for
example, may be too restrictive and may
overheat the fireplace or ceiling.
8. Do not use insulated flexible ducts as they
will overheat.
9. Do not use tees or any other components
than the ones specifically listed here.
10. Never allow the ducting to pitch down as
hot air will be trapped creating a fire hazard.
Never route the ducting downwards
.
11. The hot air outlet grills must be installed with
the louvers pointing downwards in order to
prevent overheating adjacent ceilings.
12. Always install the two outlet grills when using
the double hot air outlet kit and blocking the
upper louver of the fireplace.
CENTRAL FORCED AIR KIT (NOT TESTED
UNDER EPA CERTIFICATION)
The knock-outs provided on the back and on
the sides of the BIS Ultima CF fireplace allow
the connection of insulated flexible pipe which
enables you to heat adjacent rooms up to 50
feet from the fireplace.
The ducting system must be installed as de-
scribed below:
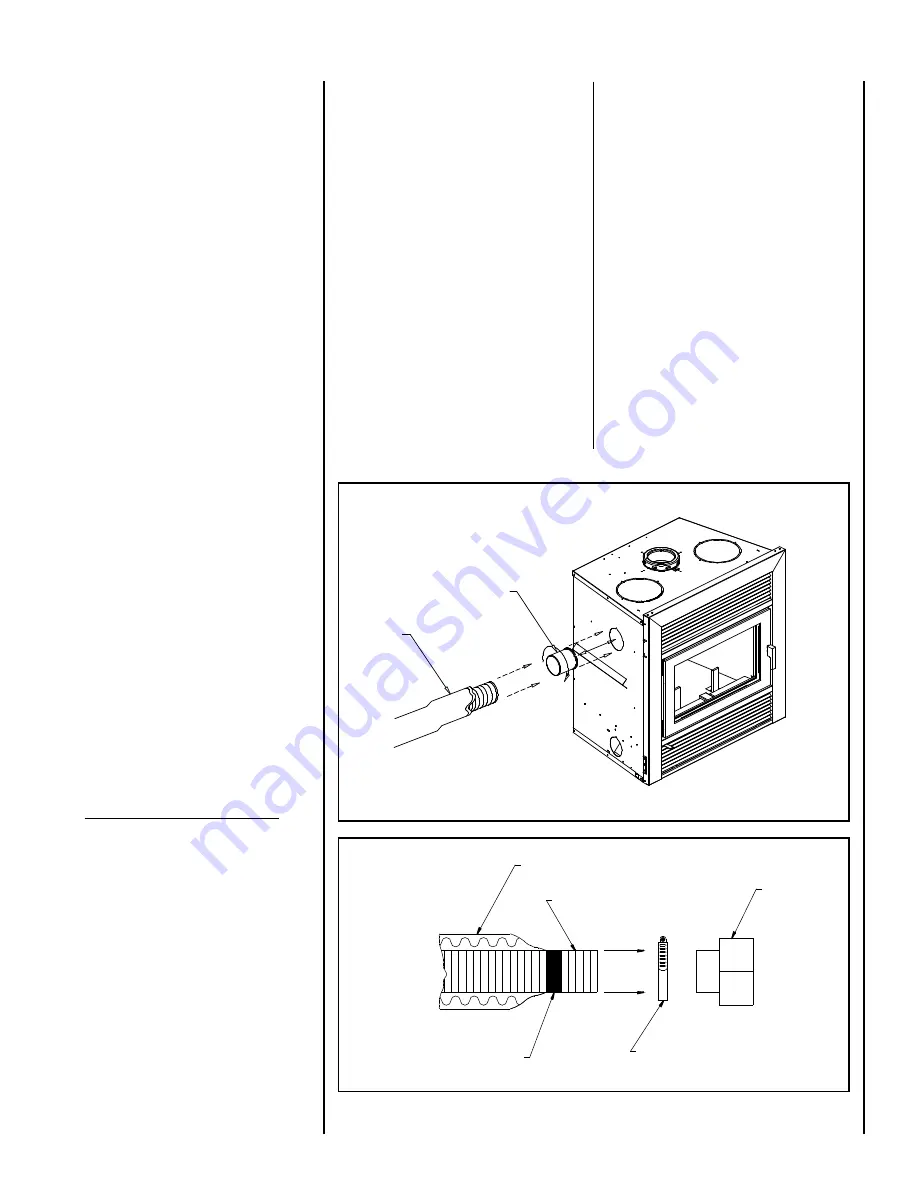
A) Remove the knock-out and cut the insulation.
In the back, there may be another knock-out
to remove under the insulation.
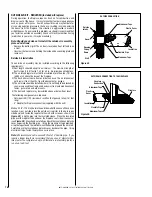
B) Fix the adaptor at the back and/or the side
of the fireplace by twist-locking the adaptor
to the fireplace. You can use more than one
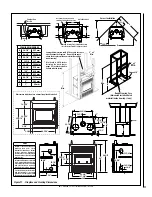
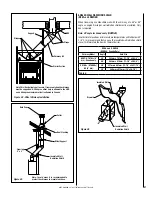
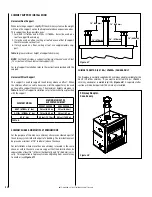
outlet on the fireplace (
Figure 23
).
C) Attach the 5” flexible pipe, using the collars
provided. Important: Make sure that the
plastic wrapping around the flexible pipe
will not be in contact with the fireplace using
aluminum tape.
D) Route the flexible pipe to the chosen location.
The ducting system can be installed either
in an upper room or in a lower room.
E) Attach the flexible pipe to the fan, using the
collars (
Figure 24
).
F) Fix the back draft damper to the fan outlet.
G) Attach a flexible pipe to the fan / flexible pipe
adaptor (square to round) and stretch it up
to the location where the heat is required.
H) At that point, the flexible pipe can be attached
to any air distribution grill.
I) Install the blower heating and cooling ther-
mostat (HCTW) in that part of the house to
be heated by the hot air duct. The thermostat
can be switched to a cooling thermostat and
installed in the same room as the unit. This
thermostat will turn on the blower when
the room where the fireplace is located
becomes too hot.
This option requires electricity. Make sure that
the connections to the fan have been made
according to the local codes and comply with
their requirements (see instruction provided
with the thermostat).
Figure 23
Figure 24
Adaptor
Insulation
Blower
Tightening Collar
Aluminium Tape
Flex 5” Diameter
Insulated
Flexible
pipe
NOTE: DIAGRAMS & ILLUSTRATIONS ARE NOT TO SCALE.
15


