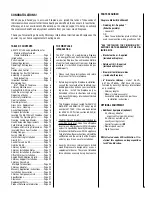
NOTE: DIAGRAMS & ILLUSTRATIONS ARE NOT TO SCALE.
9
INSTALLING THE FINISHING KITS
The BIS
®
Ultima CF requires the installation of
a finishing kit. Two options are available:
1. Louver kit (part number: LOUVRECF)
OR
2. Clean face kit (part number: CAPPINGCF)
Installing The Louver Kit
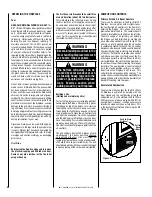
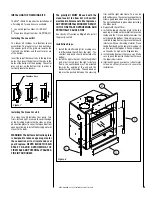
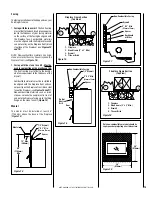
The louver kit includes two identical louver
assemblies. The louvers must be oriented so
the angular parts of the grills are towards the
front and the bottom and the cotter pins are
at the bottom.
Insert the top of the louver rods in the top trims
holes. Than insert the bottom of the rods in the
holes at the bottom of the opening. The cotter
pins will rest on the bottom trim in order to
vertically locate the louvers.
1
2
3
Fireplace Face
Figure 7
Figure 8
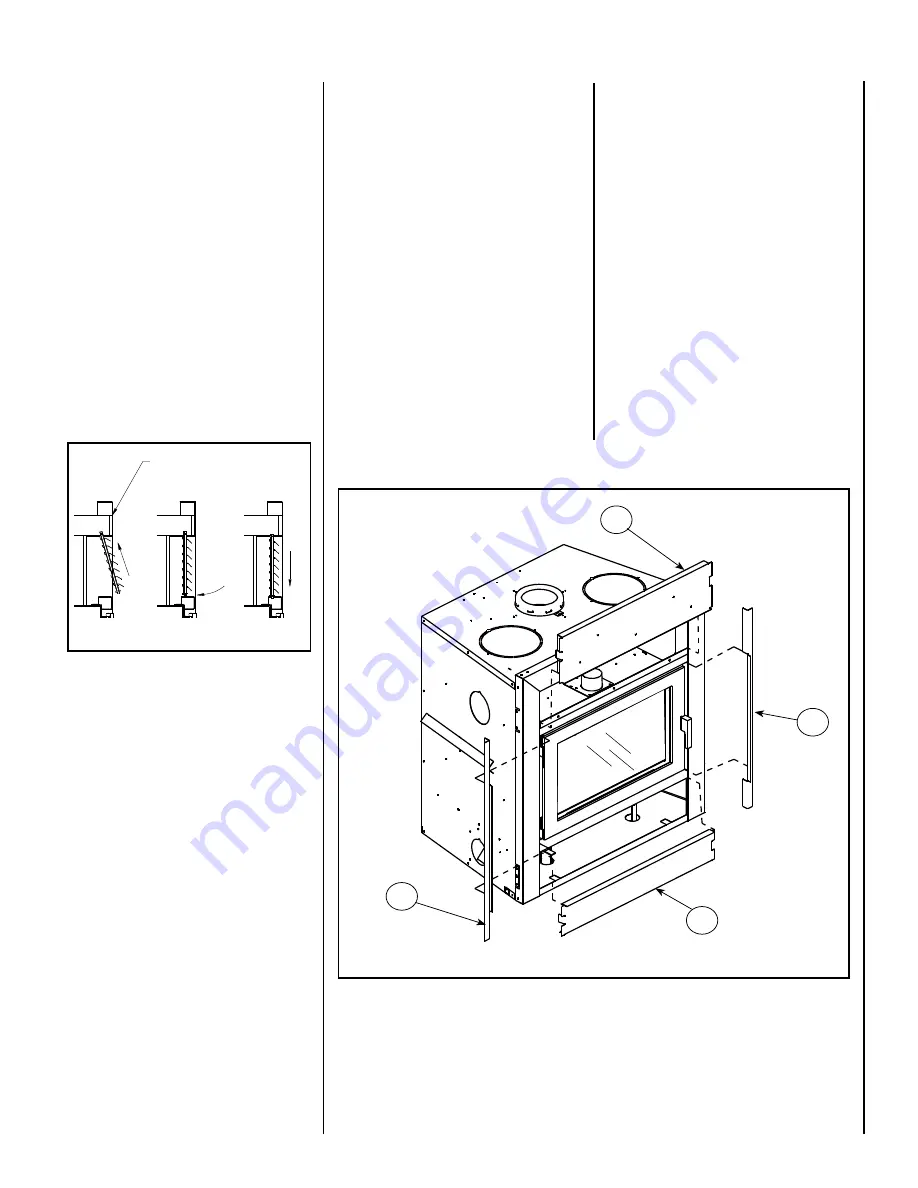
Installing The Clean Face Kit
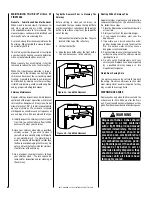
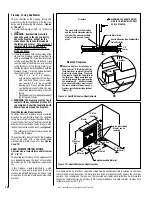
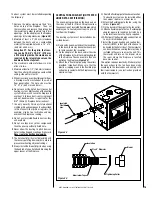
The clean face kit includes four parts. Two
trims, left and right, are used to cover the edge
of the finishing material on the sides, and two
obstruction plates to cover the top and bottom
openings allowing to install the finishing material
closer to the door.
WARNING: The bottom obstruction plate
is designed to leave an opening area for
the convection air to circulate and cool
your fireplace. NEVER BLOCK THIS AIR
SPACE TO AVOID OVERHEATING THE
FIREPLACE AND POTENTIALLY CAUSE A
FIRE IN YOUR HOME.
The gravity kit MUST BE used with the
clean face kit to allow hot air flow that
would normally come out of the top louver.
ANY OTHER INSTALLATION MAY RESULT
IN THE FIREPLACE OVERHEATING AND
POTENTIALLY CAUSE A FIRE.
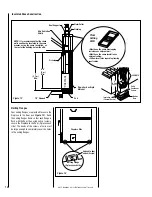
See Gravity Kit section on
Page 14
to install
the gravity vent kit.
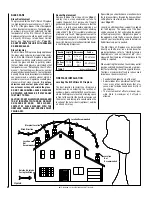
Installation Steps:
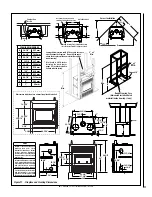
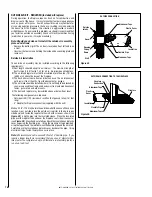
1. Install the side finishing trim, making sure
to differentiate the left from the right. The
shortest end bend should be towards the
bottom.
2. Install the right side trim. The full length flat
part must rest against the right side face
frame, the center bend must be oriented
towards the outside of the unit and the
bends towards the inside. The end bend on
top must be pushed between the crossing
1
1
2
3
trim and the right side frame. This can be
difficult because these are close together to
allow a good look when using the louver kit.
The part will be fixed in place when installing
the other parts.
3. Repeat with the left trim.
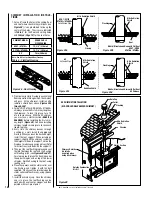
4. Install the top obstruction plate in the top
opening, oriented so the insulation faces the
inside and the 1/2 inch bend is towards the
outside and the bottom. The part is pressure
installed to keep from using screws that could
interfere with your finishing material. Place
the bottom bend on the lower trim and push
on it to insert the top bend. Push on the part
so the ends lie well on the fireplace face.
5. Install the bottom part the same way. Make
sure to push the part to the bottom to leave
the required air space.
6. (Optional) You can use rivets or sheet metal
screws on all four (4) corners to secure the
installation.


