9
S
TRAIGHT
I
NSTALLATION
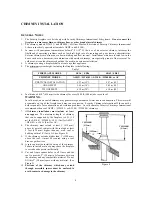
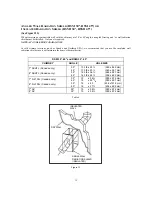
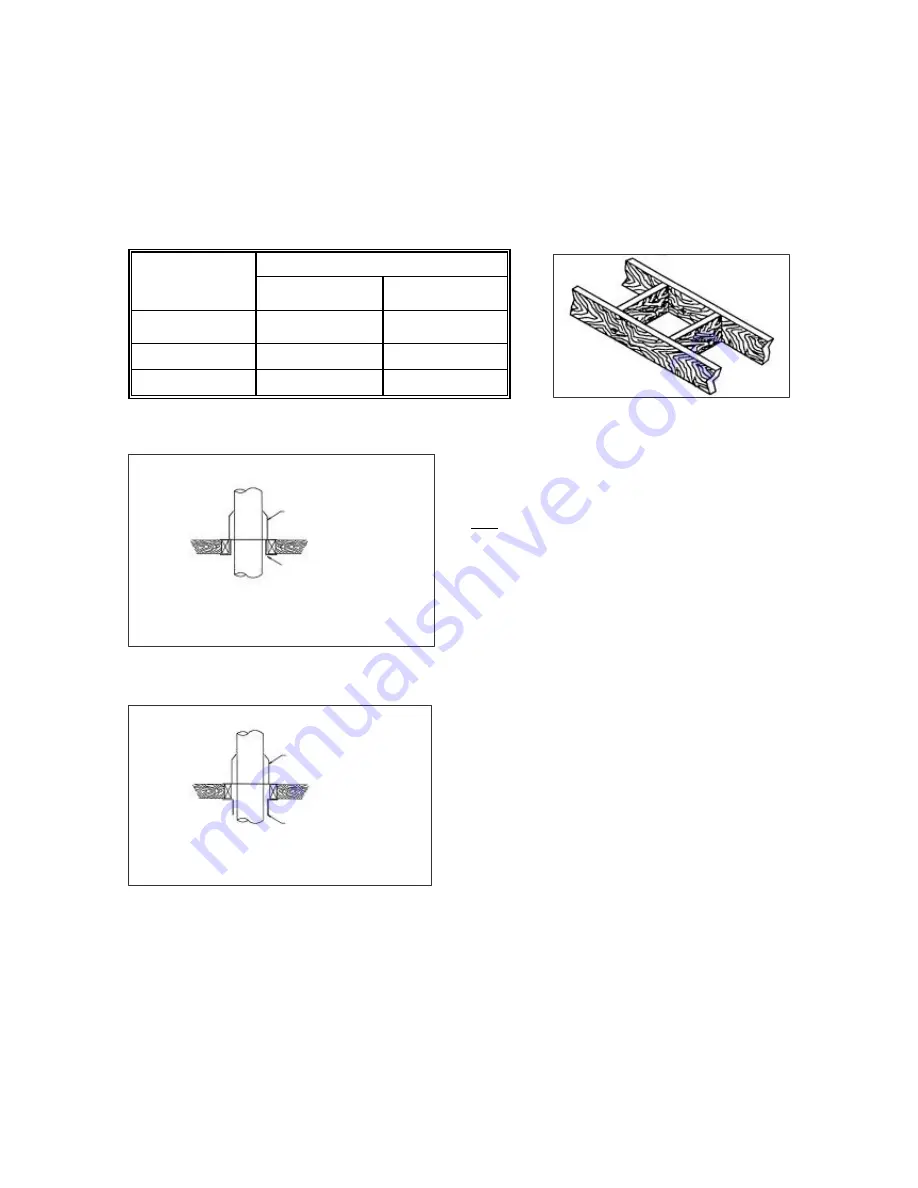
Cut and frame the holes in the ceiling, floor and roof where the chimney will pass. Use a plumb bob to line up the
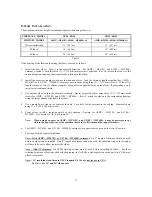
center of the holes. See Table 2 for the hole sizes and Table 3 for the roof hole sizes
Table 2
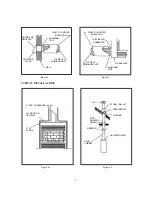
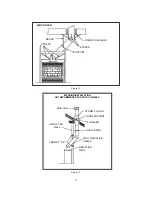
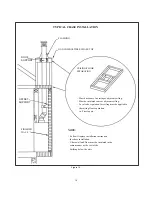
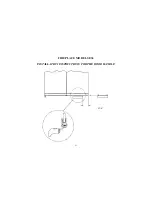
From below, install a firestop in each floor through
which the chimney passes. At the attic level, install an
attic radiation shield from above. (Figures 10a - l0b).
Note
: In cold climate locations, we recommend the
installation of an insulated radiation shield (RSI) where
the chimney penetrates the house's thermal barrier,
instead of a firestop. See details on page 15 (Insulated
Radiation Shield).
Place the first chimney length on the fireplace (A
starting section should be the first chimney length used
with the AC chimney).
Lock it into place. Continue installing chimney lengths
until you reach the desired height.
Put the roof support in place (Refer to page 16).
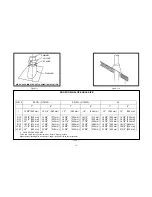
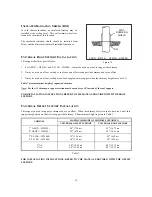
Put the roof flashing in place (sec fig. 11a & 11b). Seal
the joint between the roof and the flashing with roofing
pitch. For sloping roofs, place the flashing under the
upper shingles and on top of the lower shingles.
Nail the flashing to the roof using roofing rails.
Place the storm collar over the chimney and the
flashing, and caulk this joint, using silicone caulking.
Tighten it with the bolt supplied. Install the chimney
cap.
SQUARE HOLE DIMENSIONS
CHIMNEY
36"
42"
ASHT+ /
340 mm (13 3/8")
365 mm (14 3/8")
S-2100+ /
380 mm (15")
406 mm (16")
AC
380 mm (15")
406 mm (16")
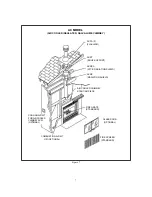
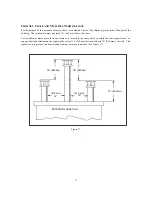
Figure 9
Figure 10a
Figure 10b
ATTIC RADIATION
SHIELD
FIRESTOP
ASHT+ / S-2100+ / /
ATTIC RADIATION
SHIELD
AC RS
AC

