12
Figure 16
Figure 15
and clearance to combustible distance if
desired. Note: Fiberglass insulation is NOT
APPROVED.
C. Connect a Pipe Adapter and Pipe Section
together then seal connection to rear exhaust
outlet. Attach a Single Tee with Clean out
adapter or a Double Tee with Clean-Out
Adapter, and proceed attaching Pipe Sections
up the wall. Installing a Double Tee with
Cleanout Adapter on the exterior of wall, allows
brushing of the Horizontal Vent run through to
appliance (Figure 14).
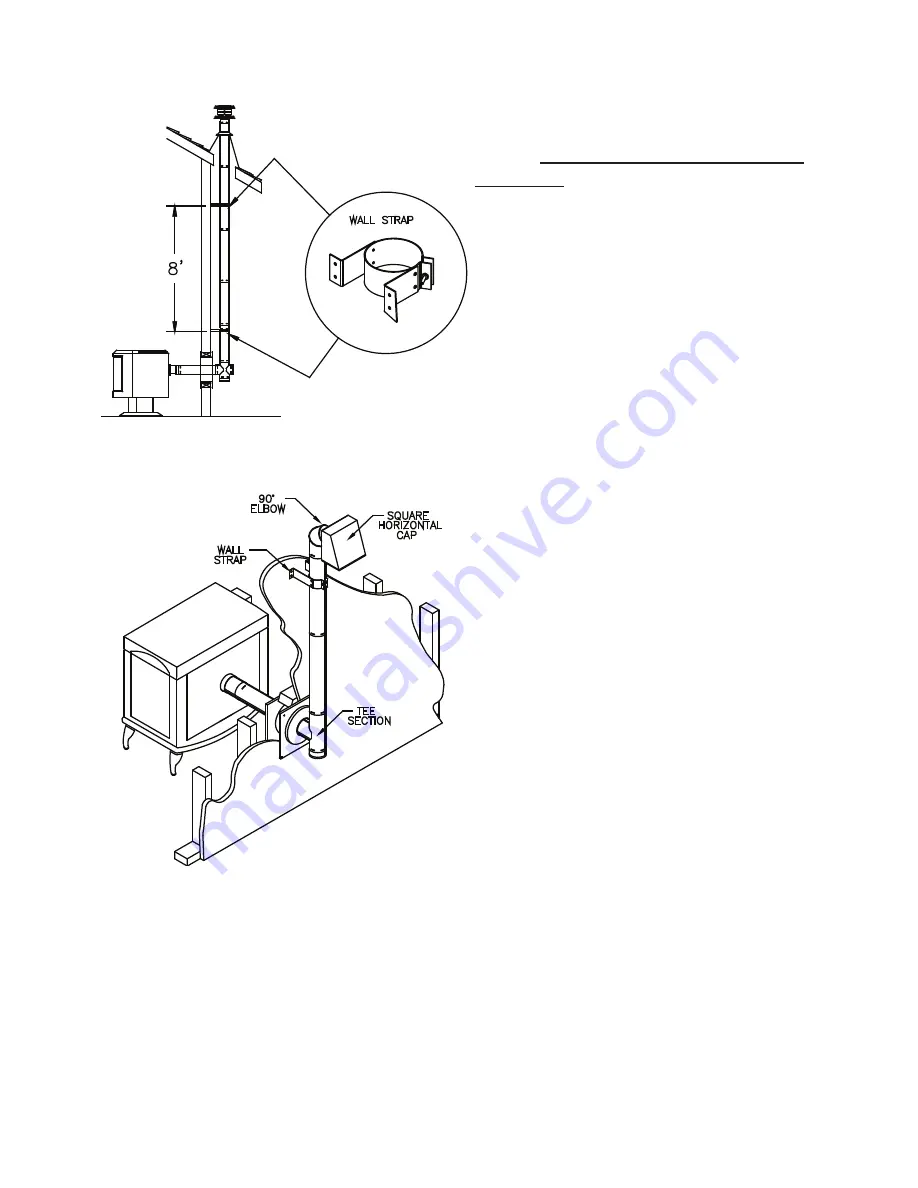
D. Attach Wall Strap just above the tee. Wall
Straps must be placed every 8-feet along
an exterior vertical run (Figure 15). If your
exterior vertical run terminates horizontally
before penetrating the roofline, install at least
one Wall Strap on the Pipe Section before 90
Degree Elbow and Horizontal Cap (Figure 16).
Under no circumstances can a Vertical Cap
be installed adjacent to vertical wall. Secure
Pellet offers fixed and Adjustable Wall Straps
to maintain a 1”-3” clearance, as desired. If
Assemble Pipe Sections in the same manner
described in Step 2 of the general instructions.
E. Seal the exterior section of the Wall
Thimble to the wall with non-hardening
waterproof sealant. As an option, you may
also seal the gap between the pipe and Wall
Thimble with sealant.
5.
If the flue exit is on back of the stove, and
a horizontal through-the-wall installation is
desired (Figure 13):
A. Place the appliance according to
manufacturer’s instructions.
B. Connect the Appliance Adapter and
sufficient Pipe Sections, seal and secure to
back of stove. Horizontal Pipe sections must
penetrate Wall Thimble and extend at least 6”
beyond the exterior wall after Horizontal Cap
Summary of Contents for secure pellet
Page 8: ...8 Figure 6 Figure 7 Figure 4 Figure 5 CUT AWAY 1 MIN CLEARANCE TO COMBUSTIBLES ...
Page 16: ...Figure 23 Figure 25 Figure 24 16 ...
Page 19: ...Figure 29 Figure 30 Figure 31 Figure 28 19 ...
Page 22: ...22 ...
Page 23: ...23 ...


