background image

14

LOOP RECORDING

The loop recording option serves as two features: “Overwrite” & “Segment Length”.  The 

overwrite feature allows the DVR to delete previously recorded events in increments when the 

SD card becomes full. The 

segment length 

feature is the length each recorded event can be 

before generating a new file. Use the UP/DOWN keys to scroll through the options. Press the 

REC/OK button to select your desired settings. The available options include:

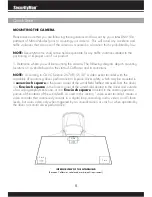
• Off 

– Disables overwrite and enables the default 24 hour segment recording.  

NOTE: 

Setting this feature to off will create on long video which will stop recording as soon as 

the file exceeds the memory cards capacity.

• 30 Seconds 

(default) – Enables the DVR to record/overwrite in 30 second increments 

• 1 Minutes 

– Enables the DVR to record/overwrite in 1 minute increments 

• 3 Minutes 

– Enables the DVR to record/overwrite in 3 minute increments 

EXPOSURE

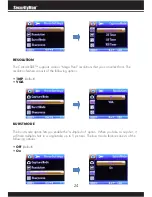
The exposure option lets you select the numeric exposure value for your video recording. The 

exposure feature consists of the following options:

• +2.0 

• +5/3

• +4/3

• +1.0

• +2/3

• +1/3

• +0.0 (default)

• -1/3

• -2/3

• -1.0

• -4/3

• -5/3

• -2.0


Summary of Contents for Carcam-SDE

Page 1: ...User s Guide Mini HD Car Camera Recorder with Smart Impact Sensor Model Carcam SDE Power USB...

Page 2: ...o be defective then as your sole remedy and as the manufacturer s only obligation SecurityMan will repair or replace the product This warranty shall not apply to products that have been subjected to a...

Page 3: ...e Time Format your SD card Change to Default Settings Buttons Settings Buttons Up Zoom In Menu Down Zoom Out Record OK Mode Lock Power Settings Video settings Resolution Loop Recording Exposure Motion...

Page 4: ...de Sharpness White Balance Exposure Quick Review Date Stamp Playback Settings Delete Protect Slide Show Playing Back Videos Carcam SDE Computer On Screen Display Live view Video Live view Photo Playba...

Page 5: ...luded Auto overwrite when SD is full for regular recording Built in microphone and speaker 120 degree wide angle lens Has zoom capabilities up to 4x original view Records 30 second 1 min or 3 min cont...

Page 6: ...ck during subsequent use DO NOT use this product to infringe on one s privacy spying intercepting and related activities are illegal and punishable by law Monitoring one s private activities without c...

Page 7: ...messages to make sure your working environment is suitable If your vehicle does not cut off power to your cigarette lighter port then you may have to manually turn off or unplug the charger to prevent...

Page 8: ...4 Package Contents 1x Carcam SD 1x Car Charger 1x Suction Cup 1x USB Cable 2x Warning Stickers Must be used and visible to all passengers User s Manual Micro SD card not included supports up to 32GB...

Page 9: ...FastForward 02 Menu 03 Down Zoom out Rewind 04 Power USB 05 Lens 06 Speaker 07 REC OK 08 Mode Video lock 09 ON OFF 10 1 5 LCD screen 11 Micro SD card slot 12 Bracket socket 13 Reset 14 Microphone 7 2...

Page 10: ...vehicle based in the state of California and its restrictions NOTE According to CA VC Section 26708 13 A A video event recorder with the capability of monitoring driver performance to improve driver...

Page 11: ...ecord both exterior and interior front and rear of your vehicle For interior recording simply follow the steps above and rotate the camera so that the lens is facing the inside of your vehicle INSERT...

Page 12: ...ower cable around the trim of your vehicle so that it will not obstruct your view while driving 2 Insert the car charger into your vehicles cigarette lighter port as shown A red light on the car charg...

Page 13: ...Carcam SDE 1 Start your vehicle and the Carcam SDE will automatically turn on and begin recording 2 Press the power button manually to turn on the Carcam SDE NOTE The Carcam SDE will automatically tur...

Page 14: ...the Date Time Use the Up and Down buttons to change the date and the time Use the Mode button to scroll through the selection FORMAT YOUR SD CARD 1 Turn on your Carcam Press and hold the Power button...

Page 15: ...Press the Menu button If there is a SD card already inserted press the Menu button until the Setup settings appears on the screen If there is no SD card wait for the Please Insert SD Card message to d...

Page 16: ...o used to take pictures while in Photo mode It can be used to make setting changes and select which event to view during playback MODE LOCK The MODE button is used to switch between Video Photo and Pl...

Page 17: ...s audio recording Date Stamp Enables Disables date stamp on recorded events G Sensor G force sensor configuration RESOLUTION The Carcam SDE supports various video resolutions that you can select from...

Page 18: ...e Off Disables overwrite and enables the default 24 hour segment recording NOTE Setting this feature to off will create on long video which will stop recording as soon as the file exceeds the memory c...

Page 19: ...e When motion detection is active or turned ON the G sensing will be deac tivated Please make sure motion detection is turned OFF for G1 and G2 sensor to function properly RECORD AUDIO The record audi...

Page 20: ...ets hit Any force that is acted upon the vehicle will result in locking the current recording video file NOTE Formatting the SD card will result in erasing all files including the locked video files P...

Page 21: ...wing configuration options Date Time Date and Time configuration Auto Power Off Auto System Shut Off configuration Beep Sound Enables Disables beep notifications Language Language settings Backlight B...

Page 22: ...ach selection MODE This button scrolls through the date and time i e Month to Day to Year etc REC OK Press this button to accept and save your date time AUTO POWER OFF The auto power off option is an...

Page 23: ...E is pressed The beep sound feature consists of the following options On Enable default Off Disable LANGUAGE The language option lets you change the language of the Carcam The language feature consist...

Page 24: ...s in motion The backlight feature consists of the following option Off 30 Seconds default 1 Minute 2 Minutes FREQUENCY The frequency option switches between the two most commonly used refresh rates 60...

Page 25: ...ff default On Selecting this option flips the screen FORMAT The format setting option is used to erase all files inside your SD card including protected files The format feature consists of the follow...

Page 26: ...your Carcam device 3 Turn on the Carcam The power light will turn on and the screen will remain black 4 Wait for the firmware to install into the Carcam 5 Once complete the Carcam screen will display...

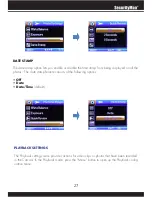
Page 27: ...s date stamp on recorded events CAPTURE MODE The capture mode option lets you configure how the Carcam SDE will operate every time the snap shot button is pressed For example you can set it to take an...

Page 28: ...solution feature consists of the following options 1MP default VGA BURST MODE The burst mode option lets you enable the multiple shot option When you take a snapshot it will take multiple shots in a s...

Page 29: ...ning the brighter pixels The sharpness feature consists of the following options Strong Normal default Soft WHITE BALANCE The white balance option lets you remove unrealistic color casts so that objec...

Page 30: ...sure feature consists of the following options 2 0 5 3 4 3 1 0 2 3 1 3 0 0 default 1 3 2 3 1 0 4 3 5 3 2 0 QUICK REVIEW The quick review option lets you preview images you ve just taken for a short am...

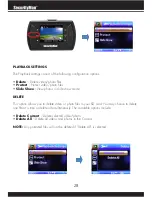
Page 31: ...he photos The date stamp feature consists of the following options Off Date Date Time default The Playback settings menu provides actions for video clips or photos that have been recorded in the Carca...

Page 32: ...hotos in slide show mode DELETE This option allows you to delete video or photo files in your SD card You may choose to delete one file at a time or delete all simultaneously The available options inc...

Page 33: ...ecting this option will unprotect the file Lock All Locks all files on the SD card Unlock All Unlocks all files on the SD card SLIDE SHOW The Slide Show option lets viewers view the photos in a slide...

Page 34: ...ck PLAYING BACK VIDEOS Selects the highlighted event to play back view Confirm an option when prompted Pause the video Switches to Video mode Used to navigate through the recorded events Fast forward...

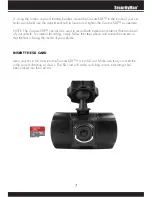
Page 35: ...on the SD card allowing it to pop out from its slot 2 Insert the Micro SD card into a Micro SD card reader not included connected to your PC your PC should load the SD card as a new Removable Drive 3...

Page 36: ...4 Open the DCIM folder to view a list of all the recorded event folders Once inside the dated folder you can double click any of the recorded AVI or JPG files to open them up in your default media pla...

Page 37: ...33 LIVE VIEW VIDEO LIVE VIEW PHOTO On Screen Display...

Page 38: ...34 PLAYBACK SCREEN...

Page 39: ...ture Operating humidity Operation system 1 5 TFT LCD Digital HD color CMOS 120 A grade high resolution ultra wide angle English Deutsch French Spanish Italian Portugal Traditional Chinese Simplified C...

Page 40: ...www securitymaninc com...

Reviews: