background image


SARK-110-ULM


User’s Manual 

Rev 1.0 June 22

th

, 2019 

- 24 - 

© 2019, Melchor Varela 

– EA4FRB 

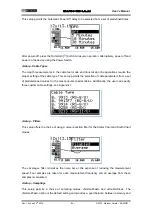
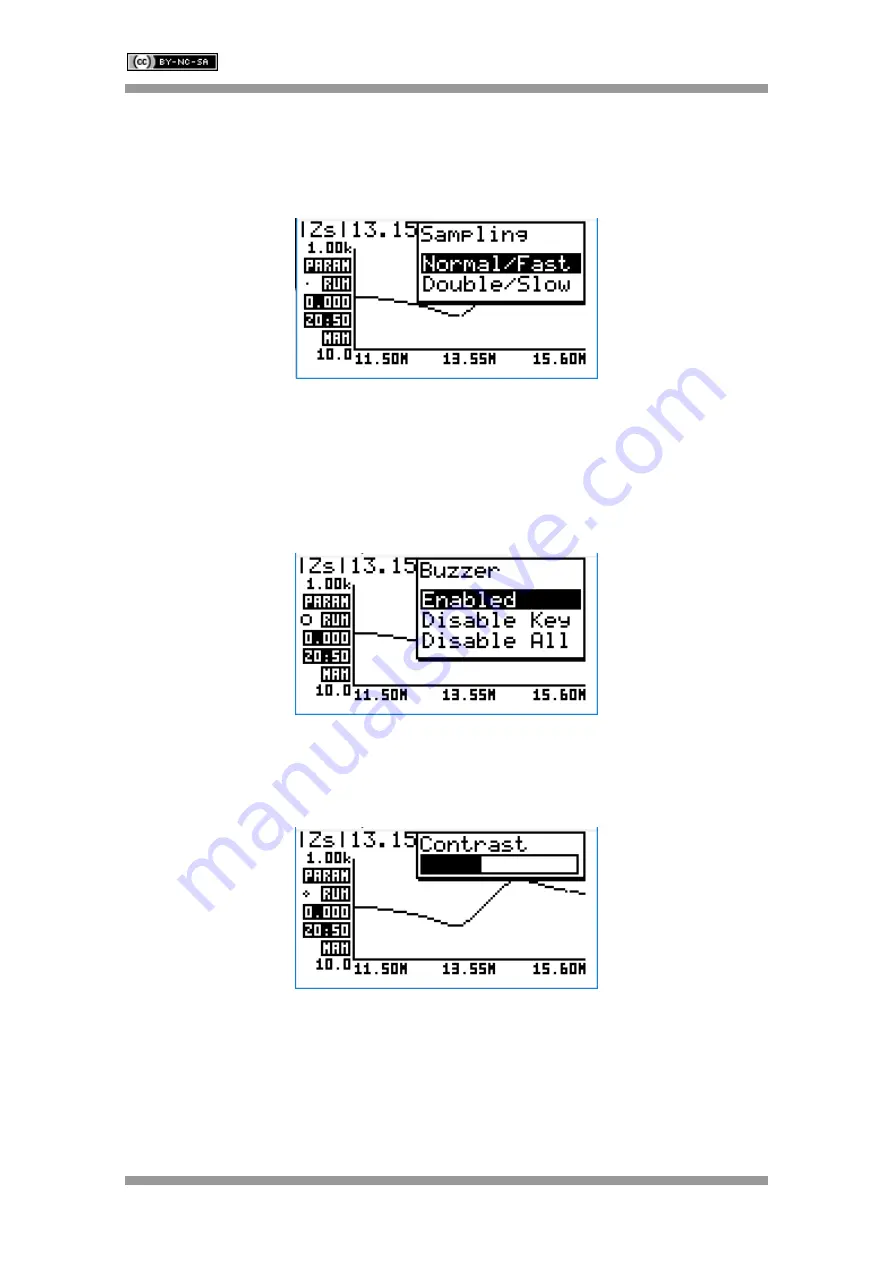
measurement  speed.  The  «Double/Slow»  option  is  intended  for  enhanced  accuracy 

measurements,  because  it  reduces  measurement  ripple  by  doubling  the  number  of  samples 

taken, but at the expense of a slower sweep speed. This enhancement of the measurements is 

more noticeable when using automatic scales for measurement over a small range of values.  


«Setup 

– Buzzer» 

This setup enables control of t

he analyzer’s sounds.  

Select  «Enabled»  to  enable  all  the  sounds.  Select  «Disable  Key»  to  deactivate  the  feedback 

click sound when pressing the buttons. Alert and error sounds will continue to be enabled. Select 

«Disable All»


for an all-silent operation. 


«Setup 

– Contrast» 

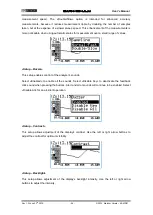
This  setup  allows  adjustment  of  the  display’s  contrast.  Use  the  left  or  right  arrow  buttons  to 

adjust the contrast for optimum visibility.  


«Setup 

– Backlight» 

This  setup  allows  adjustment  of 

the  display’s  backlight  intensity.  Use  the  left  or  right  arrow 

buttons to adjust the intensity.  

Summary of Contents for SARK-110-ULM

Page 1: ...ensed under a Creative Commons Attribution NonCommercial ShareAlike 3 0 Unported License 2019 Melchor Varela EA4FRB SARK 110 ULM Vector Impedance Antenna Analyzer User s Manual Revision 1 0 Updated to Firmware Version 1 0 ...

Page 2: ...FUNCTION 10 2 3 CHANGING THE FREQUENCY 11 2 4 USING THE FREQUENCY PRESETS 12 2 5 CHANGING THE RUN STATUS 12 2 6 USING THE MARKER 12 2 7 CHANGING THE PARAMETER 16 2 8 SAVING AND RECALLING MEASUREMENTS 17 2 9 CHANGING THE SETTINGS 20 3 OPERATING MODES 27 3 1 SCALAR CHART MODE 27 3 2 SMITH CHART MODE 28 3 3 SINGLE FREQUENCY MODE 29 3 4 SWR MODE 30 3 5 MULTIBAND MODE 31 3 6 CABLE TEST MODE TDR 32 3 7 ...

Page 3: ...al 47 4 2 4 Transmission Line 49 APPENDIX A GLOSSARY OF PARAMETERS 52 APPENDIX B UPGRADING THE FIRMWARE 54 APPENDIX C BLUETOOTH TOOL FIRMWARE 55 APPENDIX D OSL CALIBRATION 60 APPENDIX E FREQUENCY CALIBRATION 64 APPENDIX F DETECTOR CALIBRATION 65 APPENDIX G FREQUENCY PRESETS FILE 66 APPENDIX H SCALE PRESETS 67 APPENDIX I CUSTOM CABLE SETTINGS 69 APPENDIX J SPECIFICATIONS 70 APPENDIX K ACKNOWLEDGMEN...

Page 4: ...ent capability and accurately resolves the resistive capacitive and inductive components of a load The accuracy is excellent over a broad range of impedances and rivals any of the competitive devices in the market The measurement reference plane is automatically adjusted via the Open Short Load calibration procedure for higher measurement accuracy Also the analyzer implements a transmission line a...

Page 5: ...r Band Scan and Computer Control Good accuracy over a broad range of impedances Resolves the sign of the impedance Manual and automatic positioning tracking marker High capacity Lipo battery for 8 hrs of continuous operation rechargeable via USB USB and short range Bluetooth Low Energy interfaces Internal 2MB USB disk for the storage of measurements screenshots configuration and firmware upgrade S...

Page 6: ...onnected to an antenna system this radiation may cause interference to nearby communication systems Connect only for as long is necessary 6 On first time use it is recommended saving the factory files in a safe place Please connect the device to a PC via an USB cable and copy the files in the internal disk to a location in your computer 7 Please review carefully the instructions in Battery Mainten...

Page 7: ...e sure to turn off the device to avoid additional battery use To turn off the device completely use the power switch and not the automatic power off function The device uses some battery power during the automatic power off state so the battery can be completely discharged if the device is left in this state for a prolonged period Place your device in a cool moisture free environment that s less t...

Page 8: ...attery Do not dispose of a battery in fire or water Do not expose a battery to temperatures above 60 C 140 F Keep the battery away from children Avoid exposing the battery to excessive shock or vibration Do not use a damaged battery If a battery pack has leaking fluids do not touch any fluids Dispose of a leaking battery pack see the disposal and recycling considerations above In case of eye conta...

Page 9: ...he bottom side facilitates connection to a computer for communication and internal battery charging using a compatible micro USB cable not included The unit charges the internal battery when connected to USB The internal battery charger automatically manages the charge cycle and stops the process when the battery is fully charged The charger LED on the bottom lights when the battery is charging Th...

Page 10: ...etween the Function and Operation mode menus Select the needed operational mode using up or down arrow buttons and then press the Enter button to validate or the Return button to cancel 2 2 Select the Function Press the Menu button to get into the Function menu This menu allows selecting different entry options such as center span start or stop frequency change the parameter to plot or accessing t...

Page 11: ... or if the up or down arrow buttons are pressed the center frequency will be changed 2 3 Changing the Frequency Select a frequency entry mode in the Function menu such as Center Span Start or Stop Press the Enter button to get into the frequency entry dialog Press the left or right arrow buttons to change the position of the cursor Press the up or down arrow buttons to increase or decrease the val...

Page 12: ...r button to cancel the operation 2 5 Changing the Run Status The Run Hold button controls the run status The measurements can be stopped at any time by pressing the Run Hold button and resuming them by pressing this button again If the Run Mode in the Setup menu is set to Single Shot the sweep automatically stops on completion of a single pass Press the Run Hold button to start a new sweep 2 6 Usi...

Page 13: ...arker position Press the Menu button and select Marker to get into the marker menu Available options are Tracking for selecting the tracking mode Info to display detailed information and Center to set the center frequency at the marker position The automatic tracking feature makes positioning of the marker easier thus helping the user to speed up measurements ...

Page 14: ...d can be set for any parameter A detection value must be specified for the Cross detection modes Disable Peak Min p Peak Max P Absolute Min m Absolute Max M Value Cross Any X Value Cross Up Value Cross Down v For example to have the marker tracking automatically the minimum VSWR value select Marker Tracking Min Parameter VSWR ...

Page 15: ...elchor Varela EA4FRB Another example to have the marker tracking automatically the crossovers on the 50 ohm impedance select Marker Tracking Cross Any Parameter Zs Value 050 00 The Info option displays detailed information of the readings at the marker position ...

Page 16: ...019 Melchor Varela EA4FRB The Center menu option can be used to set the center frequency at the marker frequency value 2 7 Changing the Parameter Press the Menu button and select Param menu option to select the parameter to be plotted in Scalar Chart mode ...

Page 17: ... Excel application available from http www ac6la com zplots html Press the Menu button and select File menu option to get into the File menu Save Data The Save Data option enables the current measured data to be saved for further review After selecting the Save Data menu option enter the file name By default the file name has the format sark__xx csv or sark__xx tdr for Cable Test mode where xx is ...

Page 18: ...ile Use the Delete file option to delete a single file on the device disk When selecting the Delete File option a popup submenu will be displayed with the list of available files Select the file to delete using the up or down arrow keys Press the Enter button to validate the selection or the Return button to cancel Delete All Use the Delete All option to delete all user files When selecting the De...

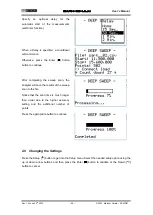
Page 19: ... a user programmable timeout for the automatic start of measurements to be specified This function is similar to the self timer function on cameras In order to use this function first set the frequency and span range in any of the sweep modes such as Scalar Chart select Function File and then select Deep Sweep The procedure is as follows Enter the file name Enter the number of frequency points Min...

Page 20: ...fter completing the sweep scan the analyzer will save the results of the sweep scan to the file Notice that the scan time is much longer than usual due to the higher accuracy setting and the additional number of points Press the appropriate button to continue 2 9 Changing the Settings Press the Setup button to get into the Setup menu Select the needed setup option using the up or down arrow button...

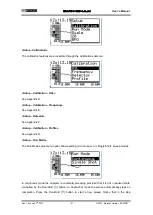
Page 21: ...pendix E Setup Detector See Appendix F Setup Calibration Profile See Appendix D Setup Run Mode The Run Mode setup menu option allows setting Continuous or Single Shot sweep modes In continuous mode the analyzer is constantly sweeping provided that it is not in paused state controlled by the Run Hold button In single shot mode the sweep automatically stops on completion Press the Run Hold button to...

Page 22: ... pre defined scale values Normal High and Low as well as Auto automatic scaling This setting defines the maximum and minimum values for each parameter on the Y axis see Appendix H This setup is valid for the Scalar Chart mode Setup Z0 This setup permits the reference characteristic impedance to be changed The value can be selected from a set of predetermined values or it can be user specified sele...

Page 23: ...selection of cable parameters from a set of predetermined values for the most popular coaxial cables Additionally the user can specify three custom cable settings see Appendix I Setup Filter This setup offers the choice of using a noise reduction filter for the Scalar Chart and Smith Chart modes The Average filter minimizes the noise but at the expense of reducing the measurement speed Four sample...

Page 24: ...all range of values Setup Buzzer This setup enables control of the analyzer s sounds Select Enabled to enable all the sounds Select Disable Key to deactivate the feedback click sound when pressing the buttons Alert and error sounds will continue to be enabled Select Disable All for an all silent operation Setup Contrast This setup allows adjustment of the display s contrast Use the left or right a...

Page 25: ...ple points for Cable Test TDR function Reducing the number of points speeds up the scan speed but at the expenses of decreasing the resolution of the measurements Setup Reset Factory This setup permits resetting the analyzer to its default settings The internal disk drive can be optionally formatted Press the Enter button to format the disk or any other button if only a reset to factory defaults i...

Page 26: ...e files will be lost during the format Only the Detector Calibration file detcalib dat and the file associated with the selected OSL Calibration profile are preserved Setup About The About screen displays copyright information firmware release number and date disk volume name disk size and free space and battery level or USB if connected to a USB interface ...

Page 27: ...at any time on the internal disk by using the save file operation See section 2 8 The Run Hold button controls the run status The measurements can be stopped at any time by pressing the Run Hold button and resuming them by pressing this button again Functions Center Sets the center frequency see section 2 3 Span Sets the span see section 2 3 Start Sets the start frequency see section 2 3 Stop Sets...

Page 28: ...n 2 6 The measurements can be stored at any time on the internal disk by using the save file operation See section 2 8 The Run Hold button controls the run status The measurements can be stopped at any time by pressing the Run Hold button and resuming them by pressing this button again Functions Center Sets the center frequency see section 2 3 Span Sets the span see section 2 3 Start Sets the star...

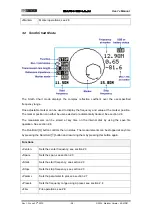
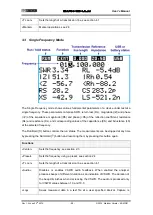
Page 29: ...e CS and inductance LS at the selected frequency The Run Hold button controls the run status The measurements can be stopped at any time by pressing the Run Hold button and resuming them by pressing this button again Functions Center Sets the frequency see section 2 3 Preset Sets the frequency using a preset see section 2 4 TL Len Sets the length of a transmission line see section 4 1 Audio Disabl...

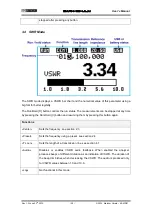
Page 30: ... pressing the Run Hold button and resuming them by pressing this button again Functions Center Sets the frequency see section 2 3 Preset Sets the frequency using a preset see section 2 4 TL Len Sets the length of a transmission line see section 4 1 Audio Disables or enables VSWR audio feedback When enabled the analyzer produces beeps of different duration as an indication of VSWR The duration of t...

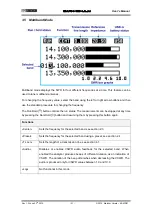
Page 31: ... can be stopped at any time by pressing the Run Hold button and resuming them by pressing this button again Functions Center Sets the frequency for the selected band see section 2 3 Preset Sets the frequency for the selected band using a preset see section 2 4 TL Len Sets the length of a transmission line see section 4 1 Audio Disables or enables VSWR audio feedback for the selected band When enab...

Page 32: ...es an indication of the fault location The step response trace provides an indication of the nature of the fault The distance resolution is 5 cm 2 inches The vertical axis of the graph displays the reflection coefficient Rho 1 for short load 0 for matched impedance load ZLoad Z0 or Rho 1 for open load The horizontal axis displays the distance in meters The distance from the start of the cable to a...

Page 33: ...unctions Zoom Sets the zoom option see paragraph below File File operations see 2 8 Marker Marker operations see 2 6 There is a basic zoom feature controllable from the ZOOM menu option This allows zooming into one of the four quarters of the graph or the complete span via the option Extends Also available is a zoom option to extend the first octave of the graph for short cable lengths See in the ...

Page 34: ...sponse Unity reflection Unity reflection Open Unity reflection 180º Unity reflection 180º Short Positive peak Positive level shift Resistance R Z0 Negative peak Negative level shift Resistance R Z0 Positive then negative peaks Positive peak Inductance Negative then positive peaks Negative peak Capacitance Display ...

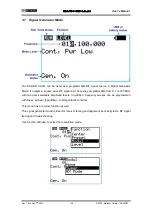
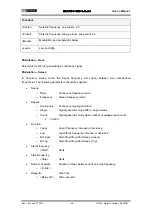
Page 35: ... signal at a frequency programmable from 0 1 to 700 MHz with two user selectable amplitude levels In addition frequency sweeps can be programmed with linear bi linear logarithmic or bi logarithmic functions This mode has a receiver function as well This signal generator mode is ideal for receiver testing and alignment sensitivity tests RF signal tracing and troubleshooting Use function Modul to se...

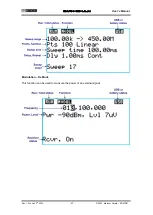
Page 36: ...parameters should be supplied Sweep o None Continuous frequency mode o Frequency Sweep frequency mode Repeat o Continuous Continuous signal generation o Single Signal generator stops after a single sweep o Count Signal generator stops when number of sweeps reach count Count Function o Linear Linear frequency increase or decrease o Log Logarithmic frequency increase or decrease o Bi Linear Start St...

Page 37: ...SARK 110 ULM User s Manual Rev 1 0 June 22th 2019 37 2019 Melchor Varela EA4FRB Modulation Rx Mode This function can be used to measure the power of an external signal ...

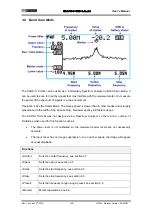
Page 38: ...of the Span setting Narrower spans yield faster sweeps The SARK 110 ULM was not designed as a Spectrum Analyzer so there are a number of limitations when used for this function such as The power level is not calibrated so the measured power levels are not necessarily accurate The input mixer has no image suppression so on narrow spans the image will appear at equal amplitude Functions Center Sets ...

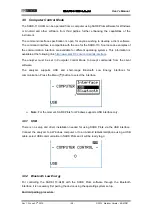
Page 39: ...rk110 com commands interface The analyzer must be set in Computer Control Mode to accept commands from the client software The analyzer supports USB and short range Bluetooth Low Energy interfaces for communication Press the Menu button to select the interface Note For the moment SARK Plots for Windows supports USB interface only 3 9 1 USB There is no setup and driver installation needed for using...

Page 40: ... then Bluetooth c Select Scan d The analyzer should show up in the list of available devices as SARK110 nnnn number is unique for each device except by chance e Select the device Once the device is paired launch SARK Plots and ensure that Bluetooth interface is selected When connected the analyser should show the screen below ...

Page 41: ...ct of a feed line The transmission line type has to be known in advance The device provides a comprehensive list of cable types and in addition the user can specify up to three custom cable types The selection of the cable is available in the Cable Type option of the Setup menu see the screenshot below For setting the length select TL LEN option in the Function menu A pop up dialog will show the c...

Page 42: ...e of the transmission line will be discounted The screenshots below show an example of this in operation A line of 28 2m of RG 58C U coax cable is unterminated at the far end The first screenshot shows the measurement without applying the TL compensation and the last screenshot shows the measurement once the subtract feature has been applied 4 2 Circuit Models The SARK 110 ULM provides advanced an...

Page 43: ...modes Press the Menu button select Model and then the desired function in the pop up submenu 4 2 1 Loop Antenna Coil This function determines the equivalent circuit model of small loop antennas or coils This function is specially tailored for the measurement of antennas for HF RFID applications Detailed usage of this function is described in the Application Note available at http www sark110 com a...

Page 44: ...Calculated impedance at Fop Ra series resistance at Fop Quality factor Entry number in the file File name Ca antenna capacitance La antenna inductance 1 MHz The internal procedure performed by the analyzer is as follows the analyzer measures the impedance at 1 MHz and at the desired operating frequency e g 13 56 MHz Then it searches for the antenna s self resonant frequency and measures the impeda...

Page 45: ...capacitance is calculated with the following equation 2 2 1 Fra La Ca The series equivalent resistance of the antenna at the operating frequency Fop 13 56 MHz is calculated with the following equation Rp La Fop Rs Ra 2 2 The quality factor is calculated using the following equation Ra La Fop Qa 2 4 2 2 Capacitor This function determines the equivalent circuit model of capacitors The measurement pr...

Page 46: ...n The figure below describes the measured parameters The internal procedure performed by the analyzer is as follows the analyzer measures the impedance at 1 MHz and at the desired operating frequency Then it searches for the self resonant frequency and measures the impedance at this point The following parameters are extracted from these measurements Fra Self resonant frequency of the capacitor Z ...

Page 47: ...Qa 4 2 3 Quartz Crystal This function determines the equivalent circuit model of quartz crystals Detailed usage of this function is described in the Application Note available at http www sark110 com application notes equivalent circuit determination of quartz crystals The measurement procedure is as follows Select the file name to store the data Press the Return button if not needed to save the d...

Page 48: ...ified in the singularities where the impedance changes from pure capacitive phase value close to 90º to pure inductive phase value close to 90º The resonant frequencies are then obtained from the frequency points where the measured phase value is close to zero After determining the series and parallel resonant frequencies the series resistance Rs at the series resonant frequency is measured Then t...

Page 49: ...th transmission lines namely The line s characteristic impedance Z0 The true velocity factor The matched line loss in terms of dB over the total line length and in dB 100m The measurement procedure is as follows Select the file name to store the data Press the Return button if not needed to save the data Enter the start frequency Enter the stop frequency Enter the transmission line length ...

Page 50: ...tton Connect the transmission line terminated with a short circuit Press the Enter button After some seconds the results are shown on the screen Note Try to keep the electrical length of the line exactly the same between the open and short termination conditions Ideally you would terminate the line with the same standard loads that were used to do the Open Short Load OSL calibration ...

Page 51: ...he following equation for all the frequency points Zsc Zoc Z 0 The calculation of the Velocity Factor VF and matched loss is more convoluted and will not be explained here The relevant information is that the VF is provided at the upper frequency and the matched loss is provided at the maximum frequency and the arithmetic mean for all frequency points ...

Page 52: ... ratio of the amplitude of the voltage to the amplitude of the current expressed in degrees VSWR Voltage Standing Wave Ratio It is a measure of how efficiently radio frequency power is transmitted from a power source through a transmission line and into a load for example from a power amplifier through a transmission line and into an antenna RL Return Losses S11 dB Return loss is the negative of t...

Page 53: ...f Pwr Percentage of Reflected Power 100 2 Rho RPwr Q Quality Factor It is defined as the ratio of the energy stored in a component to the energy dissipated by the component R X Q Cs Series Capacitance Equivalent series capacitance at the measurement frequency Ls Series Inductance Equivalent series inductance at the measurement frequency Cp Parallel Capacitance Equivalent parallel capacitance at th...

Page 54: ...drive unit using the File Explorer of your PC 3 Copy the firmware file e g SARK110ULM_V x y dfu to the SARK s USB flash drive unit 4 Do a safe eject of the SARK s USB flash drive unit from your computer 5 Power off the SARK 110 ULM and power it on again while simultaneously holding down the Run Hold button Then press the Enter button 6 The Device Firmware Upgrade screen prompts you to install the ...

Page 55: ...It can be configured in Programming mode to perform the firmware updates or in Normal mode for sending the ASCII commands The mode must be set during the firmware startup and it can be changed by pressing the button Setup Setup Follow the firmware upgrade instructions described in Appendix B for installing SARK110ULM_BTOOL dfu firmware Before installing it ensure that the normal firmware is instal...

Page 56: ... release notes are available in the Microchip s website In the screenshot below the version is V1 30 To update the module firmware perform the following steps 1 Download the firmware update images from Microchip s website and extract the contents 2 Connect the SARK 110 ULM to a computer using a USB cable 3 Install the SARK110ULM_BTOOL dfu firmware 4 Power on the SARK 110 ULM and select Programming...

Page 57: ...ware update is successfully completed The End of Write Memory message is displayed 8 Click the Disconnect button to close the COM port The port disconnect message is displayed at the end of the log window 9 Close the IsUpdate application and open TeraTerm the proper COM port needs to be selected and the baudrate set to 115200 10 Press the button Setup in the SARK 110 ULM and select Normal mode 11 ...

Page 58: ... in RN4870 71 Bluetooth Low Energy Module User s Guide and also RN4870 71 PICtail PICtail PLUS DAUGHTER BOARD USER S GUIDE includes usage guidance To enable this functionality perform the following steps 1 Connect the SARK 110 ULM to a computer using a USB cable 2 Install the SARK110ULM_BTOOL dfu firmware 3 Power on the SARK 110 ULM and select Normal mode 4 Open TeraTerm the proper COM port needs ...

Page 59: ...20 IsUpdate zip RN487x Firmware Update Tool Unzip the file and install according manufacturer s instructions https www microchip com wwwpr oducts en RN4871 RN4871 Microchip site Firmware images and release notes are available in this site http ww1 microchip com downloa ds en DeviceDoc RN4870 71 Bluetooth Low Energy Module User Guide DS50002466C pdf RN4870 71 Bluetooth Low Energy Module User s Guid...

Page 60: ...connected during the calibration is called the Reference Plane Reference Plane Open Short Load The analyzer performs a series of measurements with these loads calculating error coefficients that are stored in a file that is automatically loaded each time the analyzer is run These error coefficients are used to correct the measured values The number of calibration points is fixed to 400 The frequen...

Page 61: ...cteristics are shown in a popup dialog Once the calibration profile has been selected press the Setup button and select Calibration OSL to start the OSL calibration procedure The calibration procedure is as follows Enter the start frequency default is the lower frequency limit Enter the stop frequency default is the upper frequency limit ...

Page 62: ...e open load Load status is indicated by the status of the Rh indicator If shown in reverse mode denotes incorrect load Press the Enter button to continue or to exit The calibration progress will be shown in the display bar Connect the short circuit load Load status is indicated by the status of the Rh indicator If shown in reverse mode denotes incorrect load Press the Enter button to continue or t...

Page 63: ... in the display bar Connect the reference load Load status is indicated by the status of the Rh indicator If shown in reverse mode denotes incorrect load Press the Enter button to continue or to exit The calibration progress will be shown in the display bar Press the Enter button to validate the calibration or to exit ...

Page 64: ... counter or alternatively zero beat it against WWV until an exact 10 MHz output is obtained For best accuracy turn on the unit for at least 10 or 15 minutes before calibrating Press the Setup button and select Calibration Frequency to start the frequency calibration procedure Use the arrow keys to adjust the frequency When an exact 10 MHz output is obtained press the Enter button to permanently st...

Page 65: ...ed that the file containing the factory results detcalib dat is backed up to enable a restore if needed Press the Setup button and select Calibration Detector to start the detector calibration procedure The calibration procedure is as follows Connect the 50 ohm load Load status is indicated by the status of the Voltage and Current indicators If shown in reverse mode denotes incorrect load Press th...

Page 66: ...ker 1 frequency specified in MHz o marker2_freq default marker 2 frequency specified in MHz Kept for compatibility with SARK 110 not used in the SARK 110 ULM Example 600M 500 KHz 0 1 0 9 3 4 0 2 0 5 160M 1 8 MHz 1 3 2 3 4 5 1 8 2 0 80M 3 6 MHz 1 6 5 6 5 6 3 5 3 8 60M 5 3 MHz 3 3 7 3 5 6 5 2 5 5 40M 7 1 MHz 5 1 9 1 5 6 7 0 7 2 30M 10 1 MHz 8 1 12 1 5 6 10 1 10 2 HF RFID 11 5 15 5 5 6 13 0 14 0 20M ...

Page 67: ...near Lp 100 100 Linear High Min Max Scale Rs 10 5000 Log Xs 2500 2500 Linear Rp 10 5000 Log Xp 2500 2500 Linear Zs 10 5000 Log Zs 100 100 Linear VSWR 1 00 100 00 Log RL 60 0 Log CL 0 30 Log Rho 0 1 0 Linear Rho 190 190 Linear Rp 0 100 Linear Q 0 50 Linear Cs 100000 100000 Linear Ls 1000 1000 Linear Cp 100000 100000 Linear Lp 1000 1000 Linear Low Min Max Scale Rs 0 250 Linear Xs 125 125 Linear Rp 0...

Page 68: ...txt Scale High scal_hig txt Scale Low scal_low txt Scale Auto scal_aut txt The files must contain an entry for each parameter with the following syntax min max log Y N Note that logarithmic scales do not accept negative ranges Example file name scal_def txt 10 1000 Y Rs 500 500 N Xs 10 1000 Y Rp 500 500 N Xp 10 1000 Y Zs 100 100 N Zs 1 00 25 00 Y VSWR 40 0 N RL 0 20 N CL 0 1 0 N Rho 190 190 N Rho ...

Page 69: ... txt and the format for each cable entry in the file is as follows legend Z0 VF K0 K1 K2 Where o legend string to be display in the preset menu max length 20 o Z0 characteristic impedance o VF velocity factor o K0 DC resistance dB 100ft o K1 coefficient for conductor loss dB 100ft o K2 coefficient for dielectric loss dB 100ft Example Test cable 1 50 0 68 0 063897 0 192292 0 000051 Test cable 2 60 ...

Page 70: ...ower measurements 14 dBm Output power signal generator 14 dBm Low and 9 dBm High Test port connector type SMA Measured parameters VSWR Rs Xs Rp Xp Zs Zs RL CL Rho Rho Ref PWR Q Cs Cp Ls Lp Reactance sign measurement Yes Narrowband detectors Two narrowband detectors Two 12 bit ADCs Return loss dynamic range 0 to 60 dB Measurement limits VSWR 100 1 Z 100K R 100K X 100K Rho 0 98 C 100 nF L 100 mH 180...

Page 71: ...e of measurements configuration and firmware upgrades OSL Calibration 8 Calibration profiles 400 points USB Micro USB connector Mass Storage class HID class Wireless interface Short range Bluetooth Low Energy Battery Li Poly 1000 mAh Internal battery charger 8 hour autonomy 3 5 hour charge Charge via USB Modes Scalar chart Smith chart Single frequency SWR Multiband Cable test TDR Signal generator ...

Page 72: ...figurable presets for amateur bands Marker Save load data Deep sweep save with timer function VSWR Audible feedback Transmission line add subtract Circuit modes loop antenna capacitor crystal transmission line Dimensions 105 67 15 mm Weight 110 g Package contents SARK 110 ULM x 1 with built in battery ...

Page 73: ... 2018 Melchor Varela EA4FRB SARK Plots client Copyright c 2013 2018 Melchor Varela EA4FRB SARK 110 series embedded firmware uses the following licensed source code o SARK 110 ULM only glcd Graphic LCD Library Copyright c 2012 Andy Gock o FatFS Copyright c 2009 ChaN all right reserved o STM32 firmware and USB library c Copyright 2011 STMicroelectronics The analyzer schematics and layout have been d...

Reviews: