


Rostock MAX v2 Assembly Guide
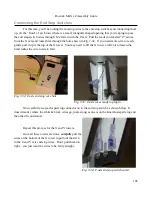
Assembling the U-Joint Carriers
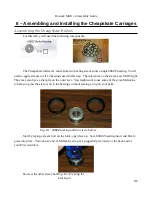
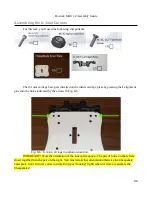
For this task, you'll need the following components:
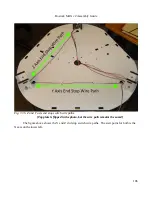
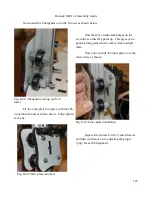
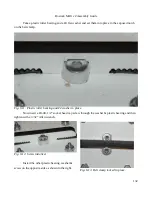
The U-Joint carriage base gets installed on the inside carriage plate by pressing their alignment
pins into the holes indicated by the arrows in Fig. 8-6.
IMPORTANT! Note the orientation of the inner plate above. The pair of holes on the left are
closer together than the pair on the right. You must retain this orientation otherwise the Cheapskate
outer plate won't fit in it's correct orientation (eyes “looking” right) when it's time to assemble the
Cheapskates!
118
Fig. 8-6: U-Joint carriage installation location.
Summary of Contents for Rostock MAX v2
Page 25: ...Rostock MAX v2 Assembly Guide Melamine Parts Sheet 1 25 ...
Page 26: ...Rostock MAX v2 Assembly Guide Melamine Parts Sheet 2 Melamine Parts Sheet 3 26 ...
Page 27: ...Rostock MAX v2 Assembly Guide Melamine Parts Sheet 4 27 ...
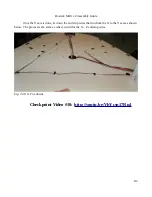
Page 171: ...Rostock MAX v2 Assembly Guide 171 Fig 14 8 Spool holder support installed ...