


Rostock MAX v2 Assembly Guide
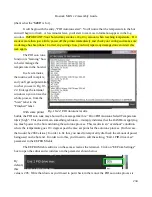
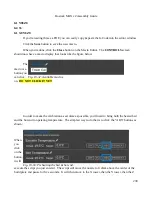
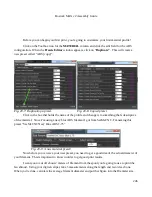
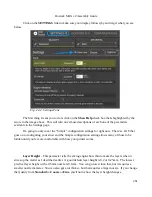
field. It may be less than 1.75mm, but shouldn't be any more than 1.8mm. If you have any
measurements of 1.8mm or greater on your filament, it may bind in the hot end. In my case, the
filament average was 1.72, so that's what I entered.
After you've updated the filament diameter, click
Save
to commit your changes. When the
editor window is dismissed, you'll see your new material preset in the list!
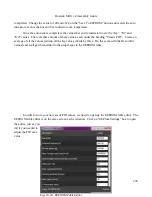
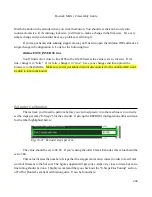
Click
Close
to dismiss the
Presets Editor
and we'll move on to the next step, printing your first
part!
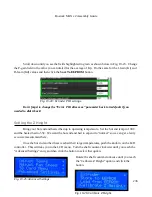
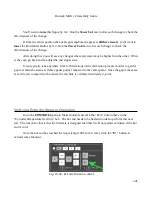
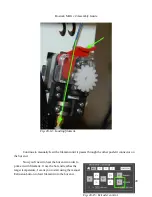
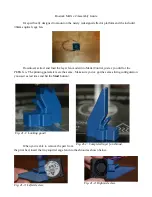
Printing The PEEK Fan Shroud
If you downloaded the MatterControl presets file, you can skip downloading the file from
Repables.
and click the “Download” link. When the download is
finished, unzip the file. This is the STL file that MatterSlice will process and turn into your first print!
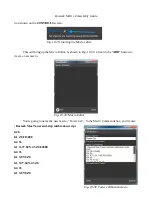
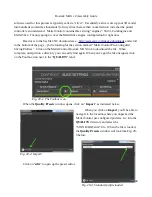
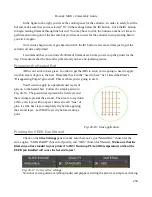
When you've got the file downloaded, you can load it into MatterControl by clicking on the
“
Add
” button and selecting the STL file you want.
247
Fig. 20-10: Updated filament diameter.
Fig. 20-11: New material preset!
Fig. 20-12: Loading an STL file.
Summary of Contents for Rostock MAX v2
Page 25: ...Rostock MAX v2 Assembly Guide Melamine Parts Sheet 1 25 ...
Page 26: ...Rostock MAX v2 Assembly Guide Melamine Parts Sheet 2 Melamine Parts Sheet 3 26 ...
Page 27: ...Rostock MAX v2 Assembly Guide Melamine Parts Sheet 4 27 ...
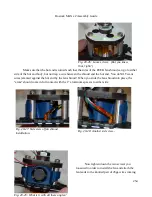
Page 171: ...Rostock MAX v2 Assembly Guide 171 Fig 14 8 Spool holder support installed ...


