background image

NOTE:
This equipment has been tested and found to comply with the limits for a Class B digital device
pursuant to part 15 of the FCC Rules. These limits are designed to provide reasonable protection
against harmful interference in a residential installation. This equipment generates, uses and can
radiate radio frequency energy and, if not installed and used in accordance with the instructions,
may cause harmful interference to radio communications. However, there is no guarantee that
interference will not occur in a particular installation. If this equipment does cause harmful interference
to radio or television reception, which can be determined by turning the equipment off and
on, the user is encouraged to try to correct the interference by one or more of the following measures:
- Reorient or relocate the receiving antenna.
- Increase the separation between the equipment and receiver.
- Connect the equipment into an outlet on a circuit different from that to which the receiver is
connected.
- Consult the dealer or an experienced radio/TV technician for help.
FCC and Safety Information


Important Safety Instructions

1. Read these instructions.
2. Keep these instructions.
3. Heed all warnings.
4. Follow all instructions.
5. Do not use this apparatus near water.
6. Clean only with a damp cloth.Please unplug power.
7. Do not block any of the ventilation openings. Install in accordance with the manufacturer’s
instructions.
8. Do not install near any heat sources such as radiators, heat registers, stoves, or other
apparatus (including amplifiers) that produce heat.
9. Do not defeat the safety purpose of the polarized-type plug. A polarized plug has two blades
with one wider than the other. The wide blade is provided for your safety. When the provided
plug does not fit into your outlet, consult an electrician for replacement of the obsolete
outlet.
10. Protect the power cord from being walked on or pinched particularly at plug, convenience
receptacles, and the point where they exit from the apparatus.
11. Only use attachments/accessories specified by the manufacturer.
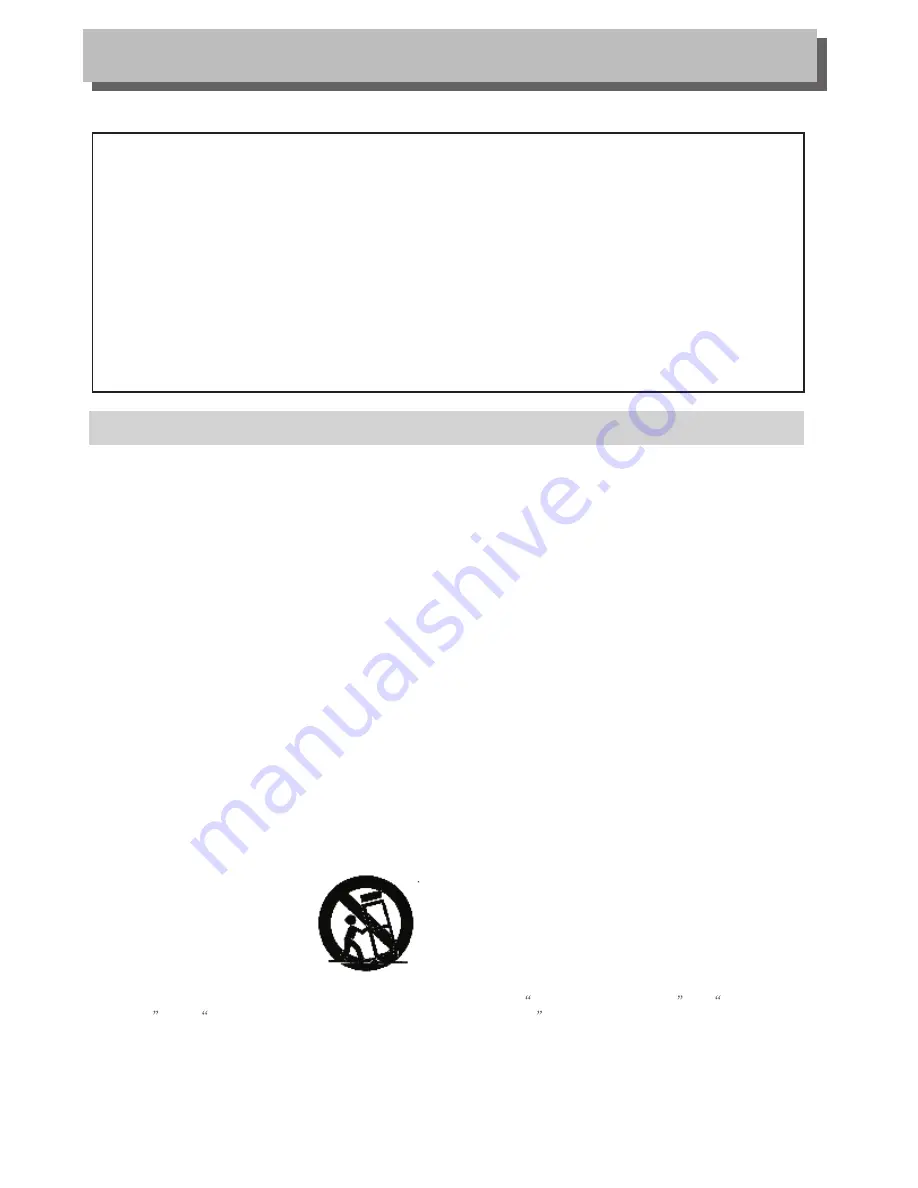
12. Use only with a cart, stand, tripod, bracket, or table specified by the manufacturer or sold
with the apparatus. When a cart is used, use caution when moving the cart/apparatus
combination to avoid injury from tip-over.
13. Unplug this apparatus during lighting storms or when unused for long periods of time.
14. Refer all servicing to qualified service personnel. Servicing is required when the apparatus
has been damaged in any way; such as when the power-supply cord or plug is damaged, liquid
has been spilled or objects have fallen into the apparatus, the apparatus has been exposed to
rain or moisture, does not operate normally, or has been dropped.

FCC and Safety Information

A Class II APPARATUS shall be permanently marked with the words

DOUBLE INSULATION

 or 

Double

insulated

 and 

hen servicing use only identical replacement parts.

WARNING: To reduce the risk of fire or electric shock, do not expose this apparatus to rain or
moisture. The apparatus shall not be exposed to dripping or splashing and that no objects filled
with liquids, such as vases, shall be placed on the apparatus.

Summary of Contents for DTR 705

Page 1: ...USER MANUAL DTR 705 English DVB T Set Top Box DTR 705 ...

Page 2: ...at registers stoves or other apparatus including amplifiers thatproduce heat 9 Do not defeat the safety purposeof the polarized type plug A polarized plughas two blades with one widerthan the other The wide bladeis provided foryour safety When theprovided plug does notfit into youroutlet consult an electricianfor replacement ofthe obsolete outlet 10 Protect thepower cord frombeing walked onor pinc...

Page 3: ...Keep away from water magnet Keep the unitaway from flowervases tubs sinks etc If liquids are spilled into the unit seriousdamage could occur Never bring amagnet or magnetizedobject near theunit Stacking Place the unitin a horizontalposition and donot place anythingheavy on it Condensation Moisture may formon the lensin the followingconditions immediately after a heater has beenturned on in a steam...

Page 4: ... Adjustment OPERATION Accessing the favoritechannels Access the ElectronicProgramme Guide EPG CHANNEL Channel list Channel list menu TV Channel list Radio Channel list Delete All Favorites Delete All Channels SYSTEM SET UP System setup mainmenu OSD Language TV System Start up Service Region and Time Timer Setting OSD Setting Parental Lock TOOLS Tools main menu Information Load Factory Default Remo...

Page 5: ...he TV AUX Scart for connection to a VCR or a satellite receiver TV aerial Loop through for an external TV aerial R F AC Mains 1 INTRODUCTION RS232 AC220 240V 50 60Hz POWER SUPPLY AC 220 240V 50 60Hz POWER CONSUMPTION 10WATTS Art Nr _________ Veseg GmbH Ostring 60 D 66740 Saarlouis Fraulautern DVB T SET TOP BOX DTR 705 Serial port for connection to PC ...

Page 6: ...e up Cursor Enter to selectsub menu from the main menu and channel to select menuand sub menu from the menu and volume Press to enter Yellow Button For teletext function Mute RECALL switch to previous channel EPG Open up Electronic Program Guide menu TTX Open Teletext function DTV VCR Switch between TV and external input through AUX scart EXIT Exit from menu Green Button For teletext function Page...

Page 7: ...ette Recorder VCR TV Scart cable Scart cable Antenna R cable F RS232 Connecting a HiFi system Hi Fi Coaxial cable RS232 3 AC220 240V 50 60Hz POWER SUPPLY AC 220 240V 50 60Hz POWER CONSUMPTION 10WATTS Art Nr _________ Veseg GmbH Ostring 60 D 66740 Saarlouis Fraulautern DVB T SET TOP BOX DTR 705 AC220 240V 50 60Hz POWER SUPPLY AC 220 240V 50 60Hz POWER CONSUMPTION 10WATTS Art Nr _________ Veseg GmbH...

Page 8: ...ge Tuner Power Auto Scan and Main Menu quickly Press to return System setup Press the to enter the setup menu of the STB Press the to select Setup Press the to enter the sub menu Press to select the desired item and press to confirm Press to exit 1 2 3 4 5 System Setup Select Enter Exit OK MENU OSD Language TV System Start up Service Region and Time Timer Setting OSD Setting Parental Lock 4 GETTIN...

Page 9: ...djustment Channel Scan Channel Scan MENU UHF 470 0 478 0 MHz Frequency FFT Modulation GI Exit 40 TV Service Radio Service Your STB will start to scan the desired service or Frequency and the picture shown right is displayed Press the to enter the setup menu of the STB Press to select Installation Press to enter the sub menu Select the Auto Scan and press Auto Scan menu appears Press to select Scan...

Page 10: ... Select Enter Exit OK MENU Auto Scan Channel Scan Aerial Adjustment The signal intensity and quality for the desired channel will display as above When you adjust the location of aerial use this menu to check signal intensity and quality of the selected channel Aerial Adjustment Change MENU 21 On Exit Signal Intensity Signal Quality 65 90 Ch No Tuner Power 6 Main Menu Channel Tools Setup Installat...

Page 11: ...ght Press the numeric button 2 to display the detail informations of current channel EPG Schedule Detail 2 15 02 2006 14 29 Select Page Enter OK Exit MENU 1 14 05 14 55 BBC News Theme News Rate 00 15 00 16 00 BBC News Theme News Rate 00 0001 HN Radio2 0003 BBC Text 0004 BBC Two 0005 BBC CHOICE 0002 BBC NEWS 2 Detail 15 02 2006 14 29 Page Extend Timer 2 BBC NEWS 24 13 00 15 00 BBC News Bill Turnbul...

Page 12: ...s list You can also select the required channel directly from on screen channel list This is displayed using the STB s main menu 1 2 3 4 Selection by EPG You can also select the required channel directly from electronic program guide EPG For EPG details see previous page Channel list menu Main Menu Select Enter Exit Tools Installation Setup OK MENU Channel Channel Select Enter Exit OK MENU TV Chan...

Page 13: ... to cancel favorite group the mark will be cancel too Press to and return to Channel list menu 1 2 3 4 Move In channel list menu press numeric button 2 there will show a moving mark in the right side of the selected channel Press to move the selected channel to the position that you want to place 1 2 5 Favorite 2 OK MENU 1 TV Channel List All Channel Preview Move 3 Find Select Page Enter Exit 4 So...

Page 14: ...ect Page ok Enter 4 Sort 5 Edit Group 0679 SZTV M Input Password Delete In Edit Channel menu press numeric button 1 can make a delete mark in the right side of the highlighted channel After save and exit Edit Channel menu the marked channel will be deleted Press 1 again to cancel delete channel Skip In Edit Channel menu press numeric button 2 can make a skip mark in the right side of the highlight...

Page 15: ...irm you change the name of channel successfully After modification highlight Save item and press to save the modified value and exit Edit mode Highlight Exit item and press to exit Edit mode and won t save any modification Video PID Audio PID and PCR PID items are grey and can not be edited NOTE Radio Channel list Enter Channel menu Press to highlight Radio channel list Press the Radio channel lis...

Page 16: ...te all favorite channels Yes No Highlight Yes to confirm Highlight No to cancel Use this menu to delete all favorite channels Enter Channel menu Press to highlight Delete All channels item Press the you will be asked to input the password Input the password using the numeric buttons a warning window is displayed 1 2 3 4 5 Warning Do you really want to delete all channels Yes No Highlight Yes to co...

Page 17: ... System Setup menu highlight OSD Language Press the sub menu appears Press to select the desired item and press to setup the desired language Press to confirm 1 2 3 OSD Language 4 To select your desired OSD language First Audio Some channels have more than one audio language for choosing use this function you can set the first audio for this channel If the playing channel has the same audio as the...

Page 18: ...ode is used for switching the screen aspect ratio mode Auto PAL NTSC Auto switch to TV System PAL TV System NTSC TV System Auto 4 3PS 4 3LB 16 9 Auto switch to Aspect Ratio 4 3 Pan Scan 4 3 Letter Box 16 9 Wide Screen Dolby Digital Dolby Digital to set AC3 on or off Video Output Video Output is use for switching the video output mode RGB CVBS Set to output RGB video signal Set to output CVBS video...

Page 19: ...tup the desired selection Press to confirm Press to exit 1 2 3 GMT Usage 4 This item is use for open the usage of GMT There are three mode for using Off User Define By Region press to switch GMT Offset This item is valid only when the setting of GMT Usage is Uesr Define Press to switch GMT Offset value and the range is 12 00 12 00 increase each half hour progressively Date Time Date and Time items...

Page 20: ...o default timer setting If you enter this menu you will be asked to input password the default password is 0000 After input password a confirmation window appears All Timers will be cleared continue No Yes Highlight Yes or No and press OK to confirm or cancel Various time can be set such as program time Sleep time Enter System Setup menu highlight Timer Setting Press the Timer Setting menu appears...

Page 21: ... and reset parameters as default value OSD Setting Select Change Exit MENU Subtitle Display OSD Timeout OSD Transparency On 5 Off Load Default OSD Setting 17 SYSTEM SET UP MENU Parental Lock The parental lock allows you to password protect channels groups of menus or allow access to all menus Enter System Setup menu highlight Parental Lock you will be asked to input password the default password i...

Page 22: ...formation Game Load Factory Default Software Upgrade Remote Control Help Welcome Page Information Enter Tools menu highlight Information Press the information window appears Press to exit 1 2 3 18 Information Exit MENU Scan Band 2006 08 21 bootloader 0 2 0 Scan Band 2006 09 26 maincode 0 4 0w2 2005 12 23 videoback 1 0 0 Scan Band radioback 1 0 0 Scan Band default db 0 1 0 user db 1 0 0 2005 12 23 ...

Page 23: ...hat user added continue Yes No Highlight Yes to confirm STB will return back to factory settings and clear all channels Highlight No to cancel back to factory settings Press to Exit 4 5 MENU 19 Tools Remote Control Help This function can show the description of each button on the screen Enter Tools menu highlight Remote Control Help Press the help menu appears Press any button on the remote contro...

Page 24: ...Veseg GmbH Ostring 60 D 66740 Saarlouis Fraulautern www SEG tv ...

Reviews: