Smart Positioner
SP740 Series
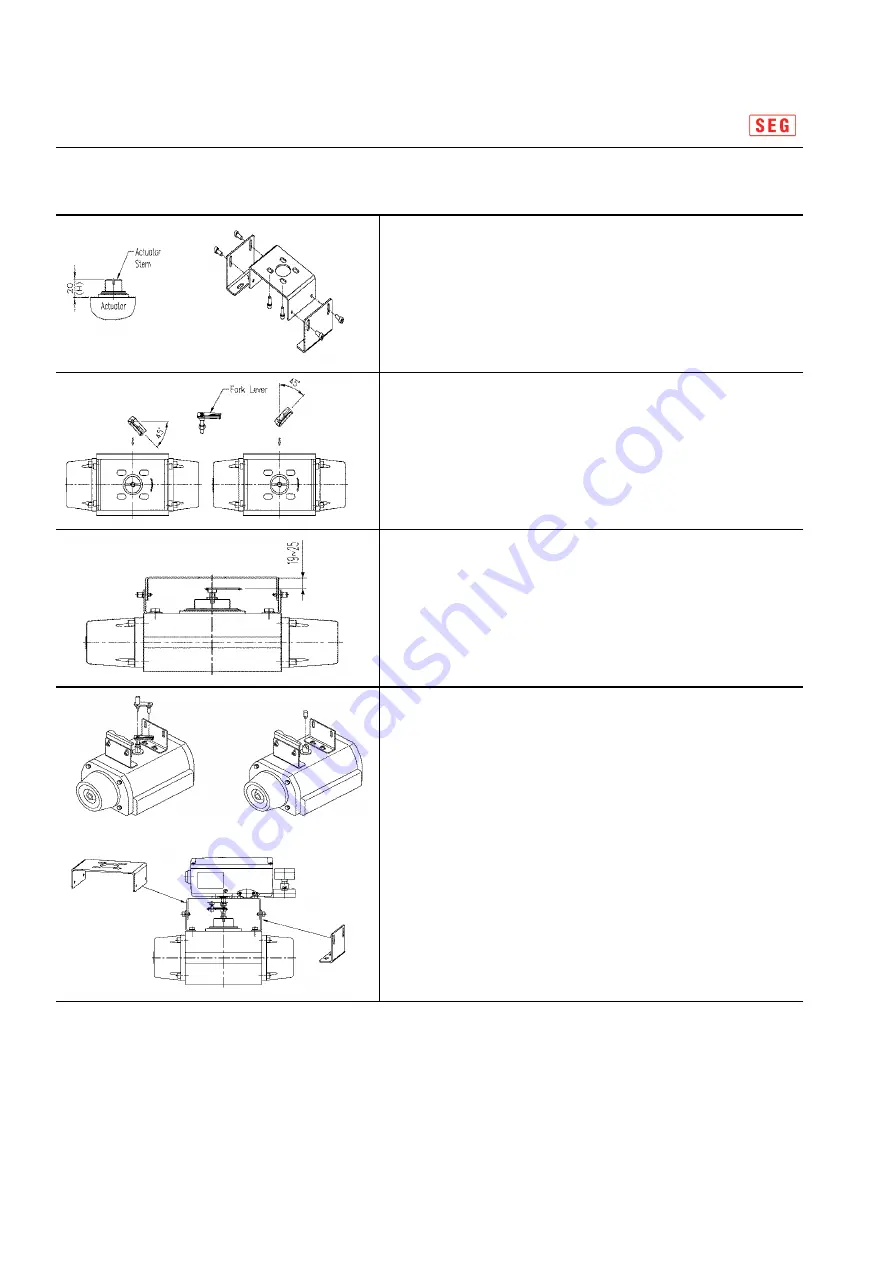
3.4.2 Rotary Positioner Installation Step
①
Connect upper/lower bracket assemblies onto an actutor
with bolts. Note the positioner manufacturer does not supply
bolts to fix an actuator.
②
With an actuator's initial start point of 0%, install the
fork lever as seen in figure according to the rotation
direction of stem.
Make sure the installation degrees of fork lever
Should be 45 degrees from the horizontal axis.
③
If fork lever position is setting , tighten the nuts,
which is assembled with the lower part of fork lever,
to an actuator stem firmly. At the moment, fork lever
upper side and the upper bracket's distance should be
19 to 25 mm each other.
Actuator
Lower/upper bracket
Clockwise / counterclockwise
Fork lever assembling height
setting
22/40
④
Attach the positioner onto upper bracket and fix it with bolts.
At the moment, insert the pin on the lower part of
the fork lever into the hole of fork lever so to be centered.
When tightening bolts, do not tighten ane bolt firmly
and after loosing 4 pcs of bolt slightly and
after checking positioner's connection, connect bracket
completely.
※
Namur type installation is very simple because there is
sufficient length and end of shaft is machined
so that it may be insert into actuator stem pin directly.
FORK LEVER TYPE
NAMUR TYPE
22/40


