2-45
2
Basic oper
a
tion
Media installation and removal
STEP2
Inputting the correction value
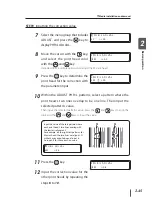
7
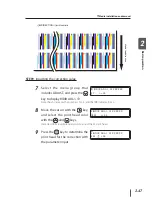
Select the menu group that includes
ADJUST, and press the
key to
display PH R/L ADJ VAL.
P H R / L A D J V A L
# Y > + 0 0
#
8
Move the cursor with the
key,
and select the print head color
with the
and
key.
# P H R / L A D J V A L
M > + 0 0
#
Here describes a sample operation to adjust the M print head.
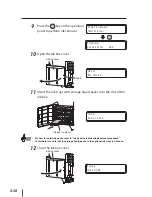
9
Press the
key to determine the
print head for the correction with
the parameter input.
# P H R / L A D J V A L
# M + 0 0
*
10
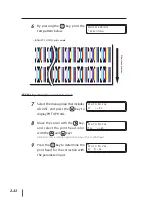
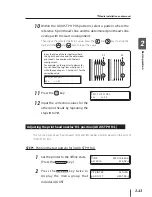
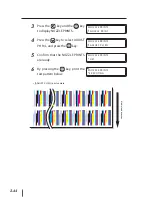
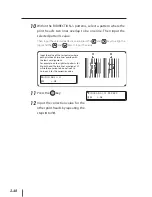
Within the ADJUST PH R/L patterns, select a pattern where the
print head’s two lines overlap to be one line. Then input the
selected pattern’s value.
Then input the selected pattern’s value, press the
and
keys to align the
digit, and the
and
keys to input the value.
-8
-21
M
M
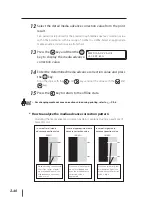
Input the value of the test pattern where
each print head’s two lines overlap with
the least misalignment.
For example, on the right test patterns for
M print head, the two lines misalign at -21
while they overlap to be one line at -8.
So input -8 for the correction value.
# P H R / L A D J V A L
# M > - 0 8
11
Press the
key.
# P H R / L A D J V A L
M > - 0 8
#
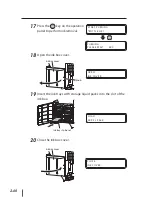
12
Input the correction value for the
other print heads by repeating the
steps
6
to
10
.

