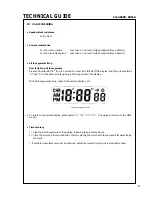


10
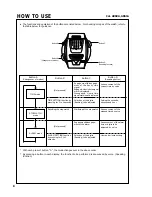
HOW TO USE
Cal. A861A
•
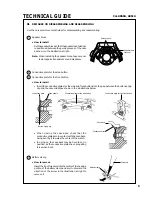
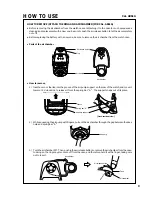
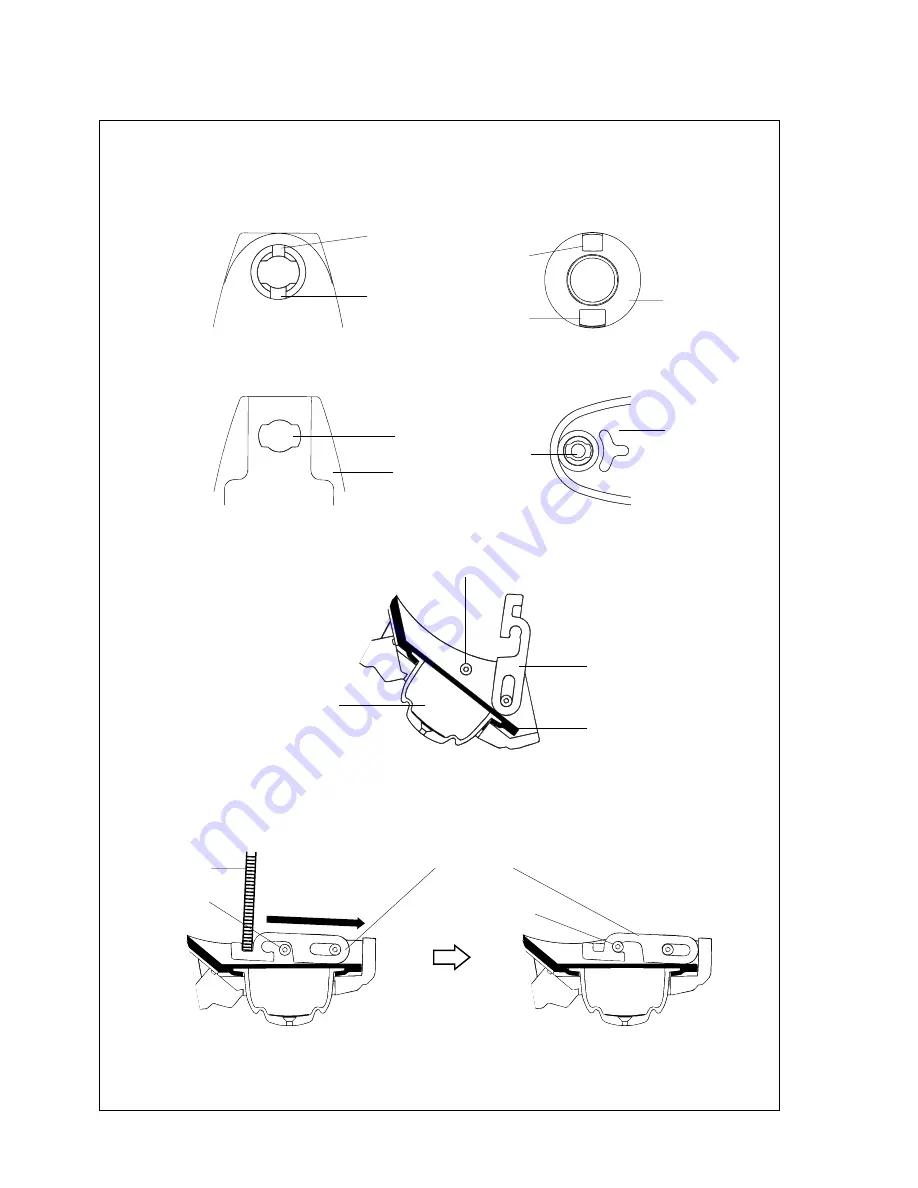
How to attach
1)
Set the ring at the 12 o’clock side of the case.
* The two protruding portions of the ring differ in size. Check that they are set to the hollows of the
corresponding sizes.
Ring (Rear side)
Smaller hollow
Smaller protruding portion
Larger protruding portion
Larger hollow
2)
While holding the ring with a finger, turn the case over, set the air release button to the slot of the case,
and turn the air chamber 90
°
to fix the ring to the case.
Slot
Case
Air release button
Air chamber
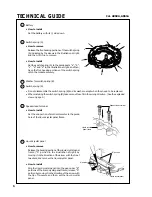
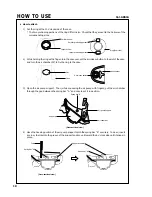
3)
Open the air pump support. Then, while squeezing the air pump with fingers, put the air chamber
through the gap between the spring bar “A” and case to set it in position.
Air chamber
Air pump support
[Cross-sectional view]
Spring bar “A”
Air pump
4)
Have the hooking portion of the air pump support catch the spring bar “A” securely. To do so, insert
a coin or the like into the groove of the support and move it toward the 6 o’clock side until it snaps in
place.
[Cross-sectional view]
Coin
Spring bar “A”
Air pump support
Spring bar “A”
Summary of Contents for A860A
Page 11: ......
Page 12: ...99 1 Printed in Japan...