63
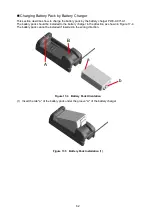
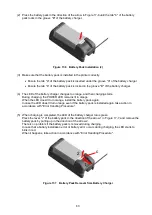
(2) Press the battery pack in the direction of the arrow in Figure 17-6 until the tab "b" of the battery
pack locks in the groove "B" of the battery charger.
Figure 17-6 Battery Pack Installation (2)
(3) Make sure that the battery pack is installed in the printer correctly.
•
Ensure the tab "a" of the battery pack is inserted under the groove "A" of the battery charger.
•
Ensure the tab "b" of the battery pack is locked in the groove "B" of the battery charger.
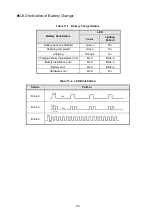
(4) The LED of the battery charger changes to orange, and then charging starts.
During charging, the POWER LED remains lit in orange.
When the LED doesn't turn orange, install the battery pack again.
In case the LED doesn't turn orange even if the battery pack is installed again, take action in
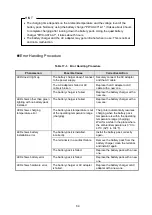
accordance with "Error Handling Procedure".
(5) When charging is completed, the LED of the battery charger turns green.
Press the lever "c" of the battery pack in the direction of the arrow 1 in Figure 17-7, and remove the
battery pack by pulling up in the direction of the arrow 2.
There is no problem if the battery pack is removed during charging.
In case that a battery installation error or battery error occurs during charging, the LED starts to
blink in red.
When it happens, take action in accordance with "Error Handling Procedure".
Figure 17-7 Battery Pack Removal from Battery Charger
c
1
2

