9H
12H
3H
6H
TECHNICAL GUIDE
Cal. V157A/V158A
8/8
4
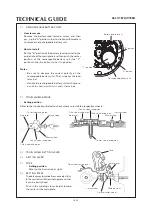
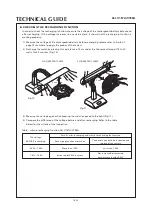
HOLDING RING FOR DIAL
• Disassembling
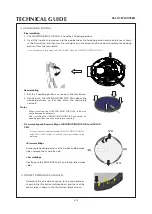
. The HOLDING RING FOR DIAL is fixed by 4 hooking portions.
2. Insert the tip of a screwdriver into the gap between the hooking portion and main plate as shown
in the illustration, and then turn the screwdriver in the direction of the arrow to release the hooking
portion from the main plate.
* It is not necessary to remove the SOLAR CELL from the HOLDING RING FOR DIAL.
• Reassembling
. Set the 4 hooking portions as shown in the illustration.
2. Gently push the HOLDING RING FOR DIAL above the
hooking portions so that they catch the main plate
securely.
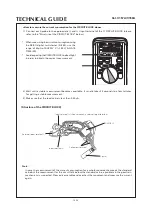
• When installing the HOLDING RING FOR DIAL, take care
not to damage or deform it.
• After installing the HOLDING RING FOR DIAL, check that all
hooking portions catch the main plate secuirely.
Notes:
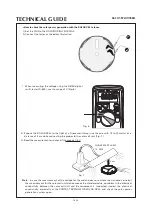
• Disassembling and Reassembling of HOLDING RING FOR DIAL and SOLAR
CELL
* It is not necessary to disassemble HOLDING RING FOR DIAL
and SOLAR CELL except in the case that a part needs to be
replaced.
<Disassembling>
As there are hooking portions at 2 o'clock and 6 o'clock
sides, release them side by side.
<Assembling>
Gently push the SOLAR CELL at 2 o'clock and 6 o'clock
sides.
6
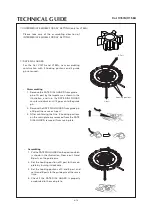
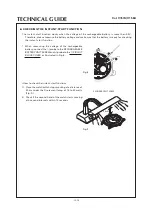
CONTACT SPRING FOR SOLAR CELL
Assemble the one side of spring to the main plate as
shown in the illustration (white arrow), and then set the
other side as shown in the illustration (black arrow)


