■
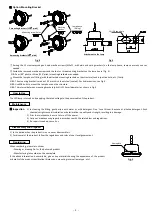
Option: Mounting Bracket
Fasten the removed machine screws and the four or three mounting brackets on the lamp house (Fig. 3).
NB: Four (90° pitch) or three (120° pitch) mounting brackets are needed.
Mount the lamp house (fitting) with the attached mounting brackets on the structure (tank inspection hole, etc.) firmly.
NB1: The mounting bracket is made of 3.2 mm-thick sheet steel (coated). For its dimensions, see Fig. 4.
NB2: Use M8 bolts to mount the lamp house on the structure.
NB3: The interval between mounting brackets (pitch) is 213mm (diameter) as shown in Fig. 4.
The LED lamp is turned on by applying the rated voltage to the power cable of the product.
■
Inspection
1)
2) Prior to maintenance, be sure to turn off the power.
3) Carry out maintenance properly in accordance with the related law and regulations.
4) If a repair is needed, consult us.
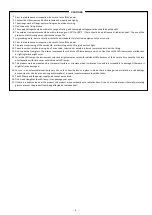
1) In the period when the product is in use, never disassemble it.
2) For disposal of the product, follow the regulations and rules of your local government.
When reordering, please let us know:
・
Drawing or drawing No. for the delivered product
・
Manufacturing lot number on the nameplate
Fig.4
How to Use
Maintenance
In cleaning the fitting, gently wipe with water or mild detergent. Don
’
t use thinner, benzene or alkaline detergent. Such
chemicals might cause discoloration or deterioration in quality and strength, resulting in a damage.
Disassembly and Disposal
Reordering
Fig.3
Among the 12 cross-recessed pan head machine screws (M5x12, with plain and spring washers) on the lamp house, remove as many ones as
needed.
If the above information is unavailable, give us any material showing the appearance of the product
or details of the product specification (dimensions, mounting interval, lamp type, etc.).
Fig.5
Nameplate
3 mounting brackets (120
°
pitch)
4 mounting brackets(90
°
pitch)
Mounting
bracket
Lamp house
(fitting)
Mounting screw holes
Attachment to the Lamp
14
×
26Long hole
- -


