U.4.55
Date Code 20020501
User’s Guide
SEL-421/SEL-421-1 Relay
Basic Relay Operations
Operating the Relay Inputs and Outputs
This example assumes that you have successfully established communication
with the relay; see
Making an EIA-232 Serial Port Connection on page 4.6
for
a step-by-step procedure. In addition, you must be familiar with relay access
levels and passwords. See
Changing the Default Passwords: Terminal on
to change the default access level passwords.
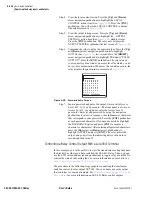
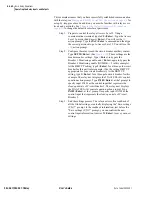
Step 1. Prepare to control the relay at Access Level 2. Using a
communications terminal, type
ACC<Enter>
. Type the Access
Level 1 password and press
<Enter>
. You will see the =>
action prompt. Type the
2AC<Enter>
command, and then type
the correct password to go to Access Level 2. You will see the
=>> action prompt.
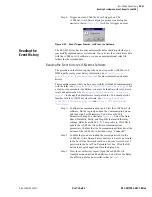
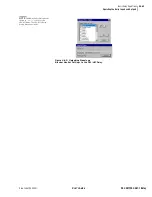
Step 2. Access the local control settings. Type
SET F <Enter>
command. Repeatedly type
>
and then
<Enter>
to advance
through the front-panel settings until you reach the Display
Points and Aliases category. Press
<Enter>
to access the
Control Points and Aliases Category.
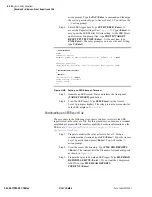
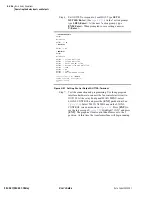
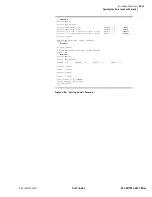
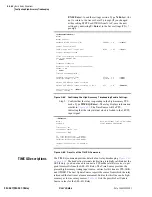
shows a
representative terminal screen.
Control Points and Aliases
(Local Bit, Alias Name, Alias for Set State, Alias for Clear State,
Pulse Enable)
1:
?
LIST<Enter>
1:
?
LB03,"5 MVA XFMR Fans",”ON”,”OFF”,N<Enter>
2:
?
END<Enter>
•
•
•
Control Points and Aliases
(Local Bit, Alias Name, Alias for Set State, Alias for Clear State,
Pulse Enable)
1: LB03,"5 MVA XMFR Fans","ON","OFF",N
Save settings (Y,N) ?
Y<Enter>
Saving Settings, Please Wait...........
Settings Saved
=
>>
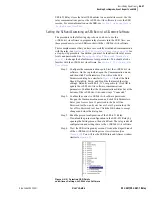
Figure 4.50
Using Text-Edit Mode Line Editing to Set Local Bit 3.
Step 3. List the active control points. Type
LIST<Enter>
at the Local
Control and Aliases prompt, This example assumes that you are
using no local bits, so the relay returns you to line “1:”
followed by the “?” settings action prompt.
Step 4. Create Local Bit 3. Type
LB03,“5 MVA XFMR
Fans”,“ON”,“OFF”,N<Enter>
at the line 1 prompt:
1:
LB03,“5 MVA XFMR Fans”,“ON”,“OFF”,N<Enter>
The relay checks that this is a valid entry and responds with the
next line prompt “2:” followed by the “?” settings action
prompt.
Step 5. End the settings session. Type
END<Enter>
. The relay scrolls
a readback of all the front-panel settings, eventually displaying
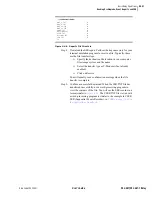
the “Save settings (Y,N) ?” prompt. (In
a vertical
ellipsis represents the readback.) At the end of the readback
information, just before the “Save settings (Y,N) ?” prompt,
you can see the new local bit information. Answer
Y<Enter>
to save your new settings.
Summary of Contents for SEL-421
Page 8: ...This page intentionally left blank ...
Page 30: ...This page intentionally left blank ...
Page 110: ...This page intentionally left blank ...
Page 204: ...This page intentionally left blank ...
Page 284: ...This page intentionally left blank ...

