background image

INSTRUCTIONS MANUAL    


CODE 80170    

REV F       


02/2021             Pag. 14 

J

.P.  SELECTA s.a.u. 


Autovía A2 Km 585.1 Abrera  08630  (Barcelona) España 

Tel (34) 93 770 08 77  Fax (34) 93 770 23 62

 e-mail: selecta@jpselecta.es -  http://www.grupo-selecta.com

1. GENERAL INSTRUCTIONS

1)  To prevent injury or damage to the unit, the appliance should be unpacked 

and set up by two people.

2)  In the event that the appliance is damaged on delivery, contact the supplier 

immediately before connecting to the mains.

3)  To guarantee safe operation, ensure that the appliance is set up and con-

nected as described in these operating instructions.

4)  Disconnect the appliance from the mains if any fault occurs. Pull out the 

plug, switch off or remove the fuse.

5)  When disconnecting the appliance, pull on the plug, not on the cable.

6)  Any repairs and work on the appliance should only be carried out by the 

customer service department, as unauthorised work could prove highly 

dangerous for the user. The same applies to changing the mains power 

cable.

7)  Do not stand on the plinth, drawers or doors or use them to support an

-

ything else.

8)  If you have a lockable appliance, do not keep the key near the appliance 

or within reach of children.

9)  Do not store explosives or sprays using combustible propellants such as 

butane,  propane,  pentane  etc.  in  the  appliance.  Electrical  components 

might cause leaking gas to ignite. You may identify such sprays by the 

printed contents or a flame symbol.

10) The noise level while the appliance is operating is below 70db(A) (relative 

noise level 1 pW).

2. SETTING UP

1)  Avoid positioning the appliance in direct sunlight or near cookers, radiators 

and similar sources of heat.

2)  The floor on which the appliance stands should be horizontal and level. 

To compensate for any unevenness, adjust the height of the feet. 

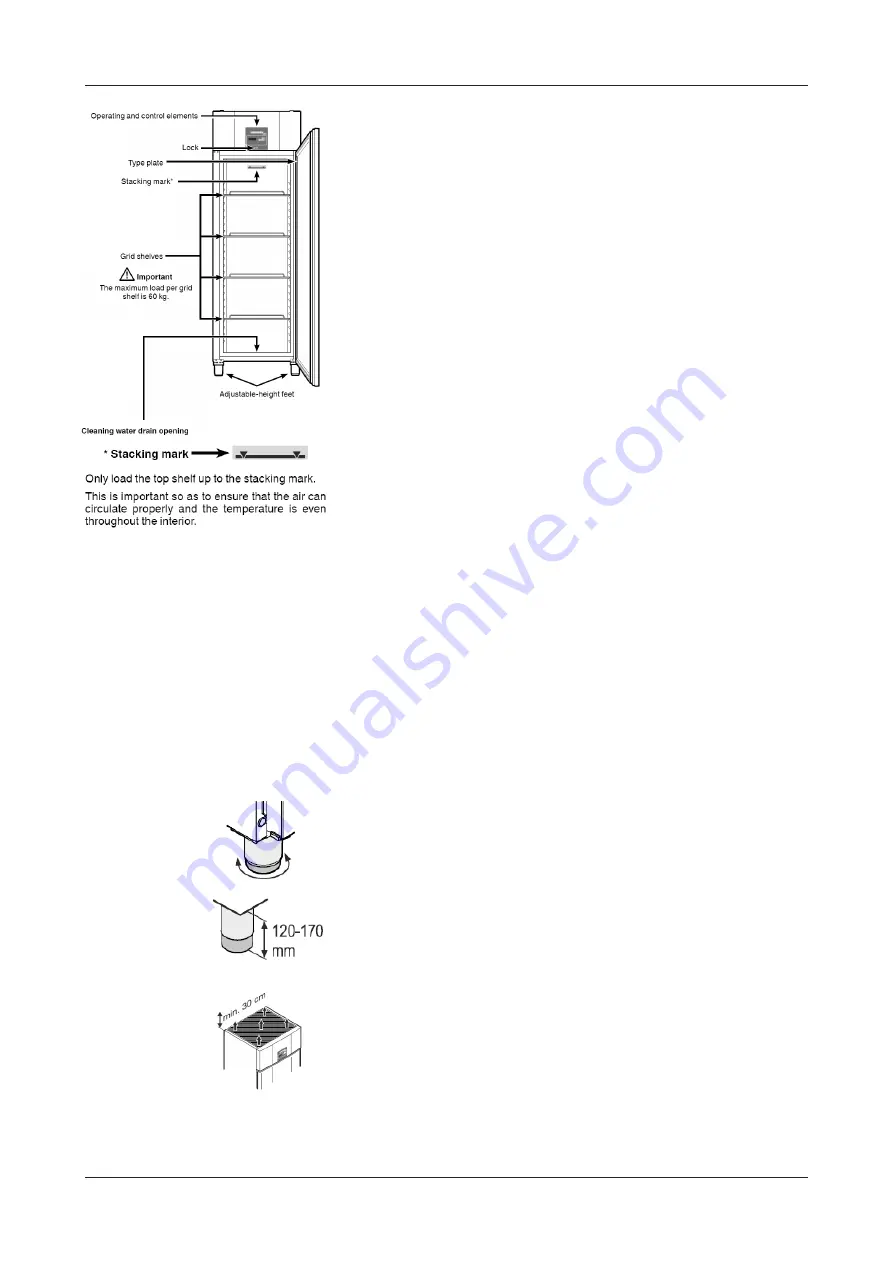
To alter 

the height, rotate the bottom section of the respective adjustable foot

WARNING!

The height of the foot can be adjusted from 120 mm to 170 mm.

Do not set the adjustable foot to a height greater than 170 mm!

The bottom section of the adjustable foot can become loose and the 

appliance may then tip over.

This can lead to serious or even fatal injuries.

3) There must be a gap of at least 30 cm between the upper edge of the 

appliance and the ceiling.


  Do not cover ventilation openings or grille.

Summary of Contents for 2101280

Page 1: ...0 REV F 02 2021 Pag 1 J P SELECTA s a u Autovía A2 Km 585 1 Abrera 08630 Barcelona España Tel 34 93 770 08 77 Fax 34 93 770 23 62 e mail selecta jpselecta es http www grupo selecta com TEMPLOW L 2101280 ARMARIO CONGELADOR UPRIGHT FREEZER ...

Page 2: ...PO 4 6 PANEL DE MANDOS 5 7 CONEXIÓN DESCONEXIÓN 5 8 AJUSTE DE TEMPERATURA 5 9 ALARMAS 5 10 DESCONGELACIÓN 7 11 LIMPIEZA 8 12 DESCONEXION POR AUSENCIA PROLONGADA 8 13 AVERÍAS 9 14 CAMBIO DE GOZNES APERTURA DE PUERTA 10 Index 1 GENERAL INSTRUCTIONS 14 2 SETTING UP 14 3 DIMENSIONS 15 4 ELECTRICAL CONNECTION 15 5 EQUIPMENT 15 6 CONTROL PANEL 16 7 SWITCHING ON OFF 16 8 TEMPERATURE SETTINGS 16 9 ALARMS ...

Page 3: ...o de equipos con cerradura nunca guardar la llave en las proximi dades del mismo o al alcance de los niños 9 Este equipo no sirve para almacenar materias explosivas o envases a presión con materiales inflamables como butano propano pentano o similares El gas de un escape fortuito podría inflamarse debido a los componentes eléctricos Tales envases a presión suelen llevar su composición impresa o el...

Page 4: ... daños en el sistema electrónico ADVERTENCIA Con anterioridad a la puesta en marcha se recomienda limpiar a fondo el interior y exterior del equipo véase el apartado de Limpieza Antes de poner en marcha el equipo es imprescindible tapar el orifi cio del desagüe para el agua de limpieza con el tapón que se adjunta Este paso es importantísimo para un correcto funcionamiento del equipo 5 EQUIPO Orifi...

Page 5: ...entos frescos El sistema electrónico retrocede automáticamente al funciona miento normal de regulación Desactivar SuperFrost anticipadamente Pulsar durante 5 seg Indicación Modo de indicación de temperatura La indicación de temperatura se puede cambiar entre grados Celsius y grados Fahrenheit El ajuste de fábrica es en grados Celsius Pulsar durante 5 seg Indicación Pulsar Indicación Seleccionar co...

Page 6: ... al funcionamiento normal de regulación Ajuste del tiempo de retardo de la alarma de apertura de puerta El tiempo hasta que suena el avisador acústico después de abrir la puerta se puede modificar Pulsar durante 5 seg Indicación Pulsar hasta que en el display aparezca Pulsar Indicación Intervalo de ajuste 1 5 minutos Seleccionar con las teclas o el ajuste deseado Pulsar Indicación Pulsar durante 5...

Page 7: ...s teclas o el ajuste deseado 0 Símbolo indicación alternativa de y temperatura actual en el interior del aparato 1 Símbolo temperatura antes de iniciar la fase de des congelación ajuste de fábrica 2 Símbolo Pulsar Indicación Pulsar durante 5 seg El sistema electrónico retrocede al funcionamiento normal de regulación Lectura de la evolución de la temperatura Pulsar Indicación Recorrer la lista con ...

Page 8: ... un paño Para los equipos realizados en acero inoxidable emplear un agente limpiador para acero inoxidable de los habituales en el mercado No emplear esponjas abrasivas ni que rayen no utilizar productos de limpieza concentrados y en ningún caso productos de limpieza que contengan arena ácidos o cloruros ni disolventes químicos ya que dañan las superficies y pueden provocar corrosión Se recomienda...

Page 9: ...aca de características La posición de la placa de características se puede ver en el capítulo Descripción del aparato Desconexión del aparato Sielaparatoestávacíoduranteunperíodoprolongado apagarlo descongelarlo limpiarlo y secarlo y mantener la puerta abierta para evitar el enmohecimiento para la eliminación de aparatos embalaje materiales valiosos y se debe lle ecogida separado de los residuos s...

Page 10: ...mente por personal profesional especializado Para la modificación se precisan dos personas 1 Abrir la puerta aprox en 90 ADVERTENCIA La puerta se debe abrir 90 antes de desmontar el soporte de bisagra inferior Gracias a ello el mecanismo de cierre automático instalado en la puerta se mantiene en una posición necesaria para el montaje ADVERTENCIA Si la puerta se desmonta y se vuelve a montar cerrad...

Page 11: ...o de la bisagra superior 6 Retirar las piezas de apoyo del soporte de bisagra Nota Al retirar el soporte de bisagra puede quedar atascado en la bisagra el manguito con la arandela de latón y el anillo que en este caso deberán ser retirados de allí 7 Cambiar el soporte de bisagra superior y las tapas protectoras al lado opuesto respectivamente 8 Girar la puerta en 180 9 Insertar el anillo y el mang...

Page 12: ... encajarse en las escotaduras de la bisagra En caso necesario girar ligeramente el anillo superior 13 Atornillar el soporte de bisagra 10 Colgar la puerta con un ángulo de apertura de 90 en el cuadradillo superior ADVERTENCIA Es imprescindible montar la puerta con un ángulo de apertura de 90 Si la puerta se monta cerrada la primera vez que se abra y se cierre se destruirá el mecanismo de cierre au...

Page 13: ...CIONES CODIGO 80170 REV F 02 2021 Pag 13 J P SELECTA s a u Autovía A2 Km 585 1 Abrera 08630 Barcelona España Tel 34 93 770 08 77 Fax 34 93 770 23 62 e mail selecta jpselecta es http www grupo selecta com ENGLISH VERSION ...

Page 14: ...r use them to support an ything else 8 If you have a lockable appliance do not keep the key near the appliance or within reach of children 9 Do not store explosives or sprays using combustible propellants such as butane propane pentane etc in the appliance Electrical components might cause leaking gas to ignite You may identify such sprays by the printed contents or a flame symbol 10 The noise lev...

Page 15: ...ee phase current or energy saving plugs Risk of damage to the electronic control system WARNING It is recommended to clean the appliance before switching it on for the first time see Cleaning section Before switching the appliance on for the first time plug the cleaning water drain opening in the floor of the appliance with the plug pro vided This is important to ensure that the appliance works pr...

Page 16: ... fresh food in the appliance The electronic control system will automatically switch back to normal operating mode Prematurely deactivating SuperFrost Press for approx 3 seconds Display Temperatur display mode The temperature display can be switched between degrees Cel sius and degrees Fahrenheit Factory setting is degrees Celsius Press for 5 seconds Display Press Display Use button or to select t...

Page 17: ...vated Press Display Press for 5 seconds The electronic control system will switch back to normal operating mode Settingthedelaytimeforthedooropenalarm The time before the audible warning signal sounds after the door has been opened can be adjusted Press for 5 seconds Display Press until appears in the display Press Display Setting range 1 5 minutes Use button or to select the desired setting Press...

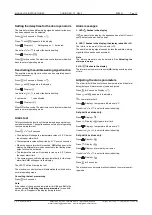
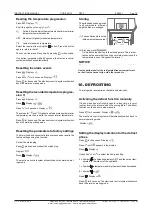
Page 18: ...play of and the current tem perature in the interior of the appliance 1 Symbol temperaturebeforethestartofthedefrostphase 2 Symbol Press Display Press for 5 seconds The electronic control system will switch back to normal operating mode Reading the temperature progression Press Display Scroll through the list using or Periodinhoursinwhichthemaximumandminimuminterior temperatures were measured Maxi...

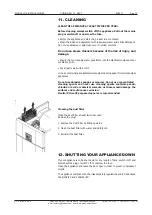
Page 19: ...rts well with a cloth Use a commercially available stainless steel cleaning agent for stainless steel appliances Do not use abrasive sponges or scourers do not use concentrated cleaning agents and never use cleaning agents containing sand chloride or acid or chemical solvents as these would damage the surfaces and could cause corrosion Neutral PH multi purpose cleaners are recommended Cleaning the...

Page 20: ...iance Shutting your appliance down If the appliance is left empty for a lengthy period it must be switched off defrosted cleaned and dried and the door is to be left open to prevent mould formation es ainsreusablematerialsandshould operly not simply with unsorted Appliances which are no longer isposed of in a professional and accordance with the current local ws refrigerant circuit of an appliance...

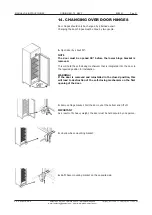
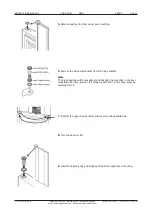
Page 21: ... The door must be opened 90 before the lower hinge bracket is removed This will hold the self closing mechanism that is integrated into the door in the required position for installation WARNING If the door is removed and reinstalled in the closed position this will lead to destruction of the self closing mechanism on the first opening of the door 2 Remove hinge bracket Pull the door out at the bo...

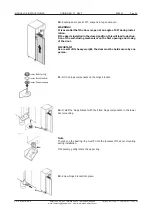
Page 22: ...nsfer the upper hinge bracket and covers to the opposite side 8 Turn the door by 180 9 Insert the bearing ring and hinge bushing in the upper door mounting 5 Remove bearing ring from upper door mounting 6 Remove the hinge components from the hinge bracket Note The hinge bushing with brass washer and bearing ring may stick in the door mounting when you pull out the hinge bracket and in this case mu...

Page 23: ...on If the door is installed in the closed position this will lead to destruc tion of the self closing mechanism on the first opening and closing of the door IMPORTANT As a result of its heavy weight the door must be held secure by one person 11 Fit the hinge components on the hinge bracket 12 Install the hinge bracket with the fitted hinge components in the lower door mounting Note The tabs on the...

Page 24: ...CTIONS MANUAL CODE 80170 REV F 02 2021 Pag 24 J P SELECTA s a u Autovía A2 Km 585 1 Abrera 08630 Barcelona España Tel 34 93 770 08 77 Fax 34 93 770 23 62 e mail selecta jpselecta es http www grupo selecta com ...

Reviews: