13
3. Fit 2D Gimbal and Camera
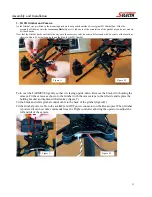
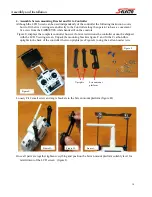
As the Gimbal was pre-fitted to the mounting brackets it has packed outside of its original 2D Gimbal box. Slide the
assembly all the way onto the
Accessory Rails
(figure A), take note of the orientation of the gimbal as you do not want to
fit it backwards.
Now that the Gimbal has been slid all the way onto the accessory rails it needs to be fastened with 4x screws at the locations
shown in figure B. Screws can be found the Box for the 2D Gimbal.
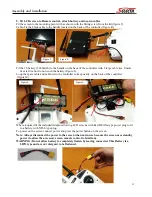
Turn over the FARMEYES gently so that it is laying upside-down. Remove the bracket for holding the
camera. Fit the camera as shown to the Gimbal with the camera lens to the left side and replace the
holding bracket and tighten with allen key (figure C).
Fit the black and white gimbal control cable to the back of the gimbal (figure D).
Fit the Gimbal power cable to the available red JST power connector on the Hexacopter. When Gimbal
is powered it can now take commands from the Flight controller allowing the operator to adjust the
roll and tilt of the camera.
Figure A.
Figure B.
Figure C.
Figure D.
Assembly and Installation


