Page 11
CF ROOF SUPPORT
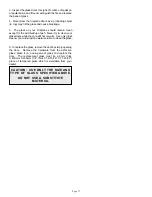
The CF Roof Support can be used with either the CF chimney
or the SS chimney. The Roof Support is located on top of the
joists and is installed after a Radiation/Dust Shield (SS
Model) or an Intermediate Joist Shield (CF Model) is installed
(when required). See figures 17 & 18. Install two carriage
bolts per chimney plate in the square holes. Bend the plate
to suit the curve of the chimney. Using the plate as a
template, drill 3/32" holes in the casing. Attach the plates
using the stainless sheet metal screws provided. Attach the
roof bracket to the chimney plates using the installed
carriage bolts. Set the assembly into position and adjust and
tighten the carriage bolts. Screw the plate to the joist using
the six (6) large wood screws per bracket. The Resupports
can hold up to 9m (30') of chimney, 6m (20') of which can be
suspended.
FIGURE 19
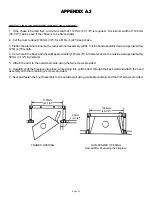
CHIMNEY ADAPTER INSTALLATION
(Model SC, SC-1, SPR, ALT, SS Plus)
FIGURE 20
OFFSET SUPPORTS
(Model CF)
Two supports are offered for the CF chimney; They are the
CF Interior Resupport and the CF Roof Support, described as
follows:
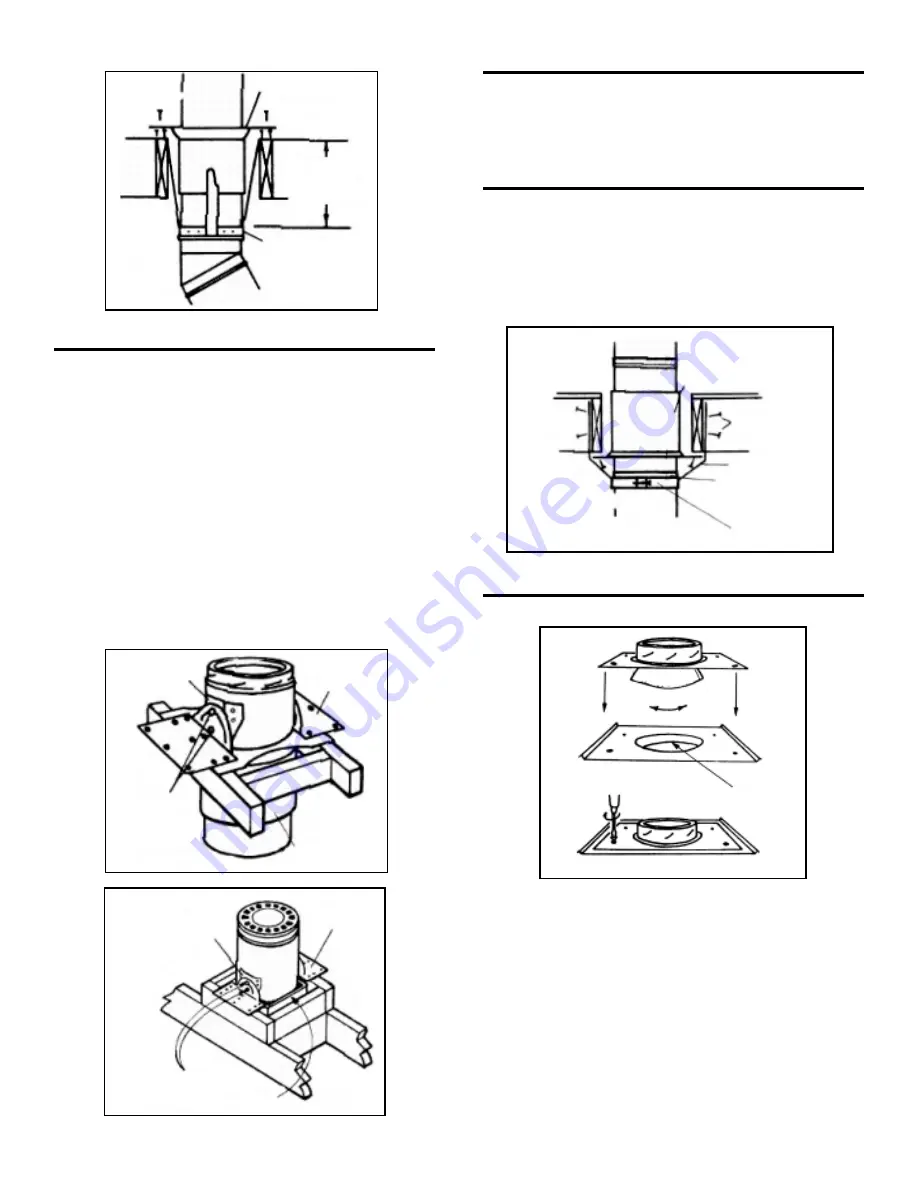
CF INTERIOR RESUPPORT/OFFSET SUPPORT
The CF Interior Resupport/Offset Support can be put below
an Intermediate Joist Shield or an Attic Insulation Shield/
Firestop Spacer. The Interior Resupport band is attached
and tightened below a Locking Band. The straps are then run
along the outside of the joists and nailed to them using eight
(8) 1-1/2" nails (2 per strap).
FIGURE 17
FIGURE 18
CARRIAGE BOLTS
INTERMEDIATE JOIST SHIELD
CHIMNEY
PLATE
ROOF
BRACKET
CARRIAGE
BOLTS
ROOF
BRACKET
CHIMNEY
PLATE
RADIATION
DUST
SHIELD
INTERIOR
RESUPPORT
ASSEMBLY/
OFFSET
SUPPORT
BAND
NAILS
CF
INTERMEDIATE
JOIST SHIELD
LOCKING
BAND
STRAP
FIREPLACE TOP
BEAD
RADIATION
DUST SHIELD
INTERIOR
RESUPPORT
2 NAILS
PER STRAP
303MM (12")
MINIMUM
FIGURE 16
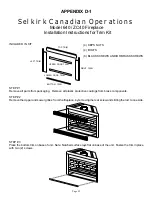
1. Place Adapter over opening at top of your Model 640/ZC40
Fireplace.
2. Twist the Adapter into the opening ensuring the adapter
is completely in place until the bottom edge of the adapter
bottoms out on the top of the bead edge inside the fireplace
flue.
3. Align the Adapter with the four (4) holes on the fireplace
top.
4. Secure the Adapter to the fireplace using the screws
provided.


