Page 12
FIGURE 21
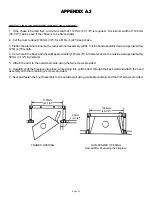
CF ADAPTER/chimney INSTALLATION
(Model CF)
EXTERIOR CHIMNEY INSTALLATIONS
(Models SS Plus, SC, & SPR)
1. On a through the wall installation as shown in figures
6c & 9c, an intermediate wall support is required
immediately above the second elbow which will support up
to 10m (30ft.) of chimney.
2. Install one length of chimney on the second elbow and
secure in place with a locking band. Assemble the
intermediate wall support with the four (4) stove bolt provided
and slide the assembly over the section just installed. Fasten
the intermediate wall support to the wall using four ¼ × 2" lag
bolts, or wood screws so that the hole in the plate is located
in the middle of the chimney section. Install the draw band
around the chimney so that it is securely against the support
plate and supporting the weight of the chimney. Install four
sheet metal screws firmly into the outer casing of the
chimney, through the pre-punched holes in the draw band.
See figure 22.
INTERMEDIATE
WALL SUPPORT
CHIMNEY
LENGTH
FRONT VIEW SIDE VIEW
SUPPORT BAND
FIGURE 22
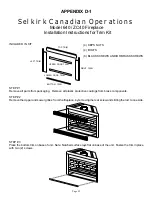
2. Remove plastic retainer to expose insulation.
3. Mount four (4) "L" brackets flush with end edge of casing
and secure with #6 x 3/4" stainless sheet metal screws. Two
per bracket.
4. Position CF chimney on coupler adapter of fireplace. Drill
3/32" holes thru holes in "L" brackets into top and secure
with #6 x 3/4" stainless sheet metal screws. Two per
bracket.
1. Place adapter on fireplace, see Chimney Adapter
Installation.


