6
FIREPLACE INSTALLATION
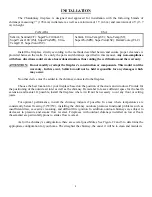
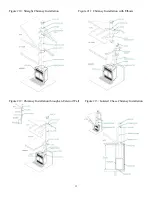
The table below shows the minimum chimney height requirements, fireplace included, according to the
number of elbows:
Chimney
Number of Elbows
Minimum Height
Straight installation
---------------
15’ (4.6 m)
1 - 15° offset
2 - 15° elbows
15’ (4.6 m)
2 - 15° offsets
4 - 15° elbows
18’ (5.5 m)
1 - 30° offset
2 - 30° elbows
15’ (4.6 m)
2 - 30° offsets
4 - 30° elbows
20’ (6.1 m)
* 1 - 45° offset
* 2 - 45° elbows
16’ (4.9 m)
* 2 - 45° offsets
* 4 - 45° elbows
23’ (7.0 m)
* Permitted only in Canada.
1. Before beginning installation, remove the fireplace trim to protect it from damage. The fastening screws are
located behind the upper and lower louvers. Make sure no masonry products or acids come into contact
with the trim as these may discolor the finish which is not under warranty.
2. Remove all combustible floor coverings, e.g. carpeting, linoleum, etc., from the area where the fireplace is
to be installed.
3. The fireplace can be installed directly on the floor or on a platform made of combustible materials, such as
wood or plywood or any other hard, sturdy surface.
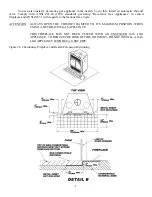
4. A 48” x 16” (1220 mm x 407 mm) minimum hearth extension made of non combustible material is
required. The extension can be installed below the base of the fireplace or flush mounted. (Figures #6)
5. To prevent any burning embers falling between the fireplace and the hearth extension from coming into
contact with the floor, insert a metal sheet under the front of the fireplace. This sheet must extend 4”
(100 mm) on both sides of the fireplace and 2” (50 mm) in front. The non combustible hearth extension
should rest on the 2” (50 mm) band of sheet metal in front. You can also prevent embers from falling in the
joint between the fireplace and the hearth extension by filling it with mortar grout. (Figure #6)
6. To anchor the fireplace to the floor, unfold the lower metal attachments and screw them to the floor using
1” (25 mm) screws.
7. The opening must be at least 24” (610 mm) away from any wall at a right angle with the appliance’s face.
(Figure #14)
8. Place the appliance in the desired location. It must directly abut against the finished wall and not insulation
or a vapor barrier.
Do not add any insulation.
Summary of Contents for Chardonnay
Page 11: ...11 Figure 7 Minimum Chimney Height...
Page 12: ...12 Figure 8 Masonry Chimney Installation...
Page 15: ...15 Figure 15 Chimney Enclosure Chimney enclosure USA and Canada Chimney enclosure Canada only...
Page 16: ...16 Figure 16a Mantel Positioning...
Page 17: ...17 Figure 16b Combustible materials positioning A 48 in B Radius of 84 in C 84 in Min...
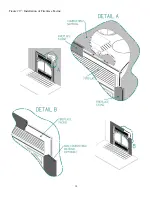
Page 18: ...18 Figure 17 Installation of Fireplace Facing...
Page 26: ...26...
Page 27: ...27...
Page 28: ...28...

