23
44
42
40
38
36
*36
*36
*36
*36
*36
54
51
48
45
42
39
36
*36
*36
*36
74
69
64
59
54
49
44
39
*36
*36
84
78
72
66
60
54
48
42
36
*36
94
87
80
73
66
59
52
45
38
*36
104
96
88
80
72
64
56
48
40
*36
114
105
96
87
78
69
60
51
42
*36
124
114
104
94
84
74
64
54
44
*36
134
123
112
101
90
79
68
57
46
*36
144
132
120
108
96
84
72
60
48
36
*36
*36
*36
*36
*36
*36
*36
*36
*36
*36
1/12
2/12
3/12
4/12
5/12
6/12
7/12
8/12
9/12
10/12
11/12
12/12
64
60
56
52
48
44
40
36
*36
*36
1/12
2/12
3/12
4/12 5/12
6/12 7/12
8/12 9/12 10/12 11/12 12/12
15
14
13
12
5
4
3
2
16.5
15.5
14.5
13.5
5.5
4.5
3.5
2.5
18
17
16
15
6
5
4
3
1.5
1
1
1
1
1
1
1
3
2
1
1
1
1
1
1
6
5
4
3
2
1
1
1
8
7
6
5
2.5
1.5
1
1
9
8
7
6
3
2
1
1
10.5
9.5
8.5
7.5
3.5
2.5
1.5
1
12
11
10
9
4
3
2
1
13.5
12.5
11.5
10.5
4.5
3.5
2.5
1.5
Y
X
4.5
3.5
2.5
1.5
1.5
1
1
1
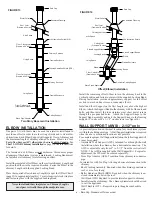
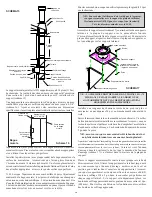
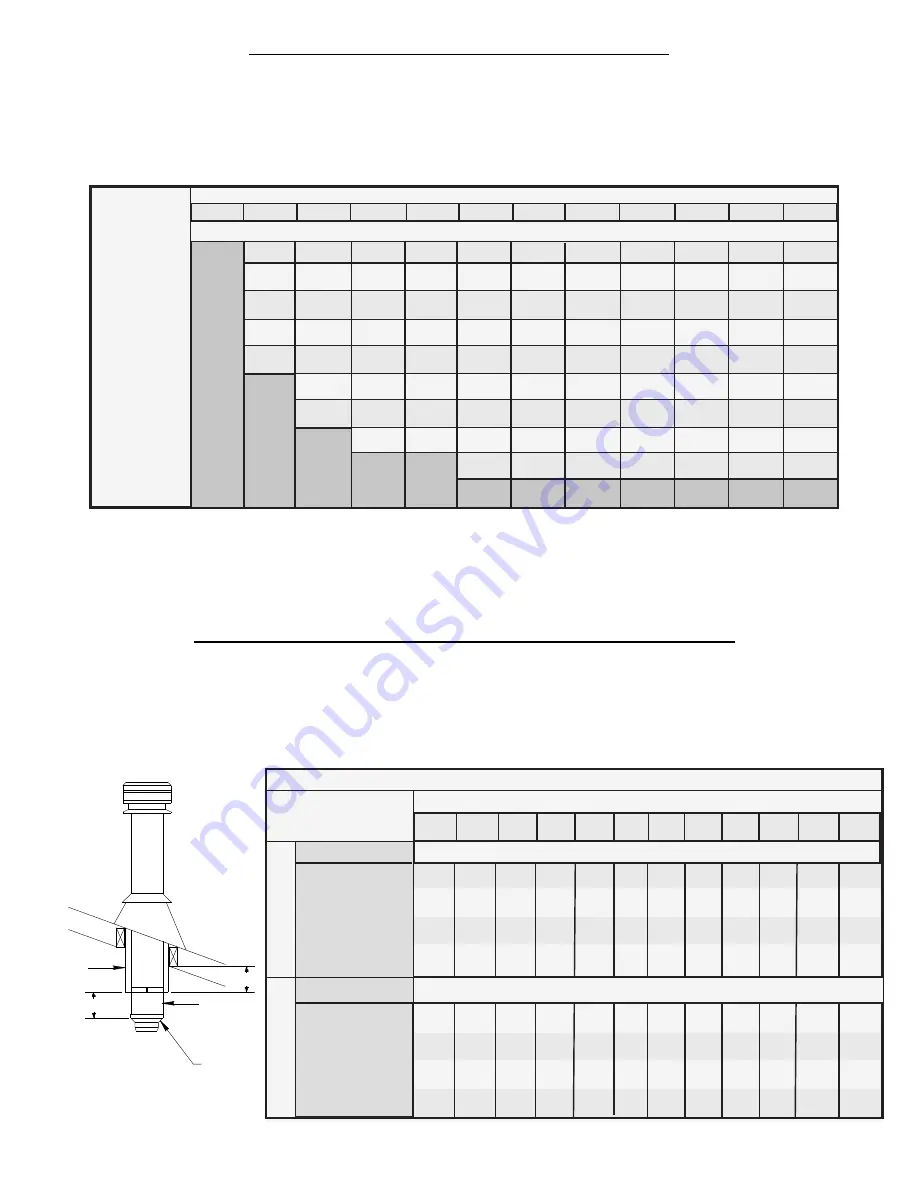
CHART 2 - CHIMNEY HEIGHT ABOVE THE ROOF
Requirement # 1 :
The code requires that the chimney must extend at least 3 feet above the highest point of the roof that it penetrates.
Requirement # 2 :
The chimney must also be 2 feet above any roof, wall or other obstruction within a horizontal distance of 10 feet.
The following Chart is to assist you in determining the minimum chimney height you will require above the roof. You may need to add to this height as nearby
buildings, trees and other parts of the house roof could interfere with airflow over and around the top of the chimney and affect its performance. If you think
a nearby obstacle could affect draft, you might want to install one or more additional lengths.
* Defaulted to 36" to meet requirement #1. Both requirements (#1 and #2) must be met.
• If the chimney extends 5 feet or more above the roof, a Universal Roof Guy Kit (JURGK-1) is required.
• It is highly recommended that any lengths above the roof should have locking bands at all joints for added safety and stability. This will eliminate the risk of
sections becoming undone below the roof line when the Rain Cap is removed when inspections and cleaning of the system is being done.
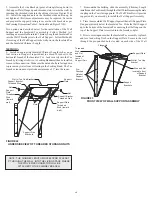
CHART 3 - Connector Pipe Clearance below Cathedral Support
1. Identify the type of connector pipe you will be installing, single wall (requires 18" clearance to combustibles) or Selkirk's Double Wall Stove Pipe (model DSP)
which requires 6" clearance to combustibles.
2. Determine the amount of the exposed Cathedral Support that will be projecting into the room as per the "X" in the diagram on the bottom left.
3. Select the pitch of your sloped ceiling from the chart below.
4. Select the measurement from the chart below where the pitch of the sloped ceiling column intersects with the exposed Cathedral Suppport row selection. This
will determine the measurement of insulated chimney required below the Cathedral Support as per the "Y" in the diagram on the left. The minimum of insulated
chimney below the Cathedral Support is 1 inch. This minimum is required for stability of the system.
All measurements are in inches.
1
Single Wall Flue Pipe requires 18" clearance from any combustible materials.
2
DSP Double Wall Stove Pipe requires 6" clearance from any combustible materials.
Cathedral
Support
Insulated
Chimney Length
Stove Pipe
Adaptor
10 Ft
9 Ft
8 Ft
7 Ft
6 Ft
5 Ft
4 Ft
3 Ft
2 Ft
1 Ft
PITCH OF ROOF
DISTANCE
FROM PEAK
CHIMNEY HEIGHT ABOVE ROOF (INCHES)
CONNECTOR PIPE CLEARANCE REQUIREMENTS FROM SLOPED CEILING
EXPOSED
CATHEDRAL SUPPORT
INTO ROOM
"Y" MEASUREMENT - INSULATED CHIMNEY LENGTH INTO ROOM
"Y" MEASUREMENT - INSULATED CHIMNEY LENGTH INTO ROOM
1
Single Wall Flue Pipe
Box flush to ceiling on
lower end
Box 1" into the room
Box 2" into the room
Box 3" into the room
2
DSP - Double Wall Stove Pipe
"X" measurement
"X" measurement
Box flush to ceiling on
lower end
Box 1" into the room
Box 2" into the room
Box 3" into the room
PITCH OF SLOPED CEILING

