16
With a new chimney installation, the chimney should be inspected at
least once every 2 weeks during the heating season to determine if a
creosote or soot buildup has occured. When familiar with the appliance
and chimney characteristics, the chimney should be inspected at least
once every 2 months during the heating season.
If creosote or soot has accumulated, it should be removed to reduce the
risk of a chimney fire. Depending on the rate of buildup, as you learn
what is going on in the chimney, you can adjust your cleaning schedule.
If you have any doubts about your ability to clean the
chimney, or if the deposits are very heavy and hard to remove, call a certified
chimney sweep. Do not try to burn them off.
If chemical cleaner is used to assist in cleaning your chimney, make sure
it is a product which is non corrosive to the chimney liner. The optimal
method for cleaning a chimney is by a mechanical brushing of the chim-
ney in conjunction with a complete evaluation of the system by a certified
chimney sweep. The National Fire Code of Canada states: “Every chim-
ney flue and flue pipe shall be inspected and cleaned annually or as often
as maybe necessary, to keep the chimney and flue pipe free from dan-
gerous accumulations of combustible deposits”.
CHIMNEY FIRES AND WHAT TO DO ABOUT THEM:
Your Selkirk chimney is not intended or designed for use as a combus-
tion or fire chamber. If the fire in your appliance has gotten out of control,
or if you suspect a chimney fire for any reason, follow these steps:
1. Immediately close all dampers and/or air entrance to your appliance.
2. Alert your family to the possible danger.
3. Inspect your appliance and chimney for possible fires, if in doubt, alert
your Fire Department.
4. Do not use salt or water on the fire. Salt is corrosive and water will
cause a dangerous steam explosion. You may be able to control the fire
by using ashes, sand or baking soda, since baking soda is an ingredient
used for dry chemical fire extinguishers.
5. Do not continue to use your appliance until it and your chimney have
been thoroughly inspected by a certified service technician.
6. After a chimney fire, when it is safe to do so, check internal locations
such as the attic and under the roof and keep watching for two or three
hours. There may be delayed smoldering and subsequent ignition even
if the fire inside the chimney has been controlled.
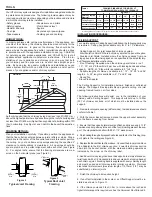
The Anchor Plate may be used for adapting the UT chimney to a
“Listed” Factory-Built Fireplace certified for use with Model UT.
NOTE: It is of the utmost importance that the Anchor Plate be installed
in accordance with the manufacturers installation instructions sup-
plied with the “listed” Factory-Built Fireplace.
MODEL UT ANCHOR PLATE
CHIMNEY OPERATION AND MAINTENANCE:
The need for chimney maintenance depends on the kind of appliance
and how it is operated. Gas and oil-burning appliances need very little,
but wood-burning appliances may need a great deal of chimney mainte-
nance.
IMPORTANT
Burning wood produces creosote, soot, and fly ash which tend to collect
in chimney flue and on termination parts causing reduced flow of gases
through the chimney. Check top weekly for excessive accumulation of
these normal combustion products and clean as necessary. If the spark
arrester becomes clogged with creosote, it should be cleaned or replaced.
4. Always secure all single wall flue pipe joints with a minimum of 3
screws.
5. Obtain proper attachment parts for the appliance end and for the
entry to the chimney.
6. Locate or support the flue pipe to avoid contact of damage.
7. Caps or plugs for single wall tees should be secured against fall-
ing out and designed so they can’t leak creosote or rain.
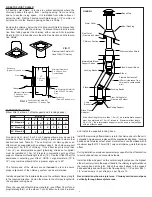
The connection of a single wall base tee or single wall flue pipe or
double wall flue pipe to the insulated chimney must be secured with
the screws supplied in the Support carton. The use of a stove pipe
adapter is recommended with the first length, this will provide a posi-
tive connection between the insulated chimney and the appliance
connector. The Stove Pipe Adapter is inserted into the female end of
the first insulated chimney length and extends beyond the ceiling
support approximately 32mm (1-1/4”). For a Cathedral Support and
Wall Support application, the stove pipe adapter is inserted into the
female end of the exposed chimney length and extend into the room
and held in place with the finishing collar secured with 4 screws
which is used to attach the stove pipe adapter to the finishing collar.
Install inter-connecting flue pipe following the appliance manufacturer’s
instructions, and appropriate building code requirements keeping in mind
that the flue pipe run should be as short and straight as possible. All
joints should be secured in place with three (3) sheet metal screws.
Besides following the appliance instructions for flue pipe, other rules that
should be taken into account:
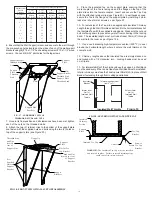
To comply with the National Building Code of Canada the single wall
base tee can be installed with a 229mm (9”) minimum airspace
clearance between connnecting single wall material and combus-
tible products provided that the flue gas temperature does not exceed
400° C (750° F) (most oil fired appliances). Otherwise, the minimum
air space clearance must be 450mm (18”). Refer to the appliance
installation instructions for the proper chimney requirements.
STOVE PIPE ADAPTER:
Connect only to low heat (liquid fuel or gas fired) appliances with continu-
ous flue gas temperatures below 540° C (1000° F). When installing a
factory-built fireplace refer to the fireplace installation instructions for the
proper chimney requirements.
1. Never enclose single wall flue pipe, even at 18 inches clearance.
2. Never run it through ceilings or floors, or windows.
3. Don’t use single wall flue pipe outdoors.
PAINTING OF THE EXTERIOR CHIMNEY
If the chimney cannot be enclosed it is highly recommended to paint
all exterior chimney, including the roof flashing and storm collar with a
heat resistant rust proofing paint when the chimney is exposed out-
doors to wind driven ocean spray. Salty humid air causes metal to
corrode faster than air with normal humidity. This will extend its life
and improve the appearance. To improve adhesion, degrease, clean,
prime before painting. Follow the paint manufacturer’s instructions.
Summary of Contents for ULTRA-TEMP UT
Page 3: ...3 CERTIFICATIONLABELS ...


